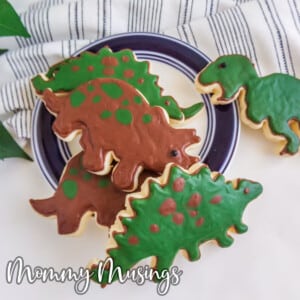
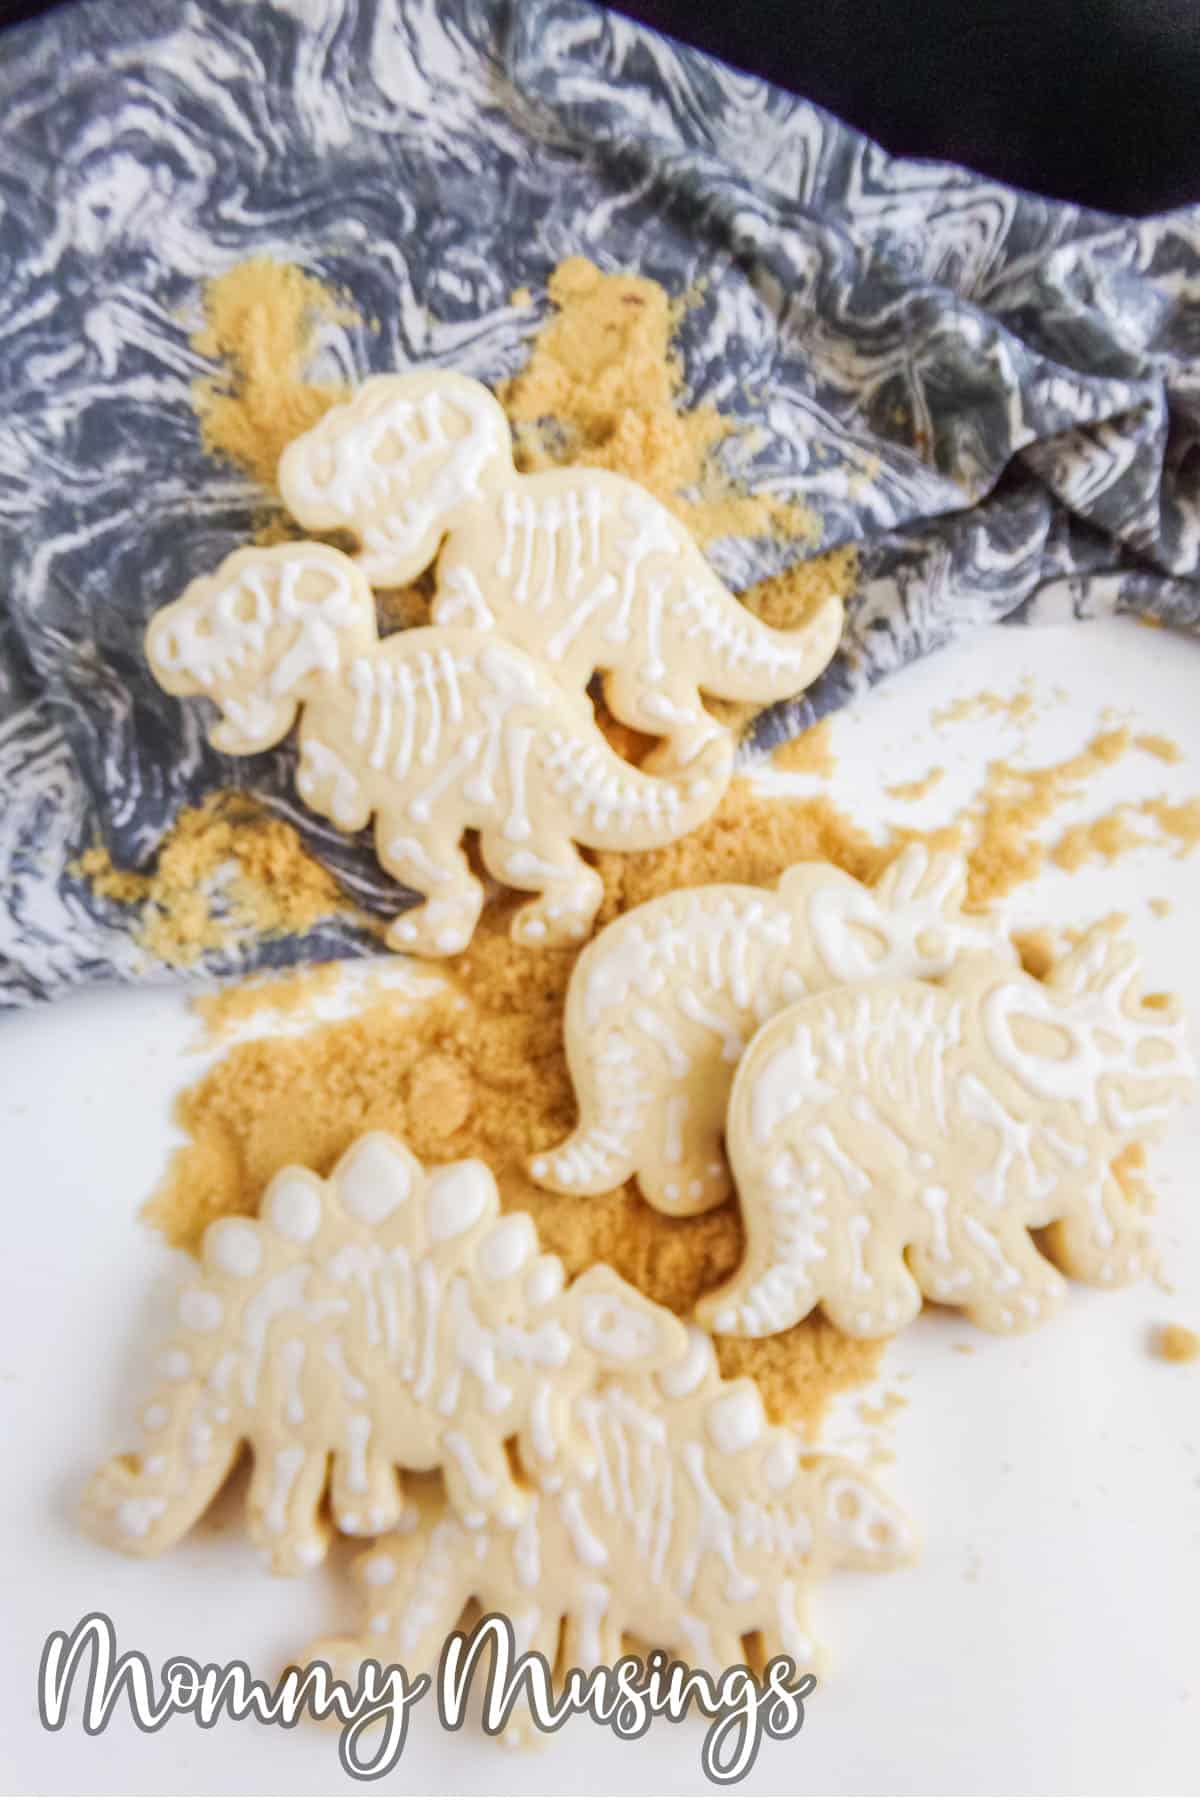
Are you planning a dinosaur party for your child and need some fun food ideas? Well, look no further! We will show you how to make fossil cookies that are both delicious and fun. Kids will love these cookies, and they will learn a lot about paleontology in the process. So what are you waiting for? Let’s get started!
How To Make Fossil Cookies for a Dinosaur Party
How Do You Keep Sugar Cookies from Spreading?
One of the most common questions we get asked is how to keep sugar cookies from spreading. The answer is a simple two step solution: refrigerate your dough before cutting out the shapes with your cookie cutter and be sure to use a dough that doesn’t have too much fat. This will prevent the cookies from spreading and help them retain their shape.
The fat content in cookies is the first thing that will make a cookie spread un-intentionally, so limiting the amount of butter and milk is paramount. I’m not saying don’t use any – this recipe certainly calls for some butter. But it needs to be limited, so use a recipe meant for cut-out cookies.
Chilling the dough is the second step and it’s key. It allows the butter to firm back up so it doesn’t melt as quickly when hitting the heat of the oven. This, in turn, means the cookies will hold their shape better. Simply place your dough in the fridge for at least 30 minutes – if you’re going to leave it for longer than an hour, be sure to put it in an airtight container. Then you’re good to roll it out and start cutting your shapes!
How Do You Get the Bone Shapes for Dinosaur Fossil Cookies?
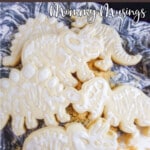
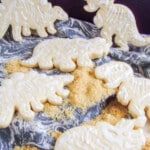
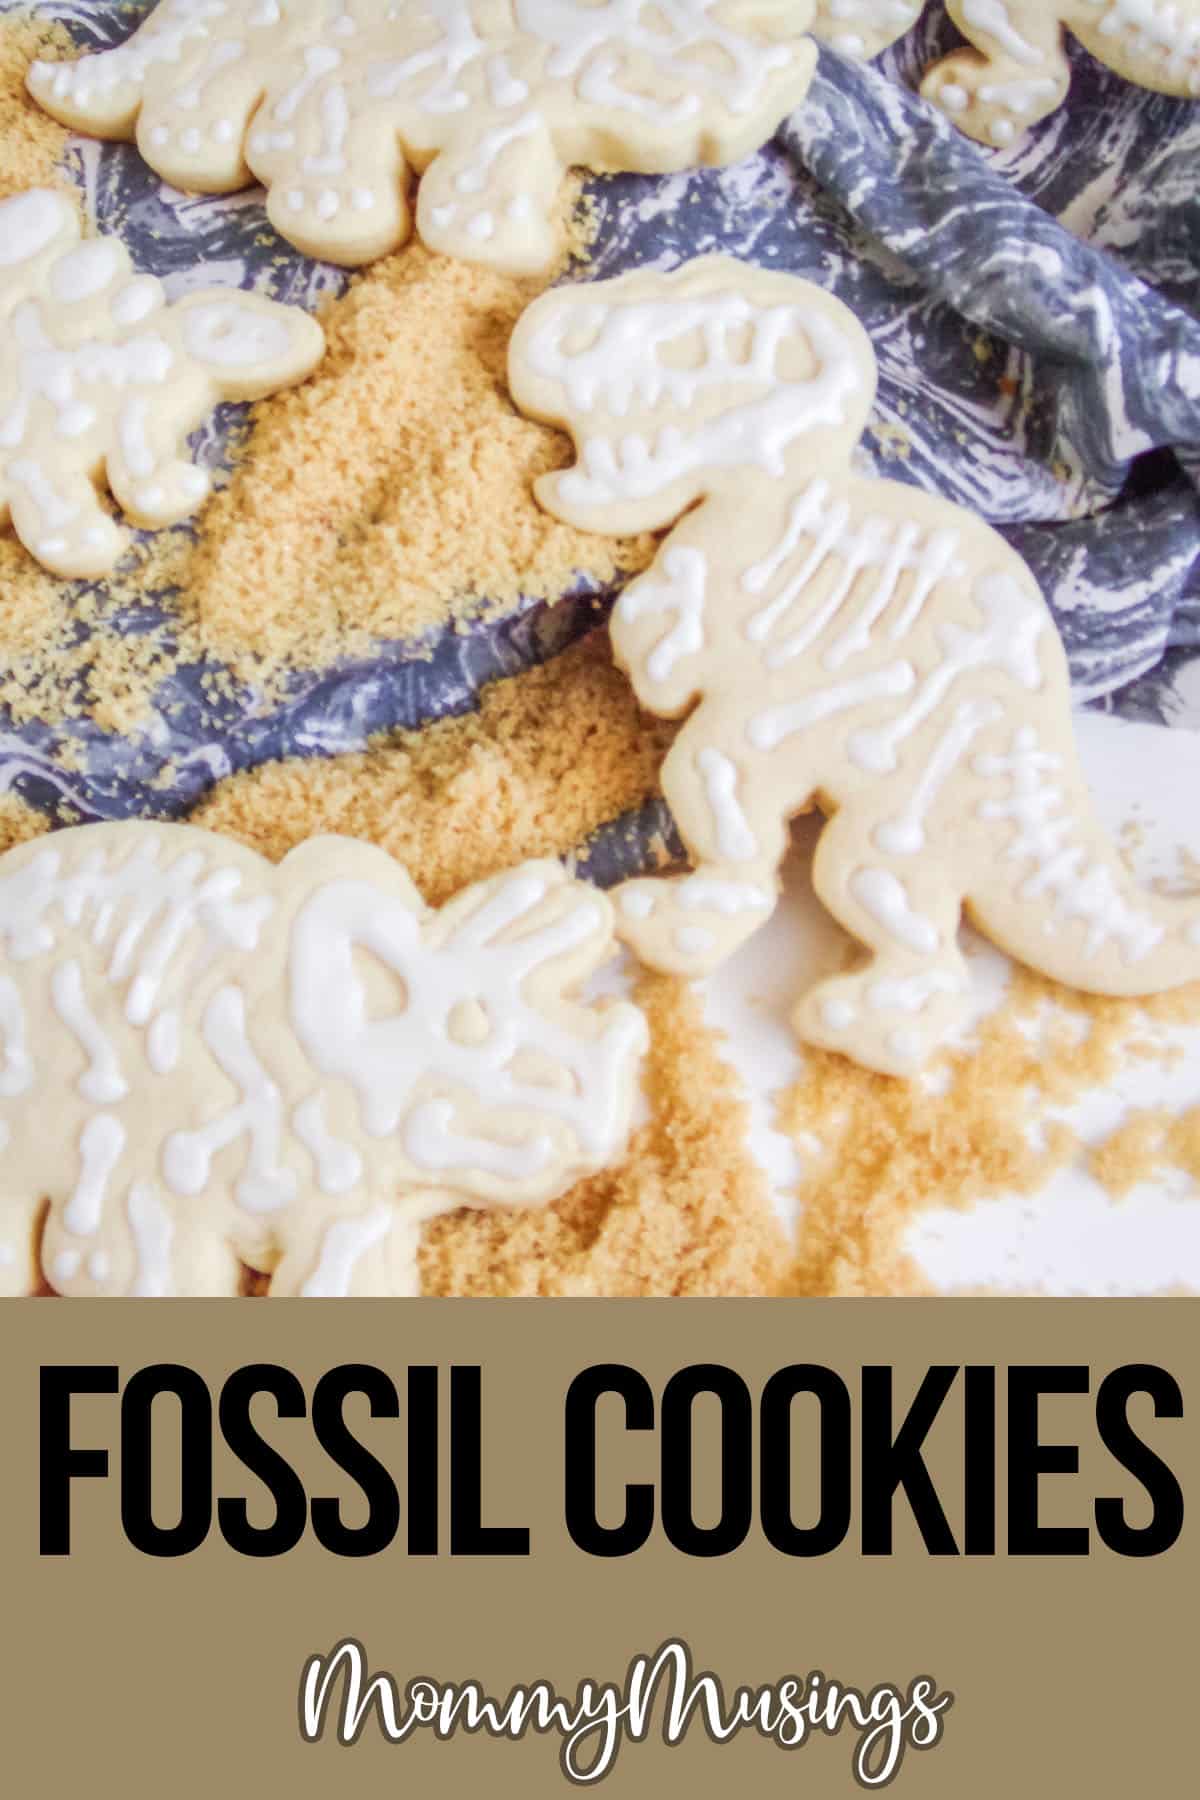
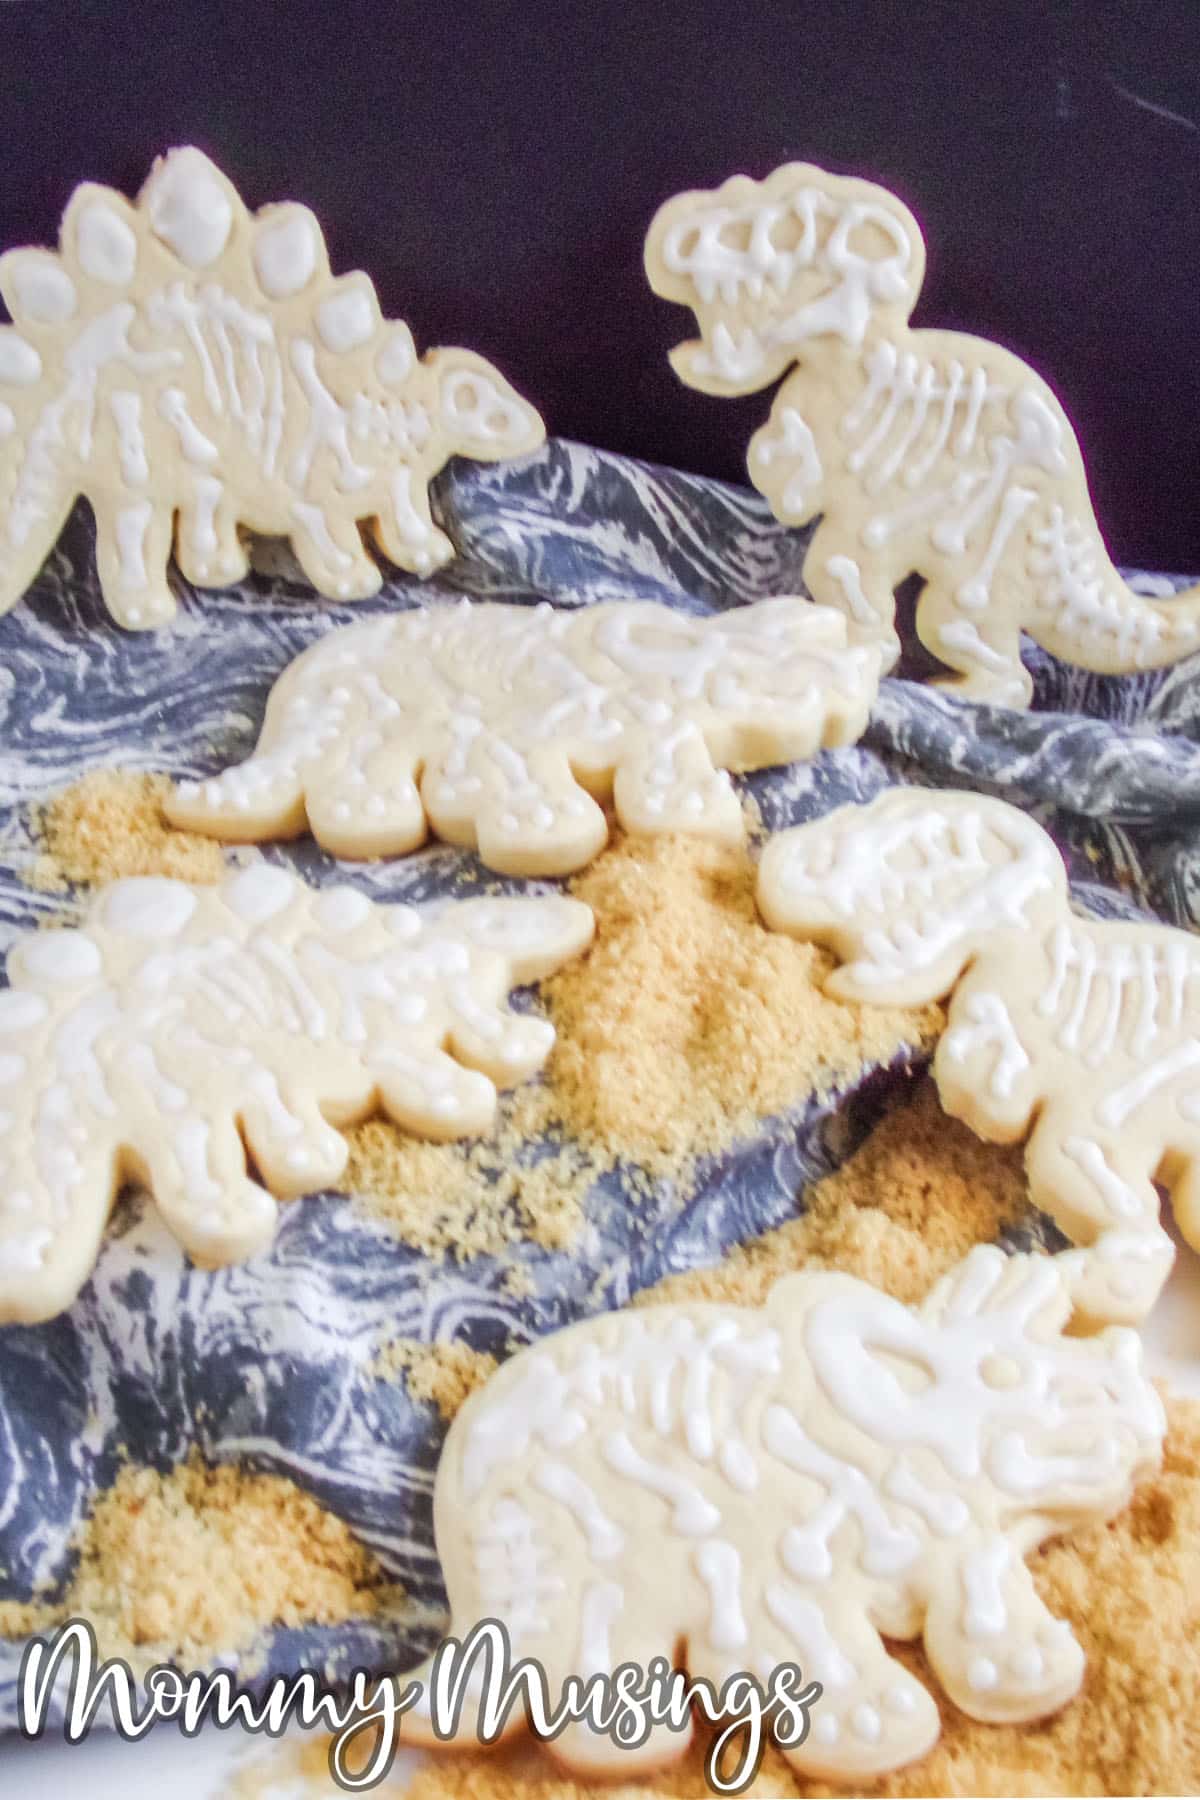
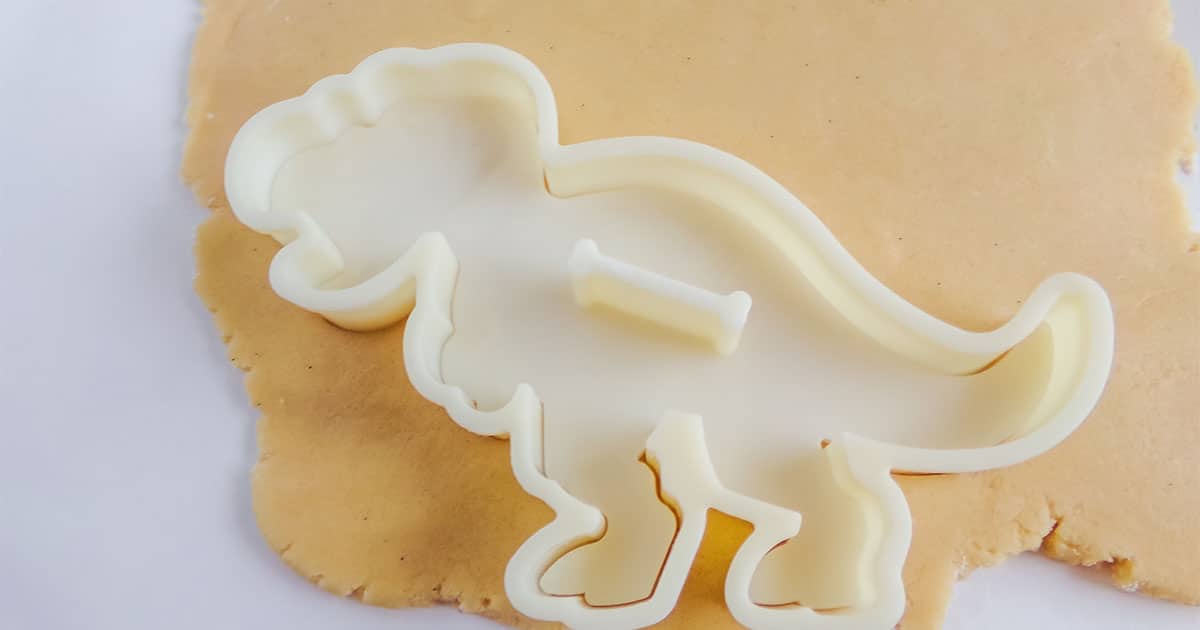
There are a few ways to get the bone shapes for your dinosaur fossil cookies. My preferred method is to use a two-part dinosaur cookie cutter mold. Simply place the outer cookie cutter piece onto the rolled-out dough like normal, then position the second piece of the mold inside the outer piece and press firmly, but only about half the depth of the dough. Then remove both cookie cutter pieces and check out the stamped bone imprint on your dinosaur!
A second method would be to forgo stamping the bone shapes into the cookie and just draw them on freehand or using a stencil with the icing. I have done this before and it’s fine. Not as easy as it is with an imprint, but it definitely works.
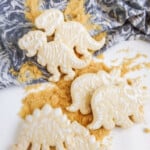
Either way you go, those bones are just too cute.
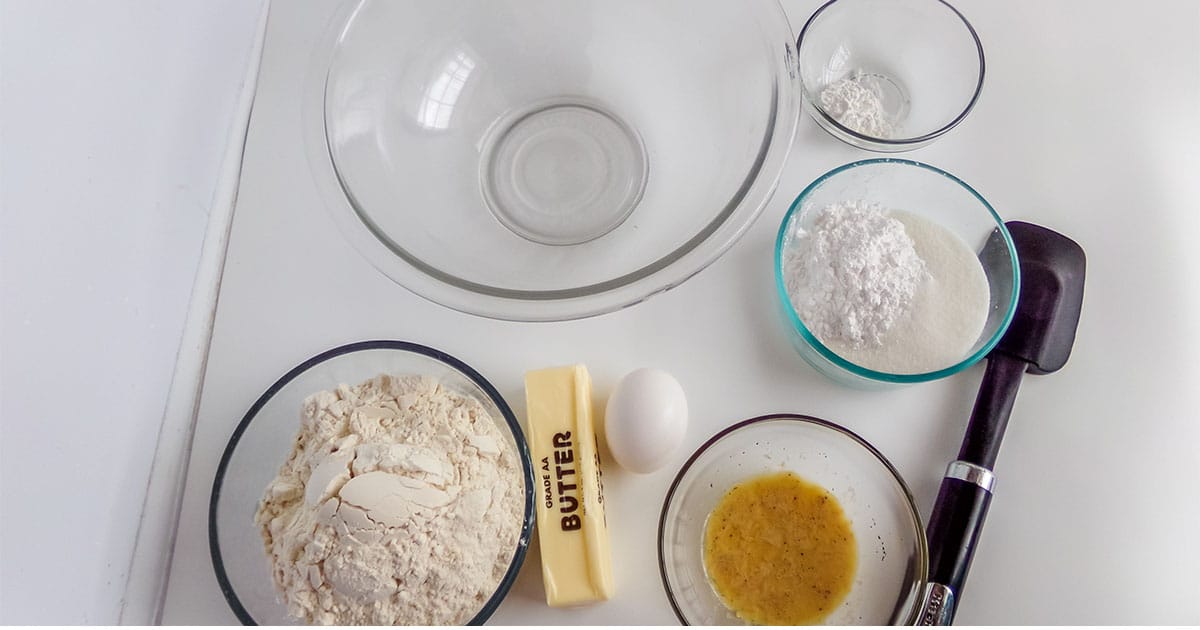
What Ingredients Do You Need to Make Fossil Cookies?
Cookies:
- 2/3 cup Butter, salted (softened)
- 1/2 cup Sugar
- 1/4 cup Powdered Sugar
- 1 tsp Baking Powder
- 1 Egg
- 1 tsp Milk
- 1 1/2 tsp Vanilla
- 2 cups Flour
Icing:
- 2 cups Powdered Sugar, sifted
- 1 tsp Vanilla
- 3-5 tsp Milk
What Tools Do You Need to Make Fossil Cookies?
- Electric Hand Mixer or Whisk
- Bowls
- Spoons
- Measuring Spoons
- 2-Part Dinosaur Cookie Cutters (recommended)
- 1 Piping Bag & Small Round Tips
- Parchment Paper
- Baking Sheet
- Oven
- Wire Rack
- Toothpick or Scribing Tool
How Do You Make Fossil Cookies?
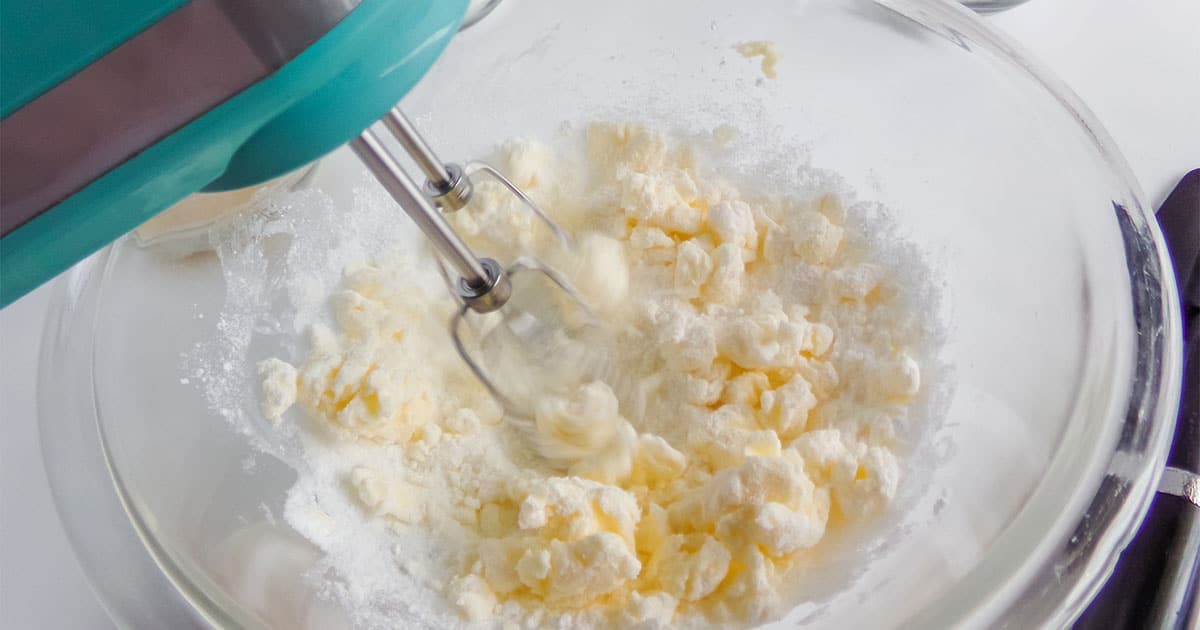
Cream together sugars and butter using an electric hand mixer or a whisk.
Add in the egg, vanilla and milk and mix until incorporated.
In a separate bowl, combine flour and baking powder. Whisk together until well incorporated.
Add the flour mixture to the butter mixture 1/2 cup at a time, stirring between each increment to incorporate.
Once the mixture is fully mixed, work dough into a ball in the center of the bowl and place in the fridge for 30 minutes to chill.
Preheat your oven to 375-degrees.
Remove dough from the fridge and roll out on a lightly floured surface.
Press the outer cookie cutter form into place then, with the outer cookie cutter still in place, fit the second stamping portion of the cookie cutter set into the first, pressing it firmly down (but not through the dough). Remove the inner cookie cutter piece first, then, using a toothpick or decorating scribe to work the dough out of each crevasse in the cookie cutter as you remove the outer cookie cutter piece.
Place the cut out cookie dough shapes on to a parchment paper-lined baking sheet and bake for 7 minutes. Bottoms should be lightly browned, but the tops pale.
Allow the cookies to cool on the pan for 10 minutes before transferring them to a wire rack.
Allow the cookies to cool completely before making the icing by combining the powdered sugar and vanilla. Stir well.
Add 3 tsp milk and stir well. If the mixture is too thick, add an additional tsp milk before testing again.
Place icing into a piping bag with a small tip.
Pipe each bone impression full of icing.
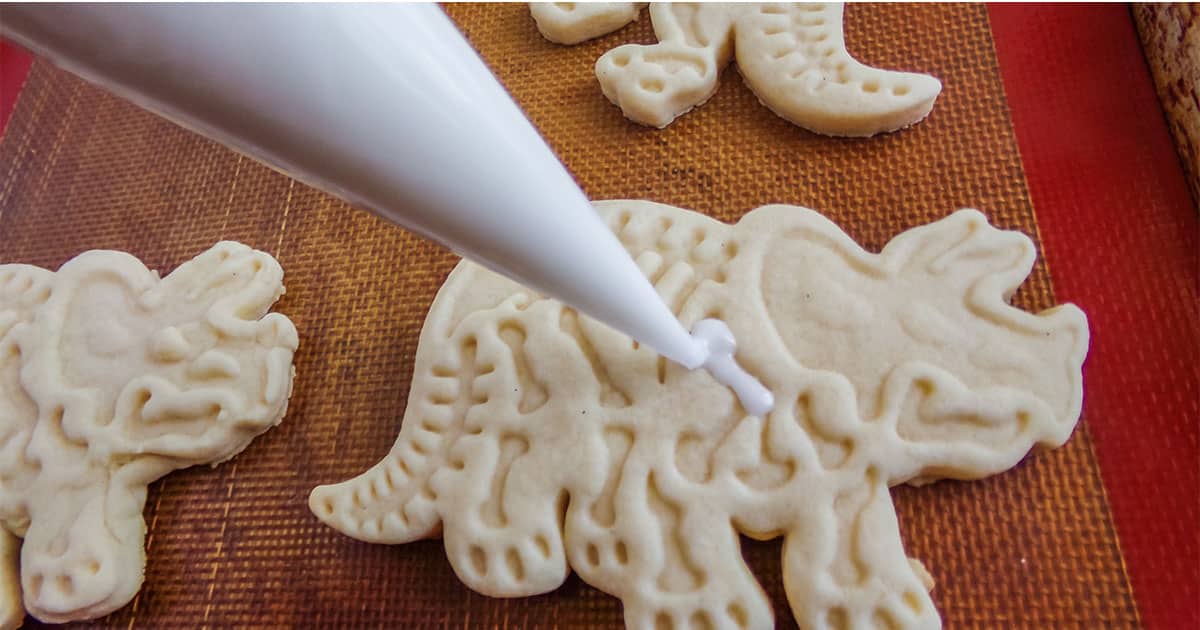
Using a scribing tool to get the teeny tiny bits filled.
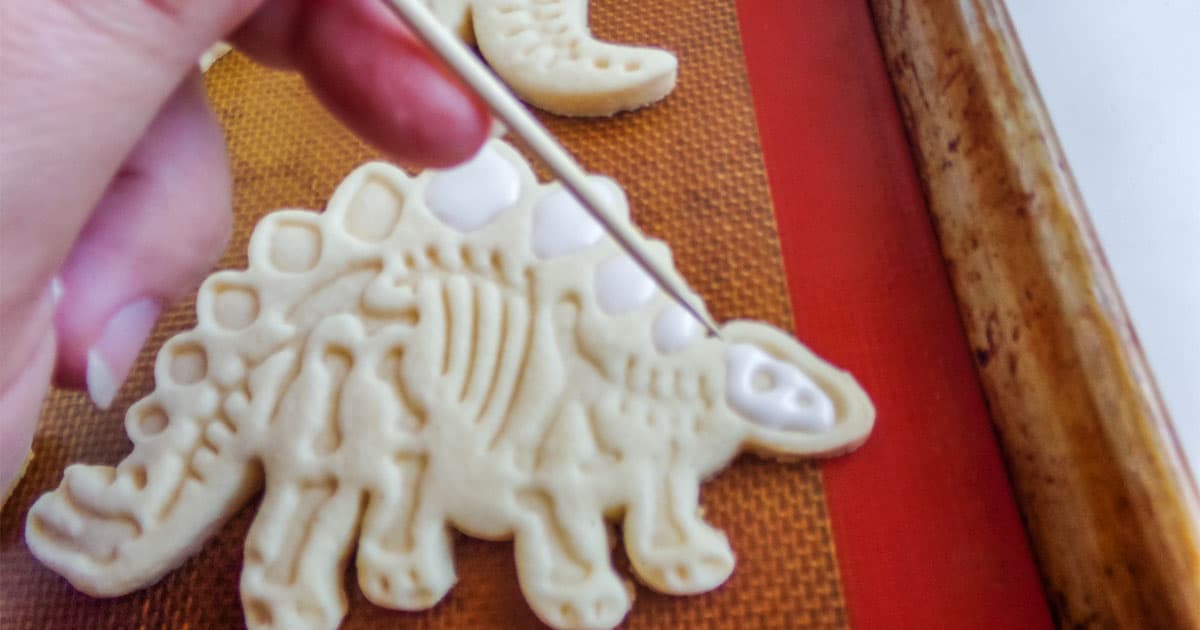
Allow the cookies to rest and the icing to harden.
Serve or place in an airtight container and enjoy later.
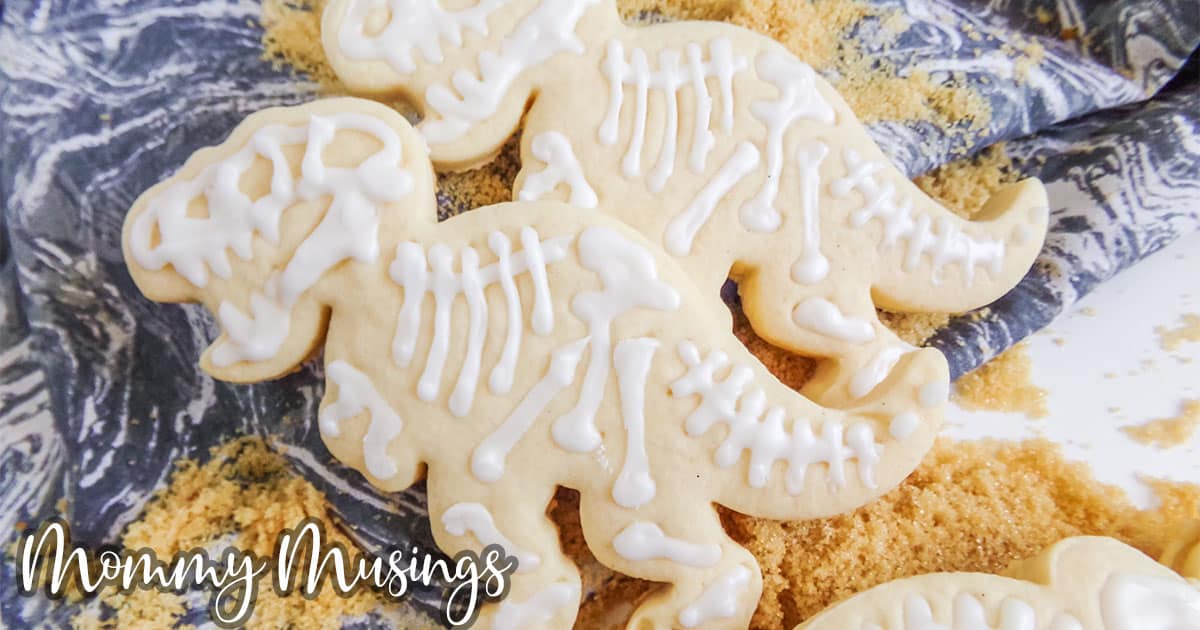
Isn’t that just the FUNNEST cookie-making idea?! Perfect for a dinosaur party or even just a snack for a kiddo obsessed with those rawrsome dinos! LOL!
Be sure to pin this to your favorite cookie board on Pinterest so you can find it again fast when you’re ready to make another batch of these growl-worthy cookies.
More Dinosaur Party Ideas You’ll Love
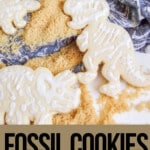
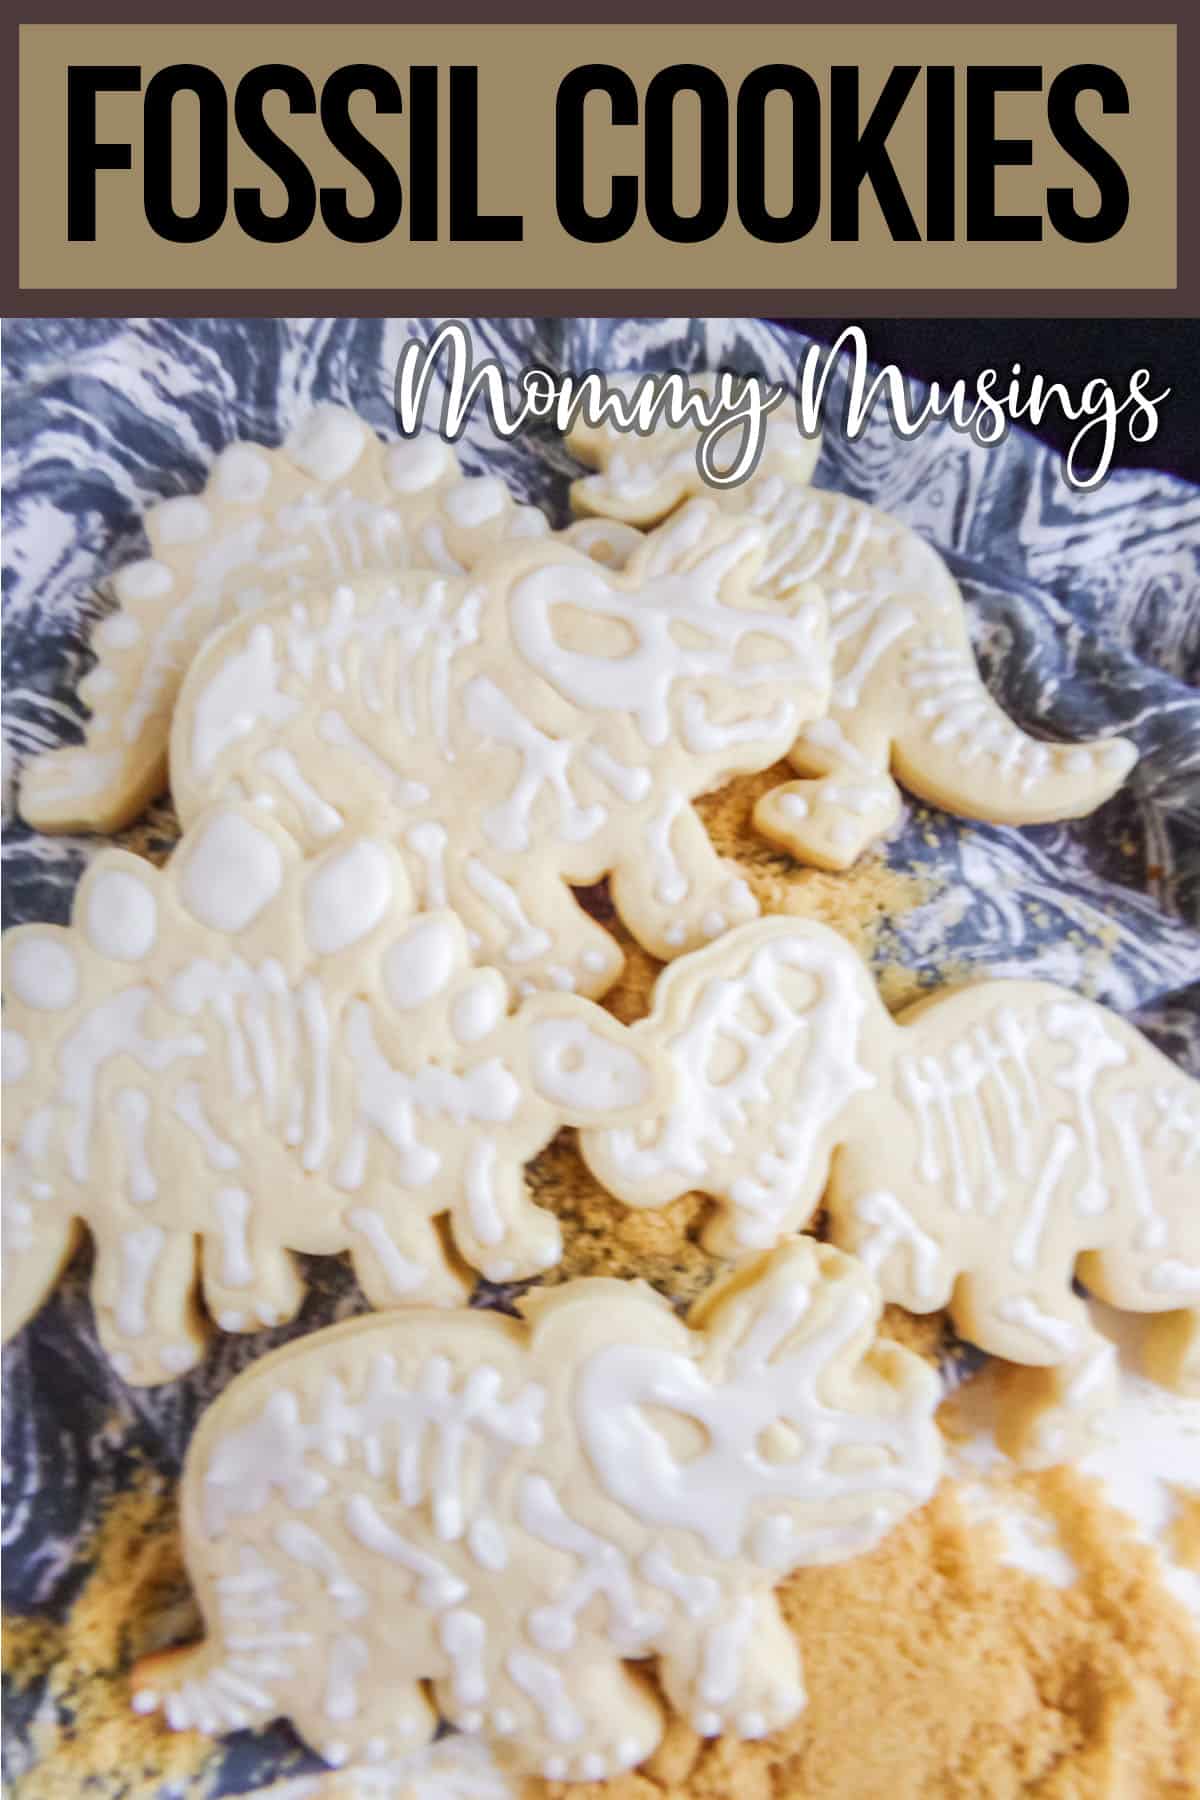
Fossil Cookies

Fast and fun to make, these fossil cookies are perfect for a dinosaur party or just for a kid that is obsessed with dinosaurs and paleontology.
Ingredients
Cookies:
- 2/3 cup Butter, salted (softened)
- 1/2 cup Sugar
- 1/4 cup Powdered Sugar
- 1 tsp Baking Powder
- 1 Egg
- 1 tsp Milk
- 1 1/2 tsp Vanilla
- 2 cups Flour
Icing:
- 2 cups Powdered Sugar, sifted
- 1 tsp Vanilla
- 3-5 tsp Milk
Instructions
- Cream together sugars and butter using an electric hand mixer or a whisk.
- Add in the egg, vanilla and milk and mix until incorporated.
- In a separate bowl, combine flour and baking powder. Whisk together until well incorporated.
- Add the flour mixture to the butter mixture 1/2 cup at a time, stirring between each increment to incorporate.
- Once the mixture is fully mixed, work dough into a ball in the center of the bowl and place in the fridge for 30 minutes to chill.
- Preheat your oven to 375-degrees.
- Remove dough from the fridge and roll out on a lightly floured surface.
- Press the outer cookie cutter form into place then, with the outer cookie cutter still in place, fit the second stamping portion of the cookie cutter set into the first, pressing it firmly down (but not through the dough). Remove the inner cookie cutter piece first, then, using a toothpick or decorating scribe to work the dough out of each crevasse in the cookie cutter as you remove the outer cookie cutter piece.
- Place the cut out cookie dough shapes on to a parchment paper-lined baking sheet and bake for 7 minutes. Bottoms should be lightly browned, but the tops pale.
- Allow the cookies to cool on the pan for 10 minutes before transferring them to a wire rack.
- Allow the cookies to cool completely before making the icing by combining the powdered sugar and vanilla. Stir well.
- Add 3 tsp milk and stir well. If the mixture is too thick, add an additional tsp milk before testing again.
- Place icing into a piping bag with a small tip.
- Pipe each bone impression full of icing, using a scribing tool to get the teeny tiny bits filled.
- Allow the cookies to rest and the icing to harden.
- Serve or place in an airtight container and enjoy later.

Nutrition Information:
Yield:
18Serving Size:
1Amount Per Serving: Calories: 194Total Fat: 7gSaturated Fat: 5gTrans Fat: 0gUnsaturated Fat: 2gCholesterol: 29mgSodium: 88mgCarbohydrates: 30gFiber: 0gSugar: 19gProtein: 2g