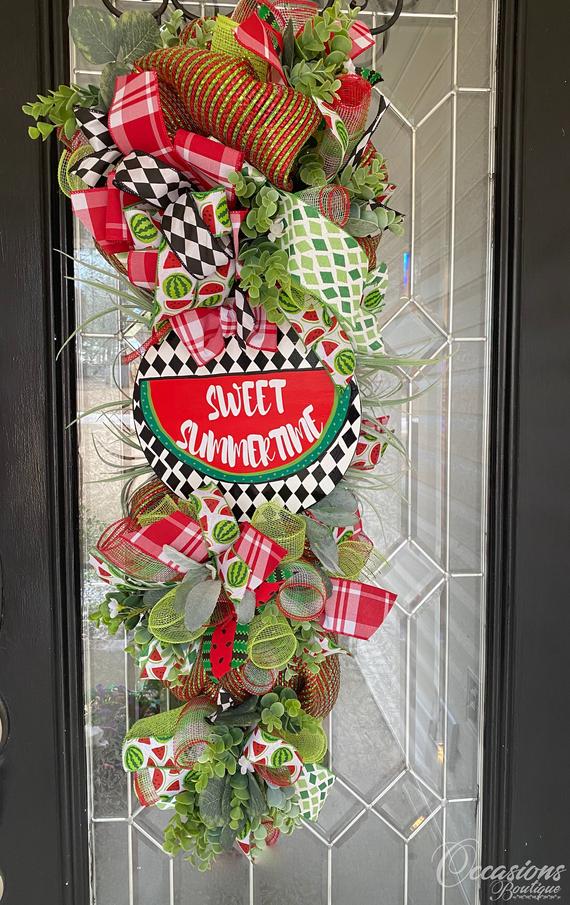
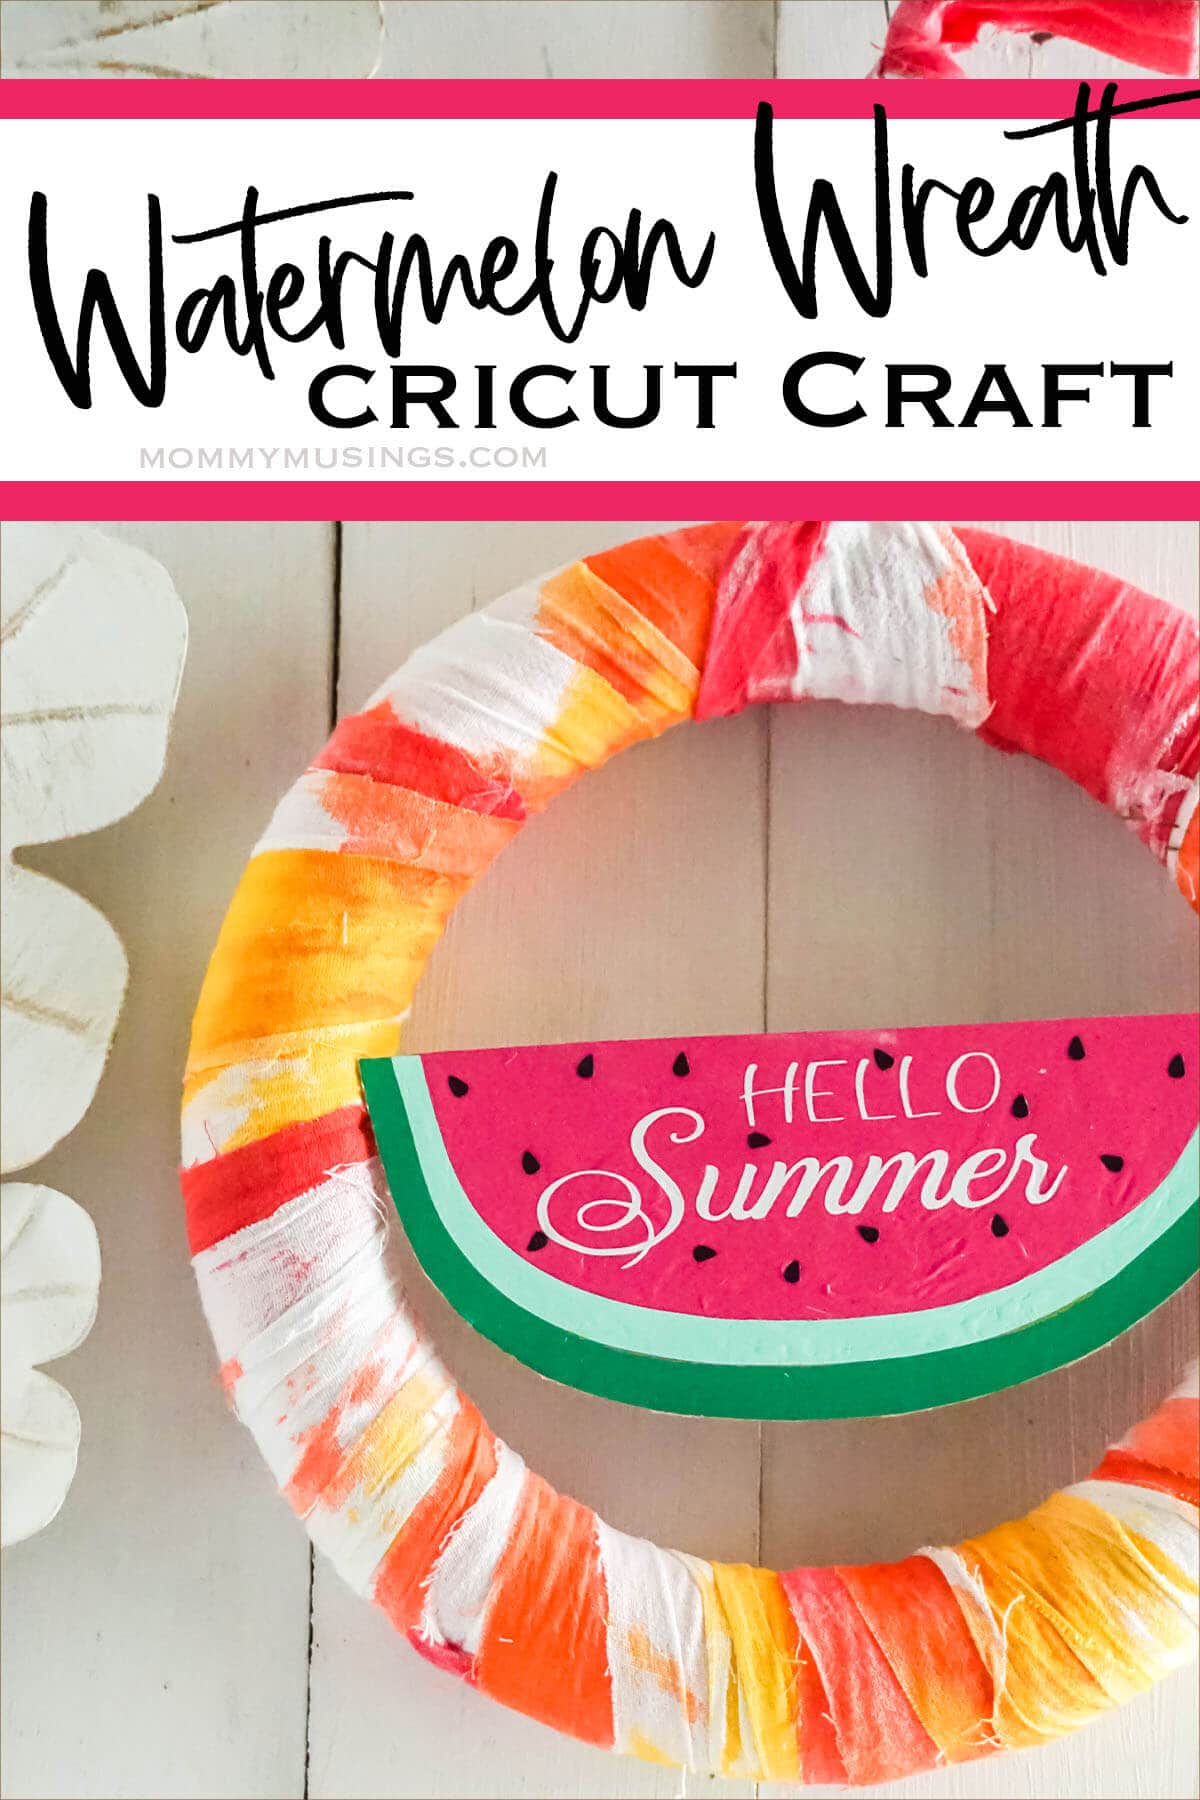
Make a cheerful Tie-Dye Watermelon Hello Summer Wreath with your Cricut machine and items you can easily find around your home. This wreath is the perfect way to welcome summer!
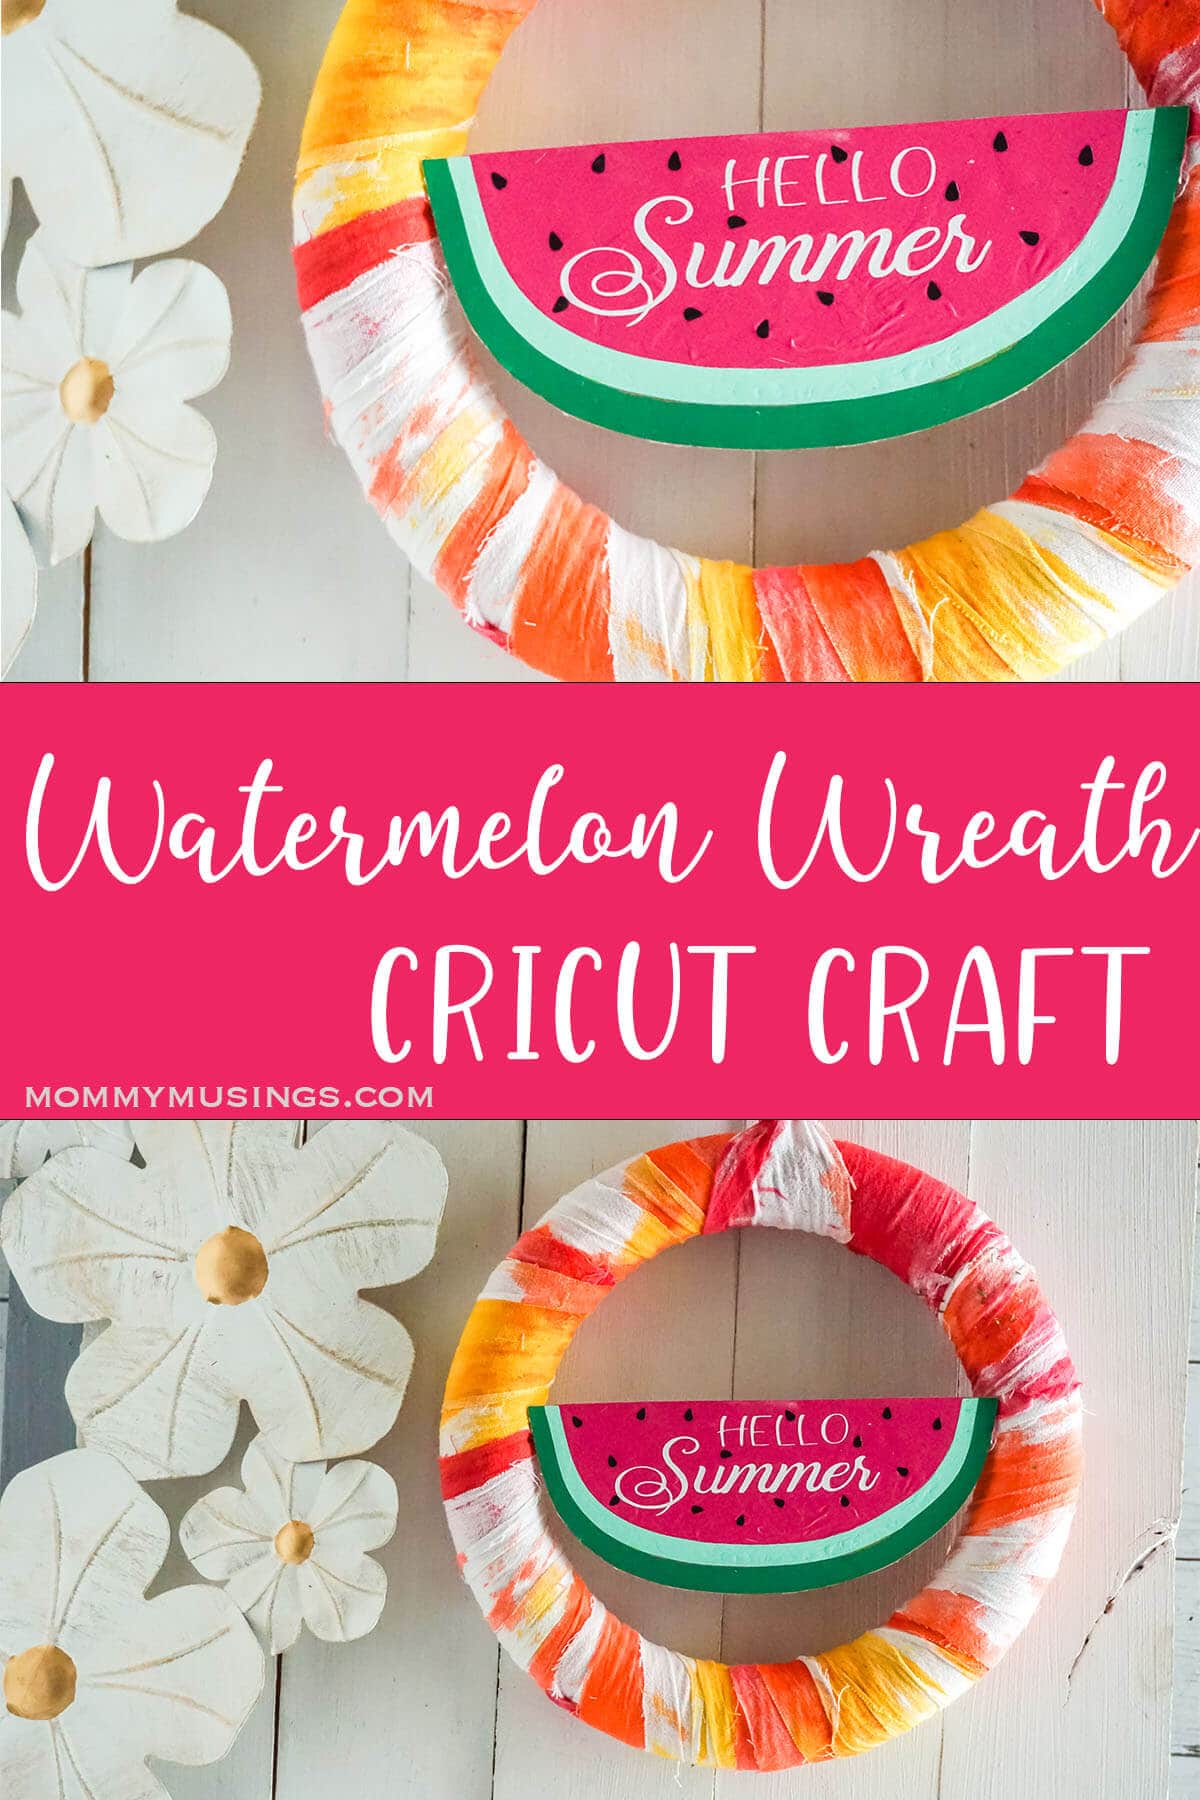
Tie-Dye Watermelon Hello Summer Wreath Cricut Craft
I absolutely am loving the tie-dye look this for this summer. Making crafts from supplies I already have on hand means this is an inexpensive project, and one kids can easily help out with.
Fun summer craft for kids
Summer is all about fun, and tie-dying all the things! Kids of all ages can help with this craft, but tie dye does stain, so be careful with that part. 😉
To complete this colorful project, I used my Cricut Explore Air 2 with a Deep Cut blade. You’ll also want to grab your Easy Press!
How to tie dye without a tie dye kit
Did you know you can tie dye at home… without a tie dye kit? It’s true! And in the spirit of truly using what you have on hand, you can create your own tie dye with vinegar and food coloring.
If you don’t have a towel to use, you could also use a cut up t-shirt. However, with the DIY tie dye method, you’ll need to use polyester – not cotton material.
I however, grabbed a little spray tie-dye kit and went to town!
Using tie dye indoors
While you can tie dye indoors, it can also get a little messy, which is why this is also a great outdoor craft project. No matter where you decide to do this fun craft, lay down a protective sheet or barrier of some type so you don’t get dye on the carpet or anything important.
You can also easily turn this craft into an educational experiment. If you pour the dye versus soaking the towel in a bowl of dye, is it less pigmented? If you let the dye soak for an hour versus 30 minutes, what’s the difference? Does cold water affect tie dye differently? There are a million little experiments you can do, all from one craft!
What You Need to Make a Tie-Dye Watermelon Hello Summer Wreath Cricut Craft
- Supplies:
- 6-8 inch Round Foam Wreath Form
- 1 Cotton Kitchen Cloth
- Tie-Dye Set (pink, yellow and orange)
- Dark Green Heat Transfer Vinyl
- Light Green Heat Transfer Vinyl
- Black Heat Transfer Vinyl
- Pink Heat Transfer Vinyl
- 1 Piece Chipboard
- 2 Cake Pop Sticks or Small Dowel
- Watermelon Hello Summer Cut File
Tools:
- Good Scissors
- Cricut Maker or Explore Air 2 with Deep Cut Blade
- Large Bowl
- 4-5 Small Rubber Bands
- Hot Glue Gun & Glue
- Transfer Tape
- Easy Press Mini or Easy Press 2
How to Make a Tie-Dye Watermelon Hello Summer Wreath Cricut Craft
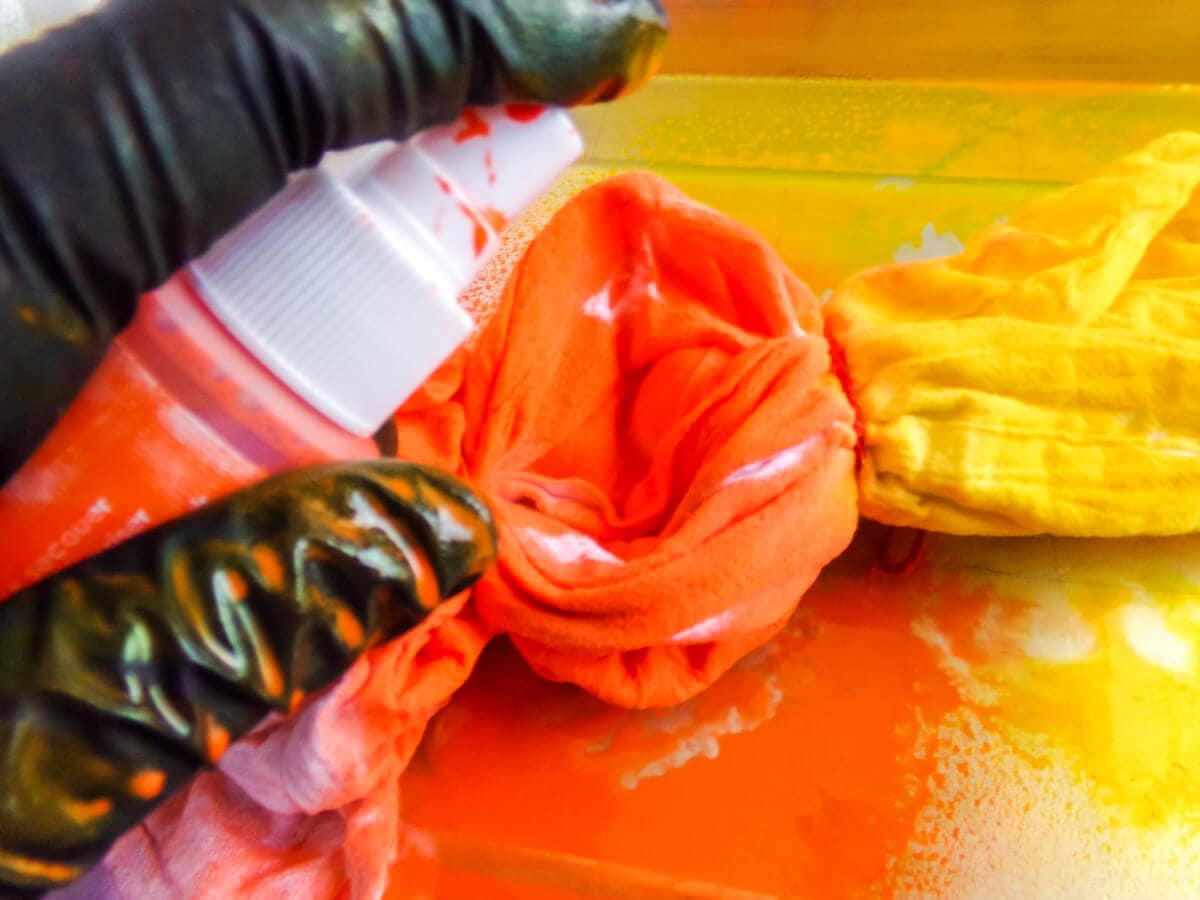
- Start by tie-dyeing your kitchen towel. Twist it up and wrap the rubber bands around the center of your bundle in 4-5 places then place it in the bowl.
- Either spray or pour (my preferred method, honestly) the dye onto your towel, saturating the towel in multiple places with the orange dye, yellow dye or pink dye, respectively. Allow the tie-dyed towel to dry completely before messing with it again.

- While the towel is drying, go ahead and make your watermelon by downloading the SVG file. Immediately load the SVG file into Design Space, then insert the image for a new project.
- Select the lettering for Hello Summer and click “weld” in the bottom right corner to have the Cricut cut the lettering as one element so it’s easier to deal with.
- Click “Make It†in Design Space, and set the material type on the machine to “Vinylâ€. Follow prompts to load and cut. Unload when finished cutting. Once the design is cut, if you need to trim excess vinyl, do so now.
- There is a brown piece to the SVG file–cut this from the chipboard by loading your deep-cut knife blade to the machine and changing the material in Design Space to chipboard.
- Layer your vinyl onto transfer tape, checking and readjusting often to get the watermelon parts in place the way you want it to look.
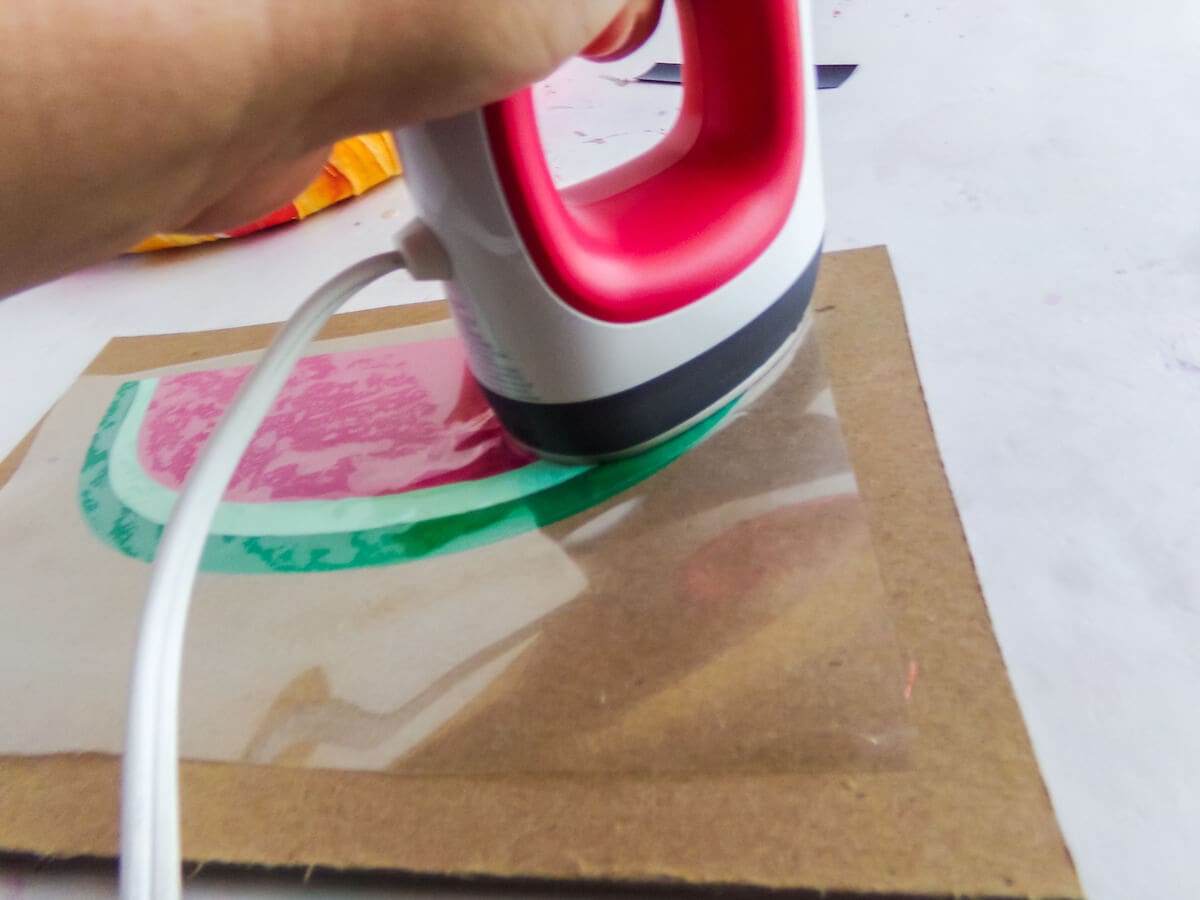
- Place the chip board onto the transfer tape with the layered vinyl and use your heat press to lock it in place. Remove the transfer tape and discard.
- Once your tie-dyed towel is dry, iron it, if desired to set in the colors. Then cut the towel into 2-inch (approximately) wide strips.
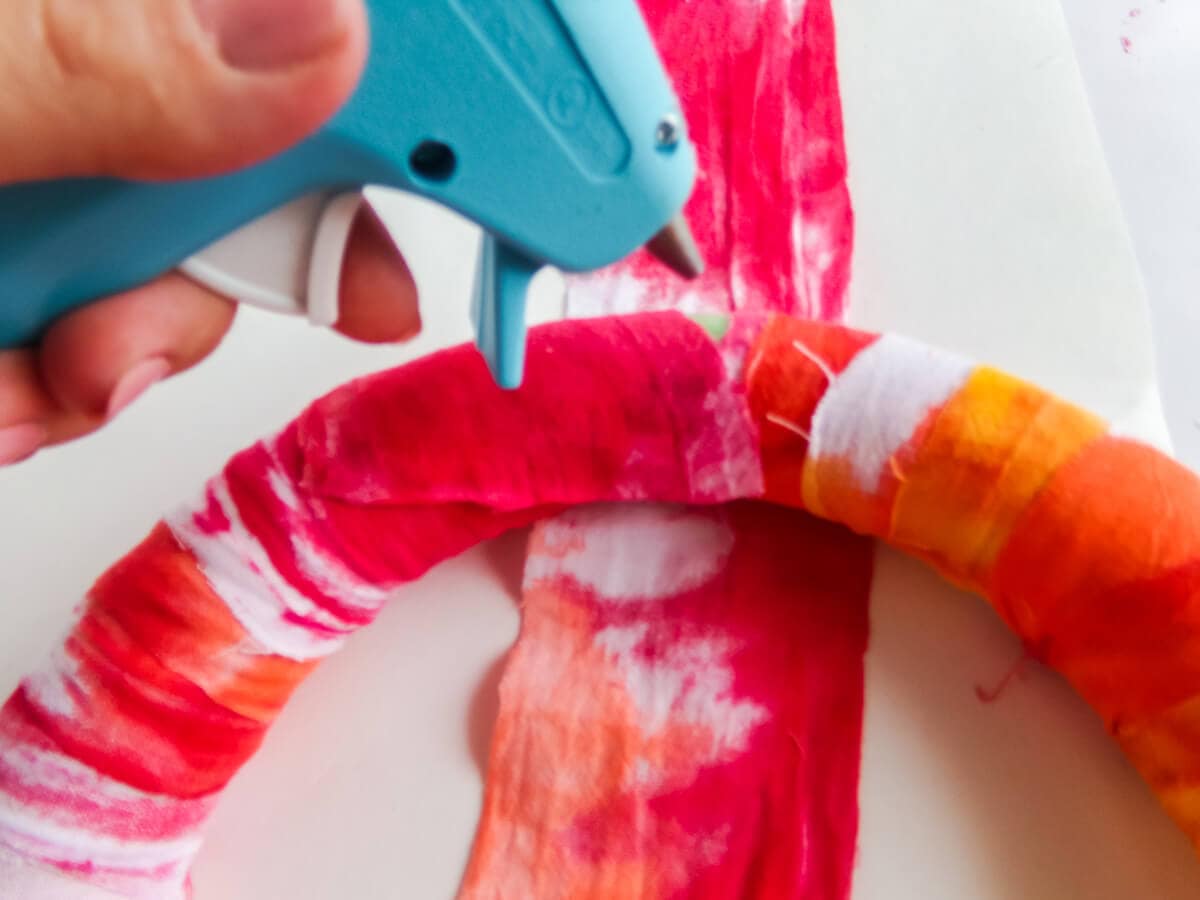
- Hot glue the strips onto the foam form, wrapping it around snugly as you go. I only used about 1/2 of the towel and I wrapped the outer edge of the strips over onto itself so that I had a nice, clean edge.
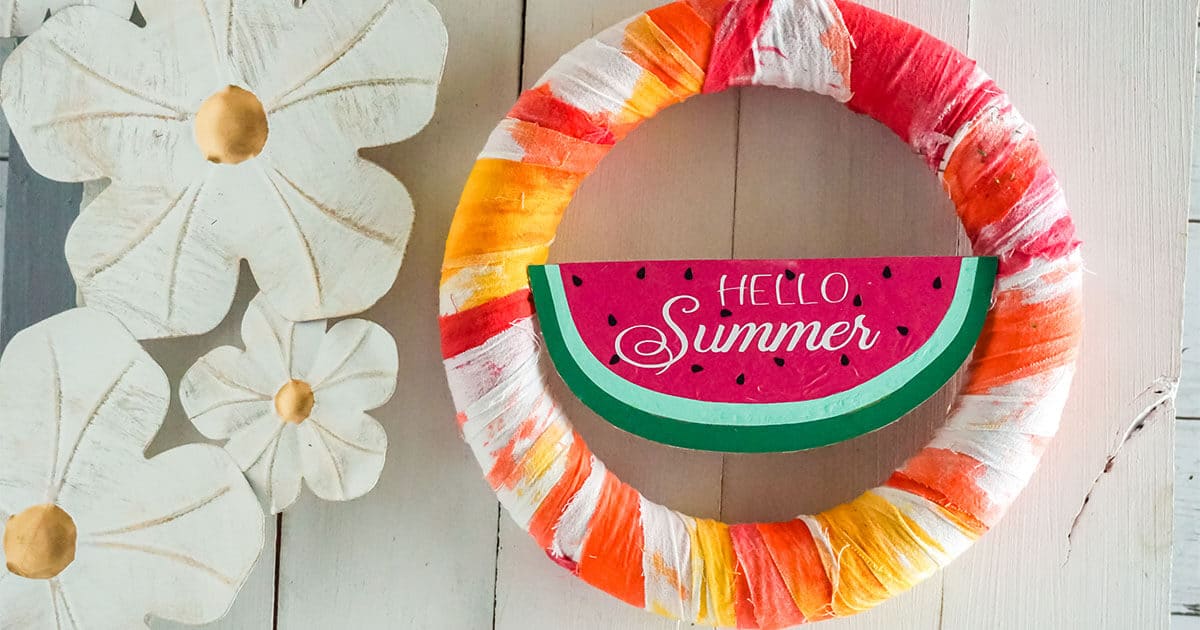
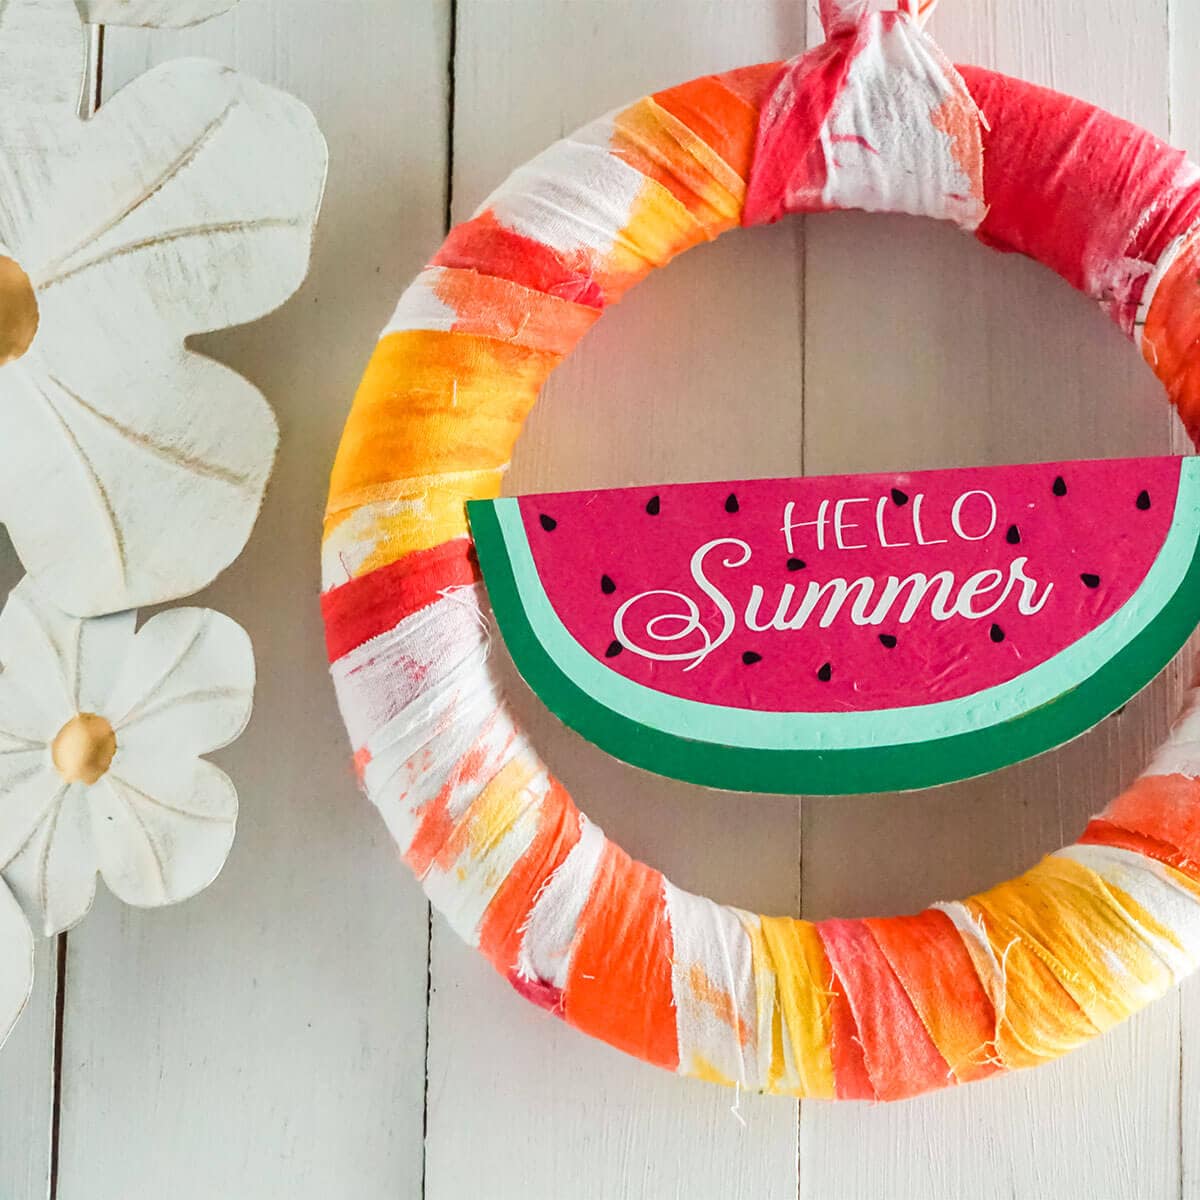
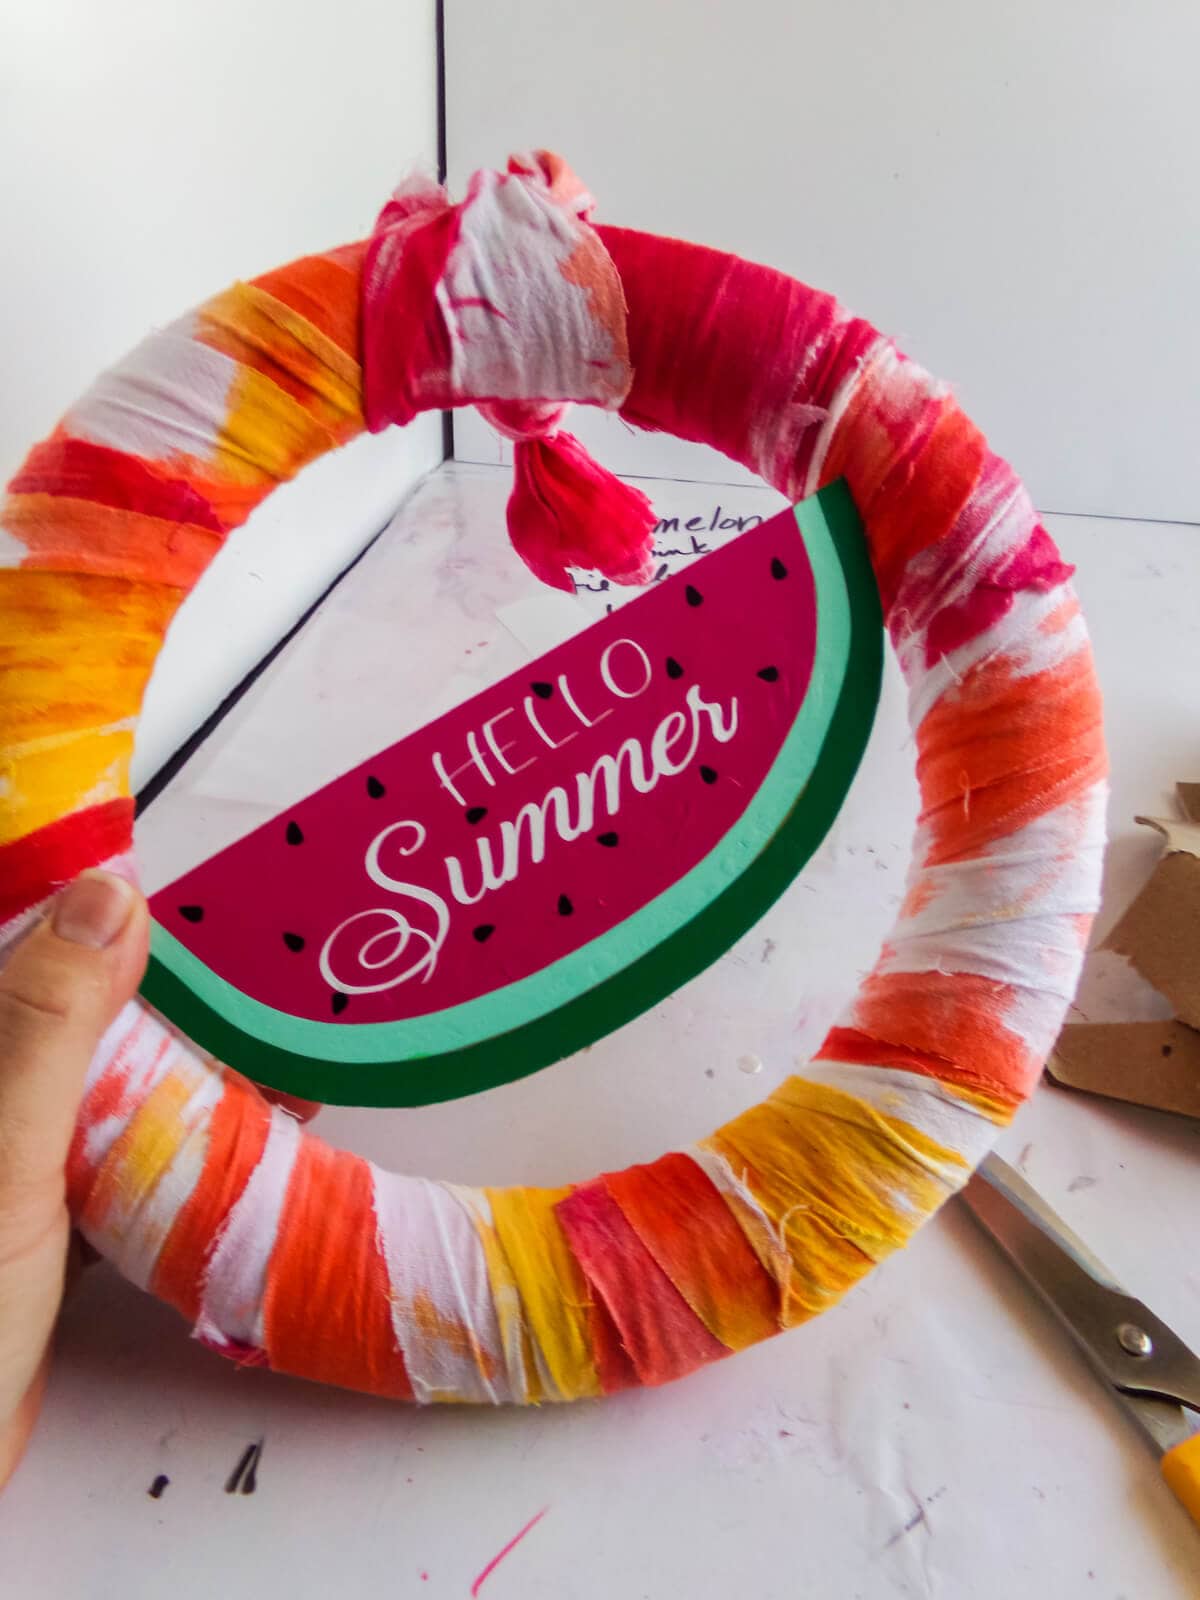
- Once the form is completely wrapped, hot glue the watermelon in place on the front of the wreath using cake pop sticks or dowel pieces to hold it in place in the center of the wreath.
- Use one of the remaining strips of the towel to make a hanger loop on the top of the wreath and enjoy!


Loving this easy Cricut craft idea, but no time to make it? That’s a-ok. Just be sure to pin this to your favorite Cricut craft ideas board on Pinterest so you can find it again fast when you’re ready!
More DIY Wreaths You Might Like
Tie-Dye Watermelon Hello Summer Wreath Cricut Craft
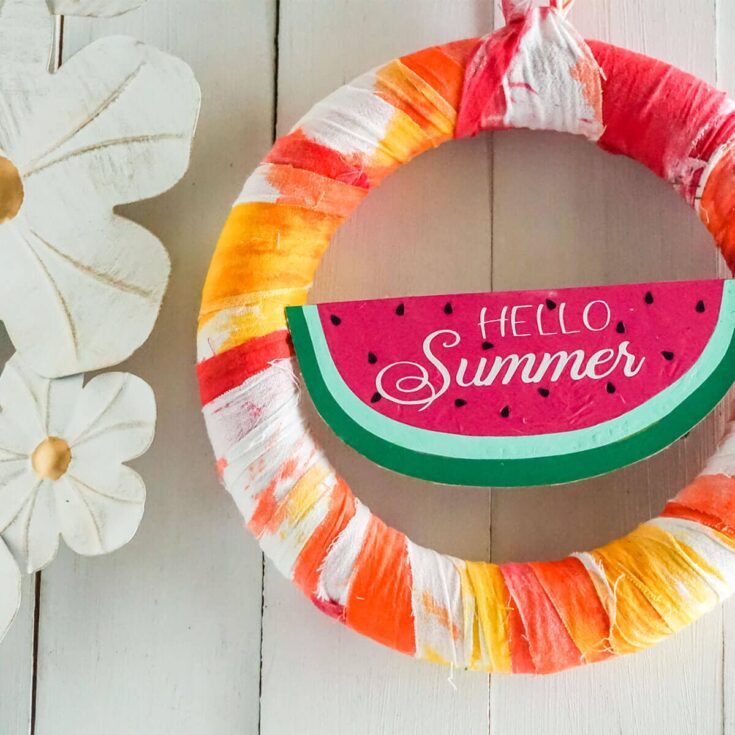
This easy Tie-Dye Watermelon Hello Summer Wreath Cricut Craft makes a beautiful wreath for summer!
Materials
- 6-8 inch Round Foam Wreath Form
- 1 Cotton Kitchen Cloth
- Tie-Dye Set (pink, yellow and orange)
- Dark Green Heat Transfer Vinyl
- Light Green Heat Transfer Vinyl
- Black Heat Transfer Vinyl
- Pink Heat Transfer Vinyl
- 1 Piece Chipboard
- 2 Cake Pop Sticks or Small Dowel
- Watermelon Hello Summer Cut File Set
Tools
- Good Scissors
- Cricut Maker or Explore Air 2 with Deep Cut Blade
- Large Bowl
- 4-5 Small Rubber Bands
- Hot Glue Gun & Glue
- Transfer Tape
- Easy Press Mini or Easy Press 2
Instructions
- Start by tie-dyeing your kitchen towel. Twist it up and wrap the rubber bands around the center of your bundle in 4-5 places then place it in the bowl.
- Either spray or pour (my preferred method, honestly) the dye onto your towel, saturating the towel in multiple places with the orange dye, yellow dye or pink dye, respectively. Allow the tie-dyed towel to dry completely before messing with it again.
- While the towel is drying, go ahead and make your watermelon by downloading the SVG file. Immediately load the SVG file into Design Space, then insert the image for a new project.
- Select the lettering for Hello Summer and click "weld" in the bottom right corner to have the Cricut cut the lettering as one element so it's easier to deal with.
- Click “Make It” in Design Space, and set the material type on the machine to “Vinyl”. Follow prompts to load and cut. Unload when finished cutting. Once the design is cut, if you need to trim excess vinyl, do so now.
- There is a brown piece to the SVG file--cut this from the chipboard by loading your deep-cut knife blade to the machine and changing the material in Design Space to chipboard.
- Layer your vinyl onto transfer tape, checking and readjusting often to get the watermelon parts in place the way you want it to look.
- Place the chip board onto the transfer tape with the layered vinyl and use your heat press to lock it in place. Remove the transfer tape and discard.
- Once your tie-dyed towel is dry, iron it, if desired to set in the colors. Then cut the towel into 2-inch (approximately) wide strips.
- Hot glue the strips onto the foam form, wrapping it around snugly as you go. I only used about 1/2 of the towel and I wrapped the outer edge of the strips over onto itself so that I had a nice, clean edge.
- Once the form is completely wrapped, hot glue the watermelon in place on the front of the wreath using cake pop sticks or dowel pieces to hold it in place in the center of the wreath.
- Use one of the remaining strips of the towel to make a hanger loop on the top of the wreath and enjoy!
Recommended Products
As an Amazon Associate and member of other affiliate programs, I earn from qualifying purchases.