I love craft projects, and I’m always looking for new ones to try. So when I came across this Family Birthday Cricut Craft idea, I knew it was perfect for me! It’s so easy to do with the help of my trusty cutting machine. The best part is that anyone can make this project – even beginners!
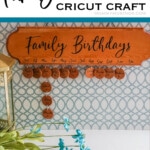
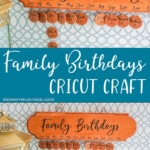
Family Birthday Cricut Craft
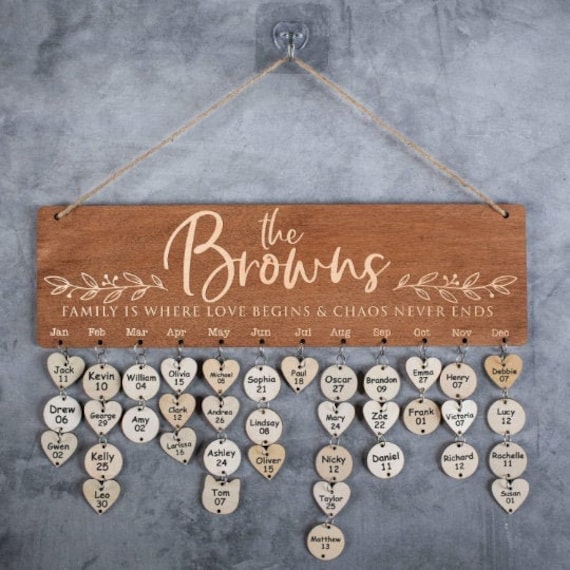
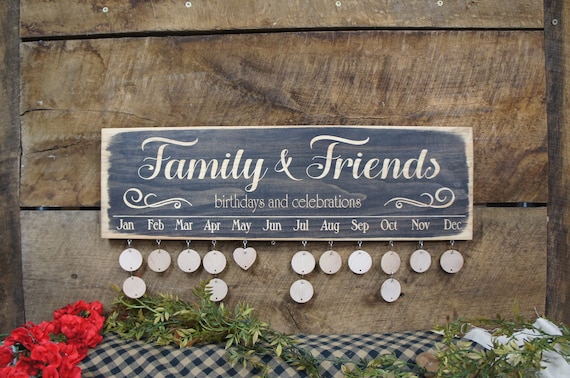
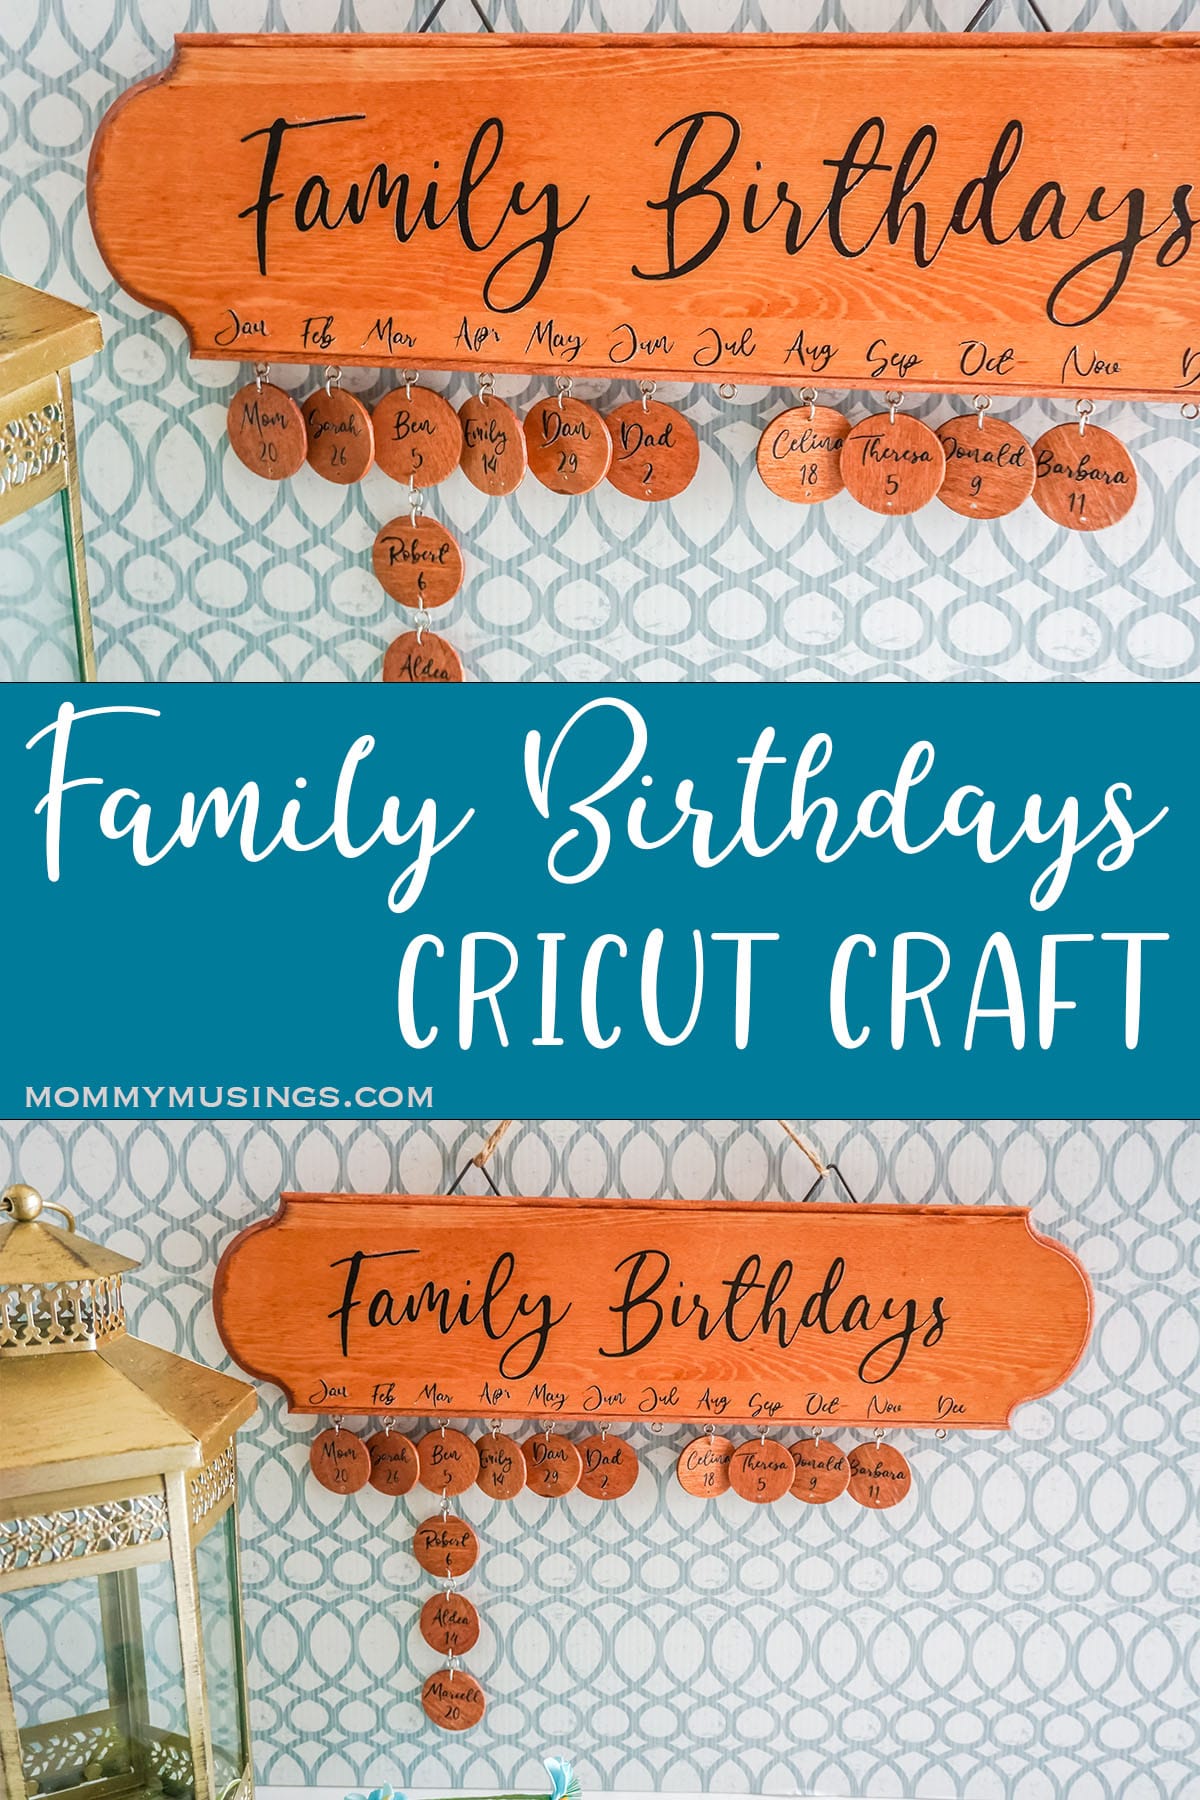
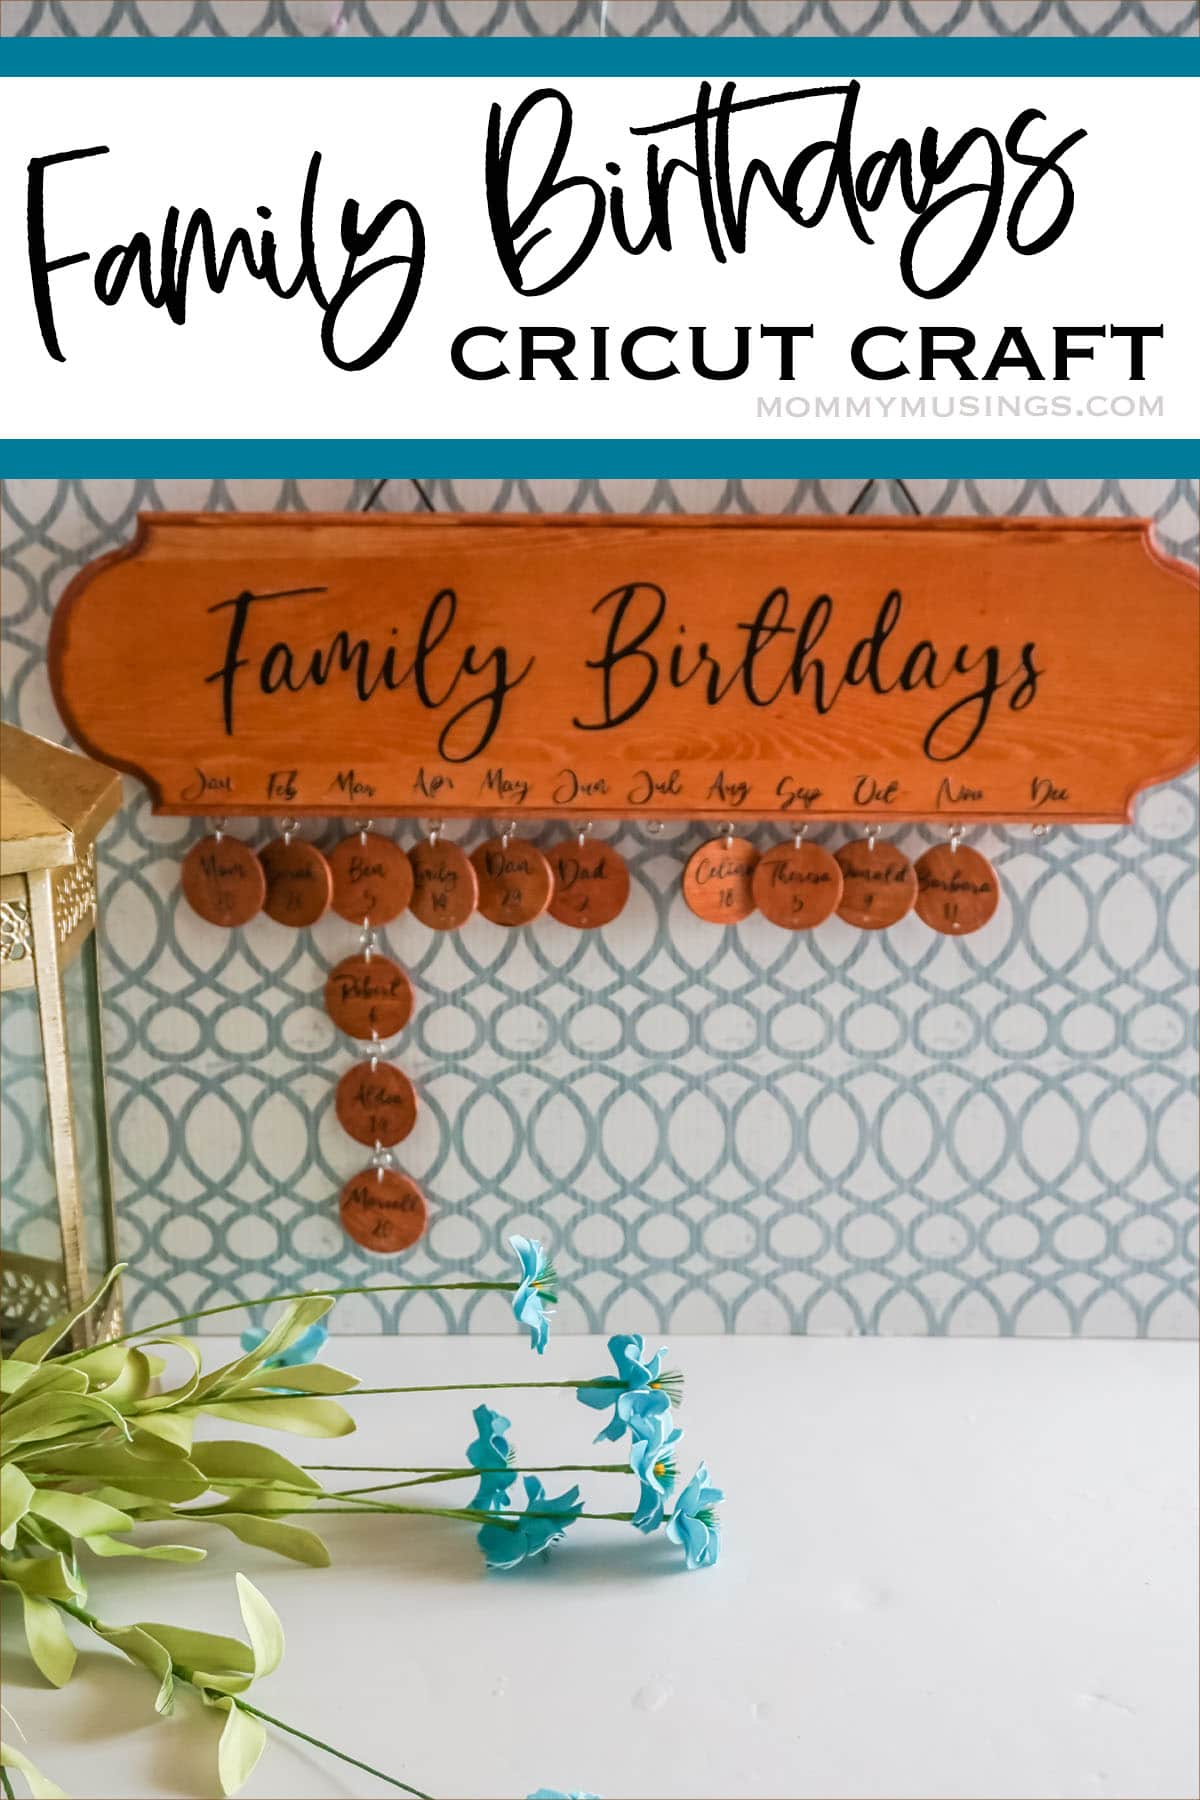
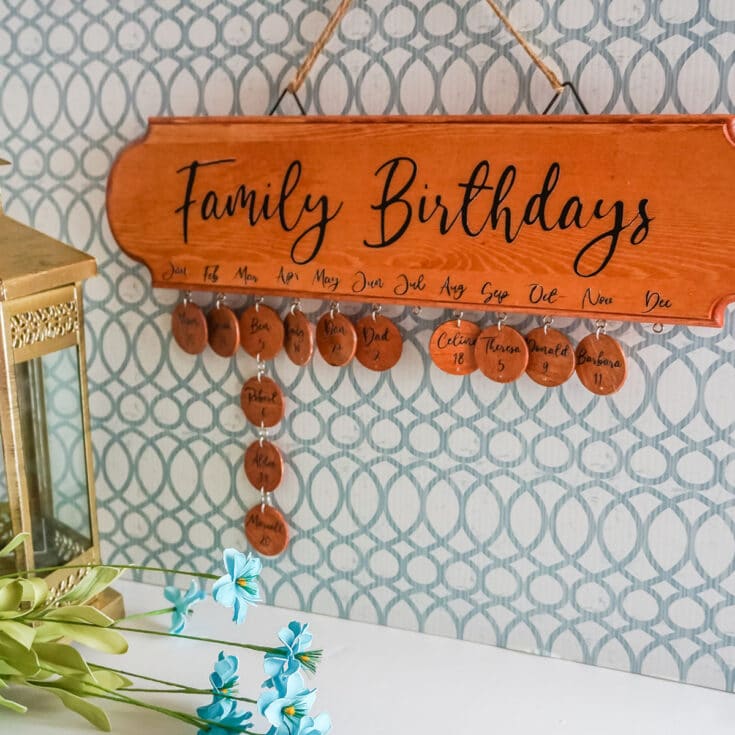
Are you looking for a cute and unconventional gift idea? Look no further than this DIY Family Birthday Cricut Craft. It’s an easy craft that can be used to create personalized plaques with names of family members in the order they were born on their birthday. This is an amazing way to commemorate your loved ones and never forget their special day!
Imagine if you will, a mom with lots of birthday dates to remember. This is the perfect gift idea for her. Particularly if you are that mom and you’d like to make it for yourself. LOL!
Let’s get crafty!

What You Need to Make This Family Birthday Cricut Craft
- 1 1/4-inch wood rounds
- 17×6-inch wood plaque
- Black Heat Transfer Vinyl
- Wood Stain
- Tiny Eye Hooks
- Tiny Hooks
- Picture hanging hardware
- Mod Podge or other craft sealant
- Cricut Cutting Machine with Fine Cutting Blade and Light Grip Mat
- Clean (but disposable) Rag
- Sponge Brush
- Cricut Easy Press Mini
How to Make This Family Birthday Cricut Craft
- Start by staining your wood pieces. Apply the stain in smooth, consistent motions, moving the sponge brush with the grain of the wood. Immediately wipe away any excess stain with the rag. Allow the stain to dry completely.

- Apply a coat of Mod Podge or other craft sealant onto the wood pieces. Allow this sealant to dry completely.
- To make your design, open Cricut Design Space and click the “+†button to open a new canvas.
- In the toolbar on the left, select the draw a square button and draw a square on your canvas.
- Click the unlock button on the left side of your square to allow you to resize your square into a rectangle, resizing the square to 5-inches tall by 16-inches wide. This will be your template for the elements to make sure they will fit well on your plaque.
- Using your chosen font (I used this font: https://www.dafont.com/bombinate.font), write ‘Family Birthdays’ of a size to generally fill your rectangle as desired. Write the abbreviation of each month of a size to be no more than 1-inch wide, ensuring that these will sit below the ‘Family Birthdays’ text comfortably on the plaque. Write each of the first names of your family members with the day of their birthday underneath of a size to be no more than 1-inch wide, ensuring that these will sit on the wood rounds comfortably.
- Delete the rectangle template.
- Attach the lettering of each name and birthdate; each month abbreviation; and ‘Family Birthdays’ using the “attach†button in the bottom of the toolbar on the right.
- Click on “Make It†in the top of the toolbar on the right.
- Follow the prompts to mirror your lettering, identify your material as heat transfer vinyl and cut the vinyl.
- Load the heat transfer vinyl, shiny-side-down, onto the light grip mat and load the mat into the cutting machine.
- Tell Cricut Design Space and the cutting machine to cut the design.
- After the design has been cut, weed the design, discarding all of the excess vinyl around the lettering.
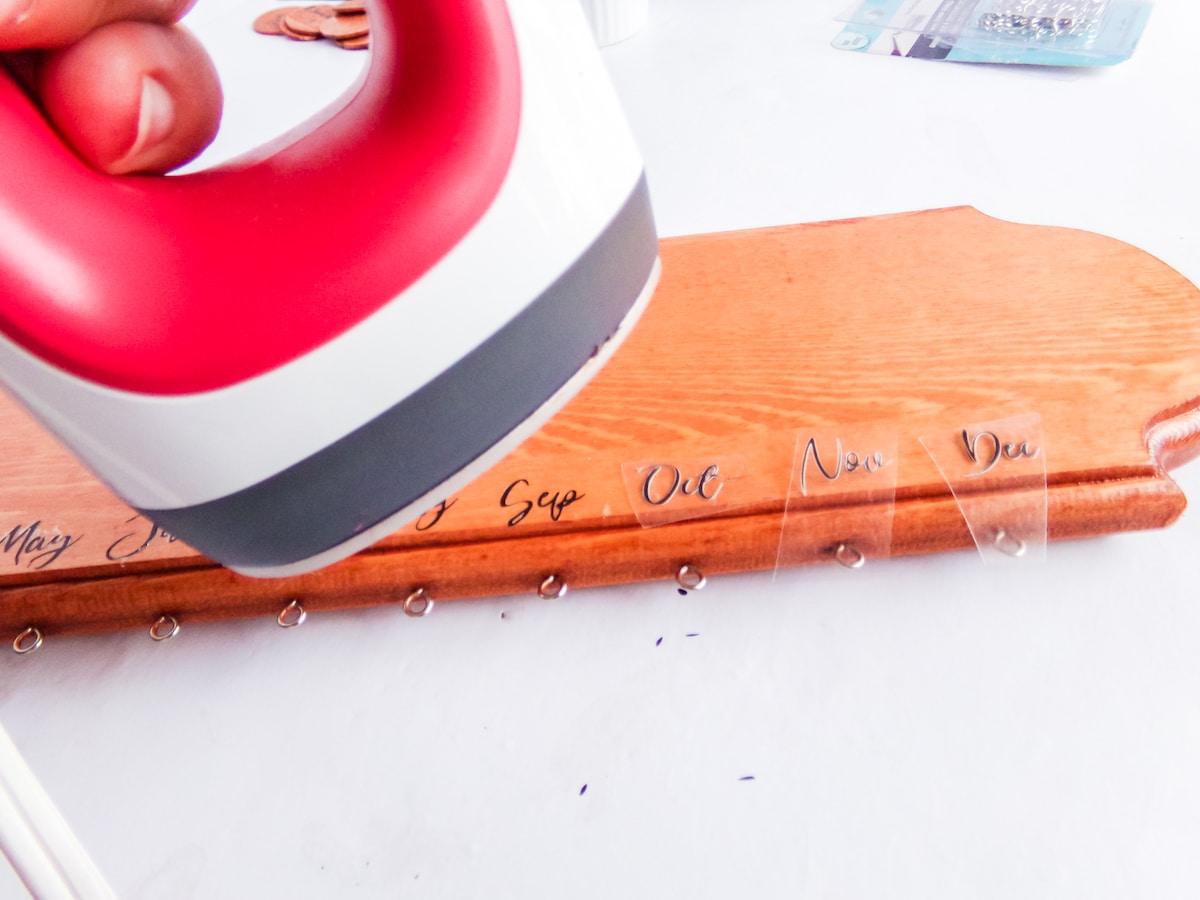
- Preheat your Cricut EasyPress Mini.
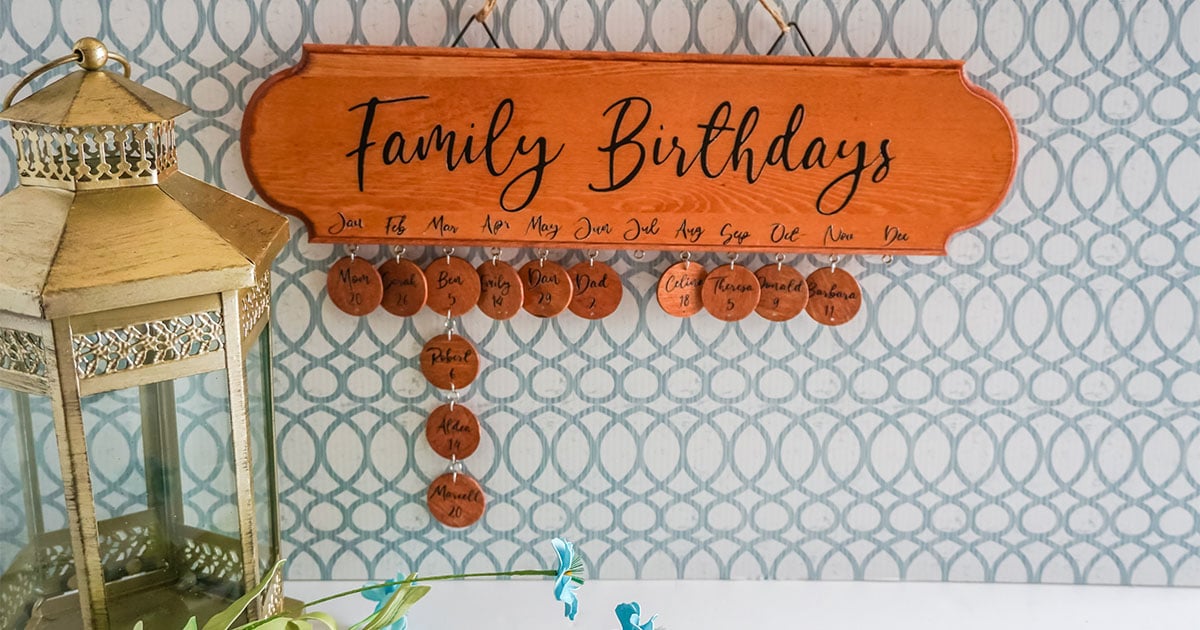
- Place the design into position on the corresponding wood piece. ‘Family Birthdays’ should be located in the center/top of the plaque with the month abbreviations located along the bottom of the plaque, spaced apart evenly; finally the names and dates should be placed on the wood rounds.
- Using the EasyPress Mini, press the vinyl onto the corresponding wood pieces. Remove the transfer sheet and discard.
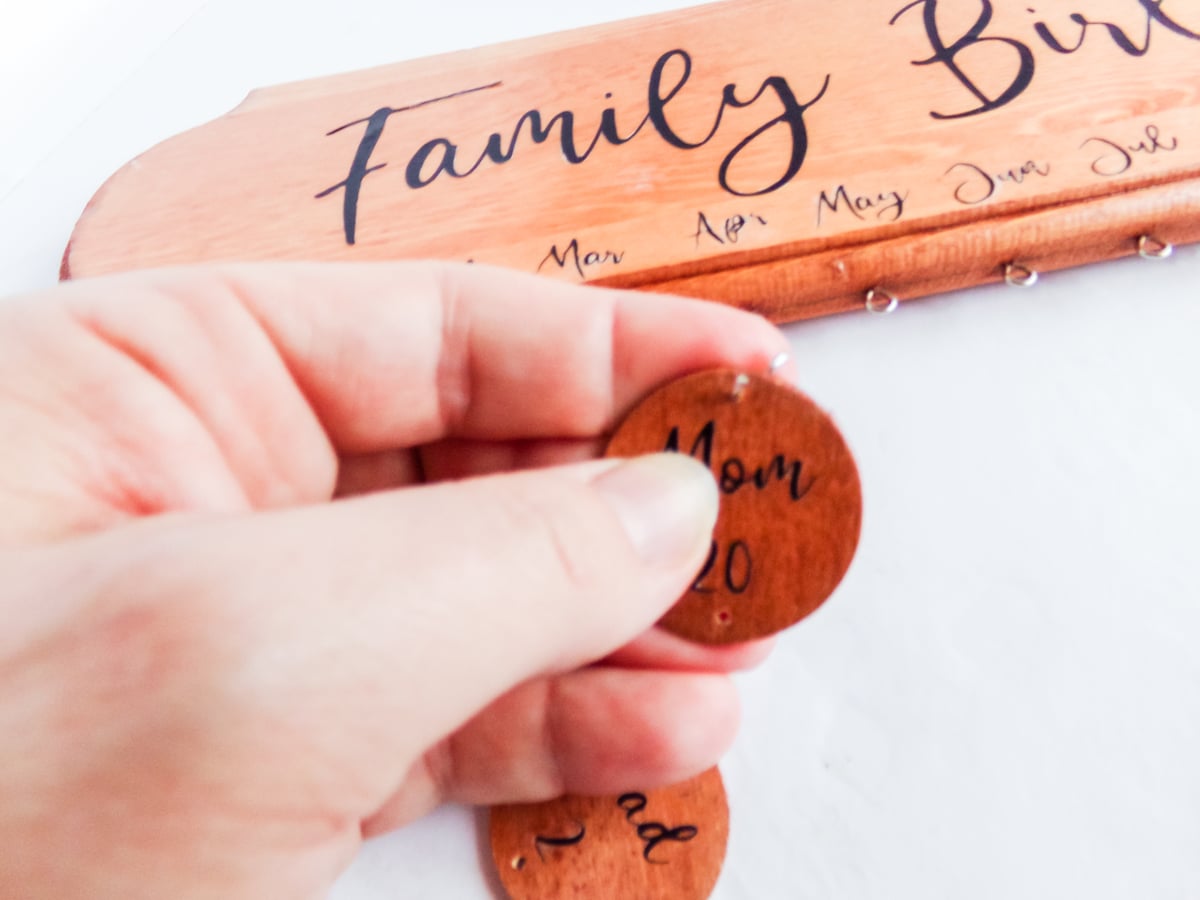
- Using the tiny eye hooks, screw one into the top of each of the wood rounds with names.
- Screw one of the tiny hooks (not the eye hooks, the plain hooks) into the bottom of each wood round which will have a second wood round hanging below it.
- Screw one of the tiny hooks (not the eye hooks, the plain hooks) below each of the month abbreviations on the bottom of the plaque.
- Attach the picture hanger(s) on the back of the plaque.
- Hang the plaque on the wall and attach the wood round names on the hooks, as they correspond with each month. Then enjoy!


More Fun Cricut Crafts You’ll Love
Family Birthday Cricut Craft
Such a fast and fun way to make a gift for someone you love, this Family Birthday Cricut Craft is a simple but meaningful DIY idea.
Materials
- 1 1/4-inch wood rounds
- 17x6-inch wood plaque
- Black Heat Transfer Vinyl
- Wood Stain
- Tiny Eye Hooks
- Tiny Hooks
- Picture hanging hardware
- Mod Podge or other craft sealant
Tools
- Cricut Cutting Machine with Fine Cutting Blade and Light Grip Mat
- Clean (but disposable) Rag
- Sponge Brush
- Cricut Easy Press Mini
Instructions
- Start by staining your wood pieces. Apply the stain in smooth, consistent motions, moving the sponge brush with the grain of the wood. Immediately wipe away any excess stain with the rag. Allow the stain to dry completely.
- Apply a coat of Mod Podge or other craft sealant onto the wood pieces. Allow this sealant to dry completely.
- To make your design, open Cricut Design Space and click the “+” button to open a new canvas.
- In the toolbar on the left, select the draw a square button and draw a square on your canvas.
- Click the unlock button on the left side of your square to allow you to resize your square into a rectangle, resizing the square to 5-inches tall by 16-inches wide. This will be your template for the elements to make sure they will fit well on your plaque.
- Using your chosen font (I used this font: https://www.dafont.com/bombinate.font), write ‘Family Birthdays’ of a size to generally fill your rectangle as desired. Write the abbreviation of each month of a size to be no more than 1-inch wide, ensuring that these will sit below the ‘Family Birthdays’ text comfortably on the plaque. Write each of the first names of your family members with the day of their birthday underneath of a size to be no more than 1-inch wide, ensuring that these will sit on the wood rounds comfortably.
- Delete the rectangle template.
- Attach the lettering of each name and birthdate; each month abbreviation; and ‘Family Birthdays’ using the “attach” button in the bottom of the toolbar on the right.
- Click on “Make It” in the top of the toolbar on the right.
- Follow the prompts to mirror your lettering, identify your material as heat transfer vinyl and cut the vinyl.
- Load the heat transfer vinyl, shiny-side-down, onto the light grip mat and load the mat into the cutting machine.
- Tell Cricut Design Space and the cutting machine to cut the design.
- After the design has been cut, weed the design, discarding all of the excess vinyl around the lettering.
- Preheat your Cricut EasyPress Mini.
- Place the design into position on the corresponding wood piece. ‘Family Birthdays’ should be located in the center/top of the plaque with the month abbreviations located along the bottom of the plaque, spaced apart evenly; finally the names and dates should be placed on the wood rounds.
- Using the EasyPress Mini, press the vinyl onto the corresponding wood pieces. Remove the transfer sheet and discard.
- Using the tiny eye hooks, screw one into the top of each of the wood rounds with names.
- Screw one of the tiny hooks (not the eye hooks, the plain hooks) into the bottom of each wood round which will have a second wood round hanging below it.
- Screw one of the tiny hooks (not the eye hooks, the plain hooks) below each of the month abbreviations on the bottom of the plaque.
- Attach the picture hanger(s) on the back of the plaque.
- Hang the plaque on the wall and attach the wood round names on the hooks, as they correspond with each month. Then enjoy!
Recommended Products
As an Amazon Associate and member of other affiliate programs, I earn from qualifying purchases.