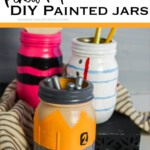
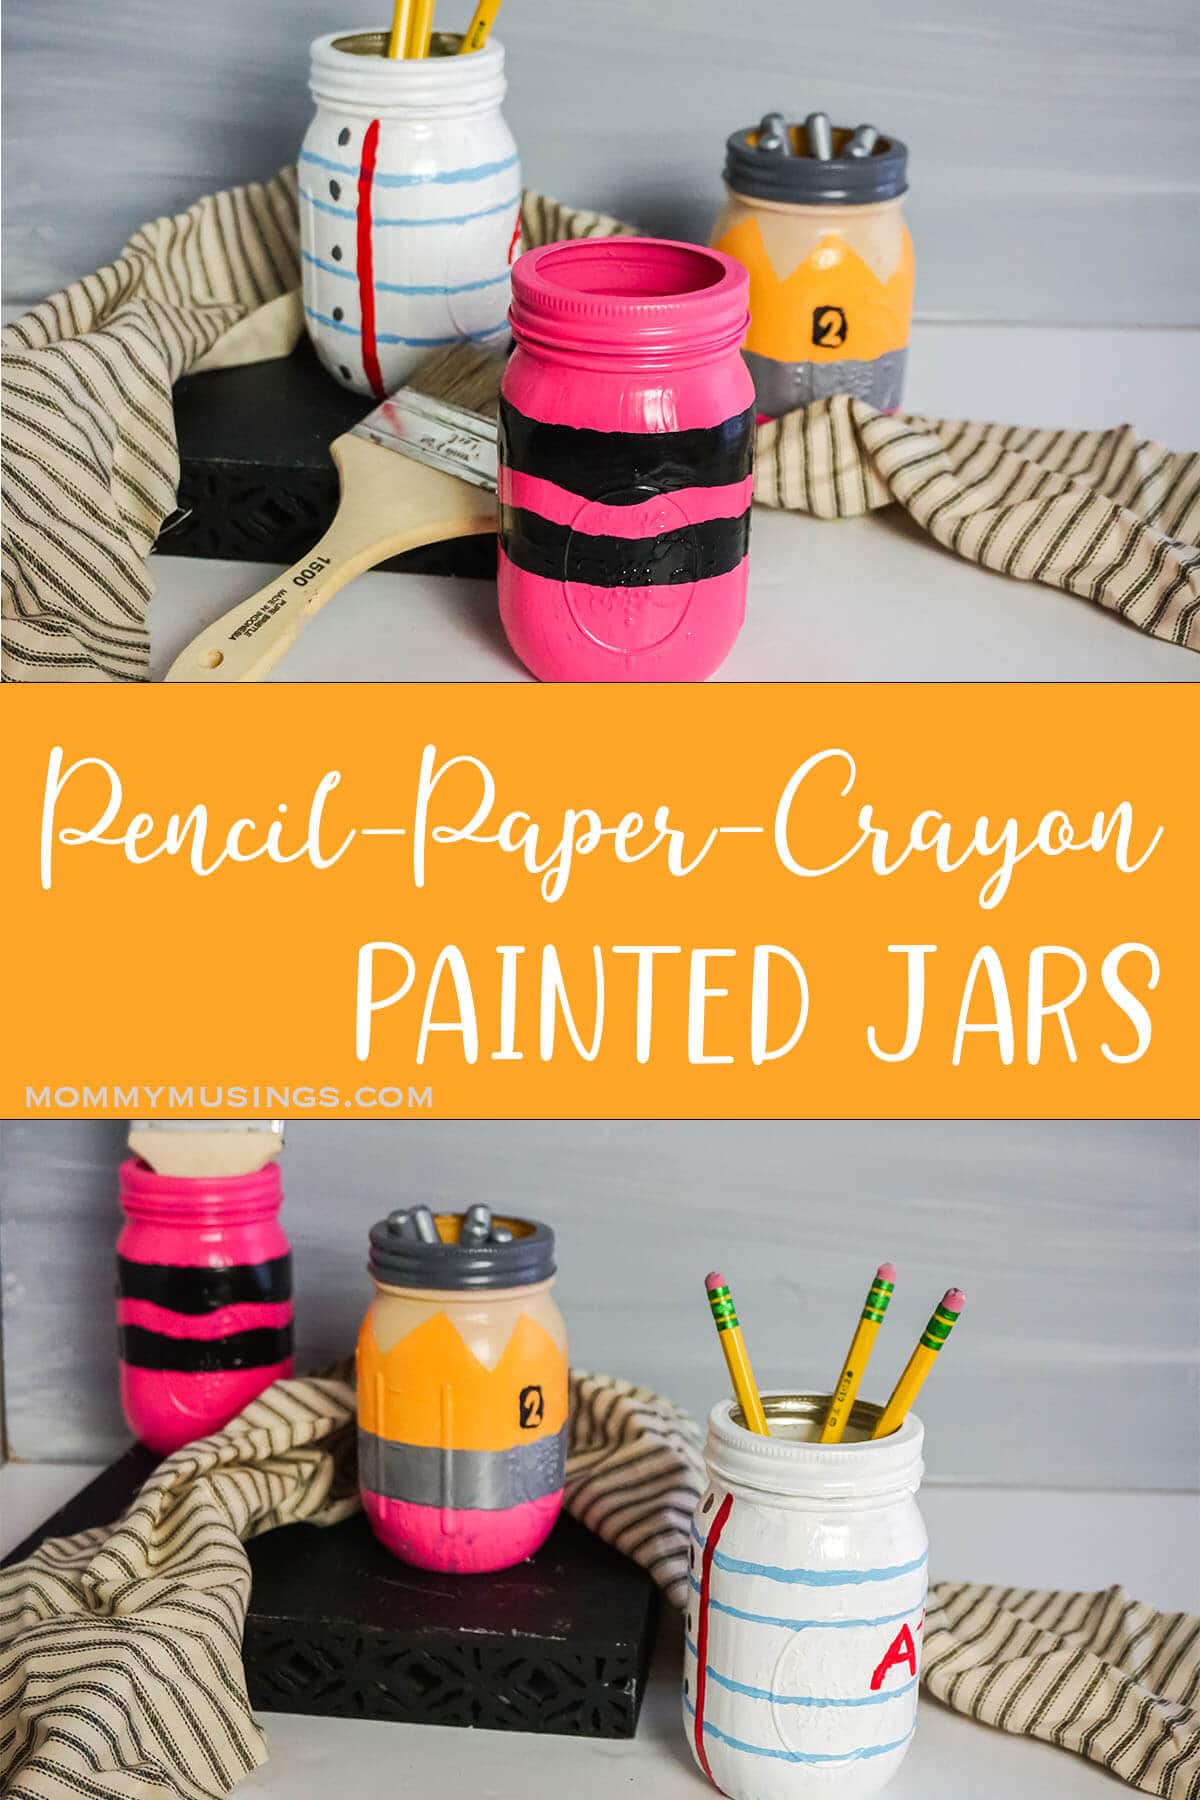
Looking for a cute, fast gift for a teacher? These Pencil Paper and Crayon Painted Mason Jars are adorable, super easy to make, and any teacher would love it! Whether you fill it with pencils or candy, it’ll take just a short time to put together and you’ll have a DIY teacher gift in a flash.
Pencil/Crayon/Paper Painted Mason Jars
Designing your mason jars
Don’t feel like you have to be perfect while crafting. Art is open for interpretation. If you decide to design a pencil and crayon, awesome! If something else happens and you end up with polka dots, that’s awesome, too.
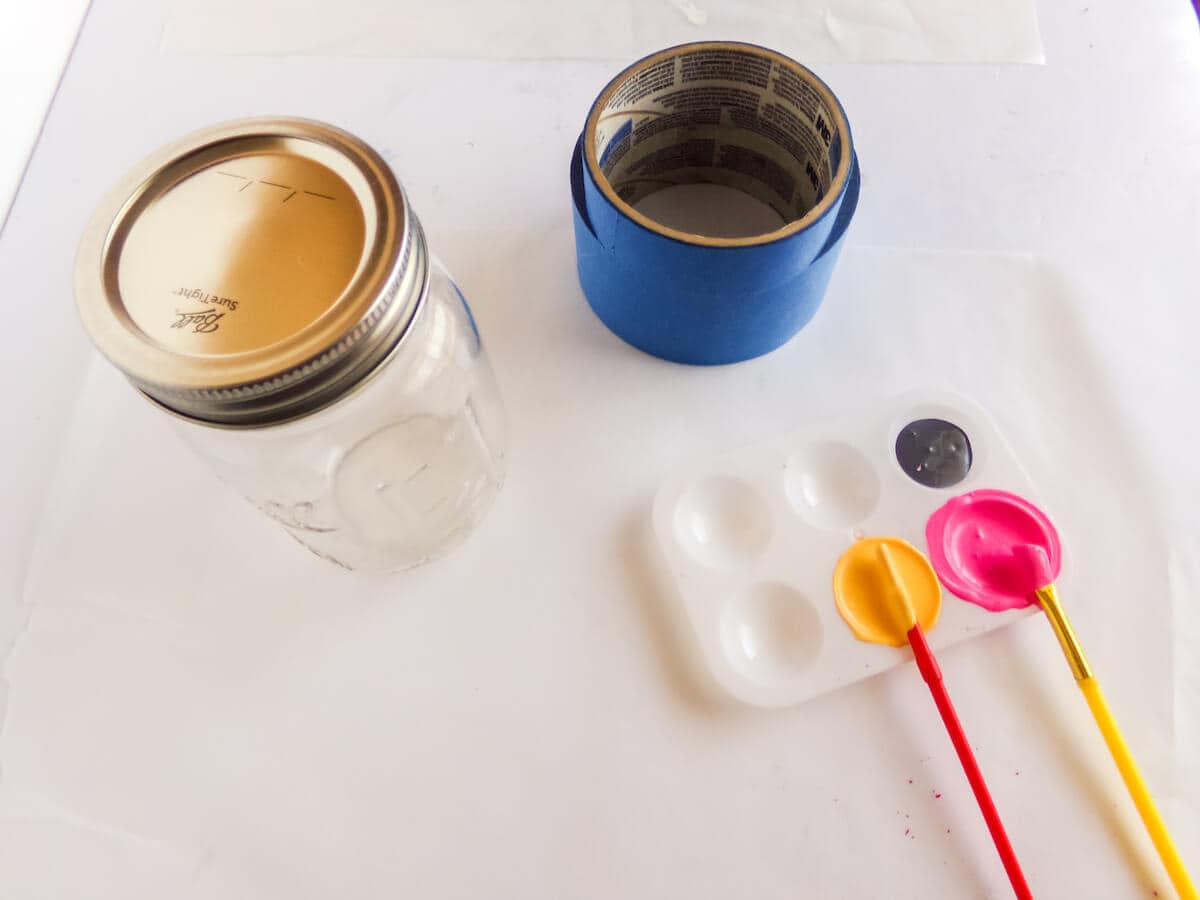
Supplies Needed:
- Mason Jars
- Acrylic Paint (not tempura – learned that the hard way)
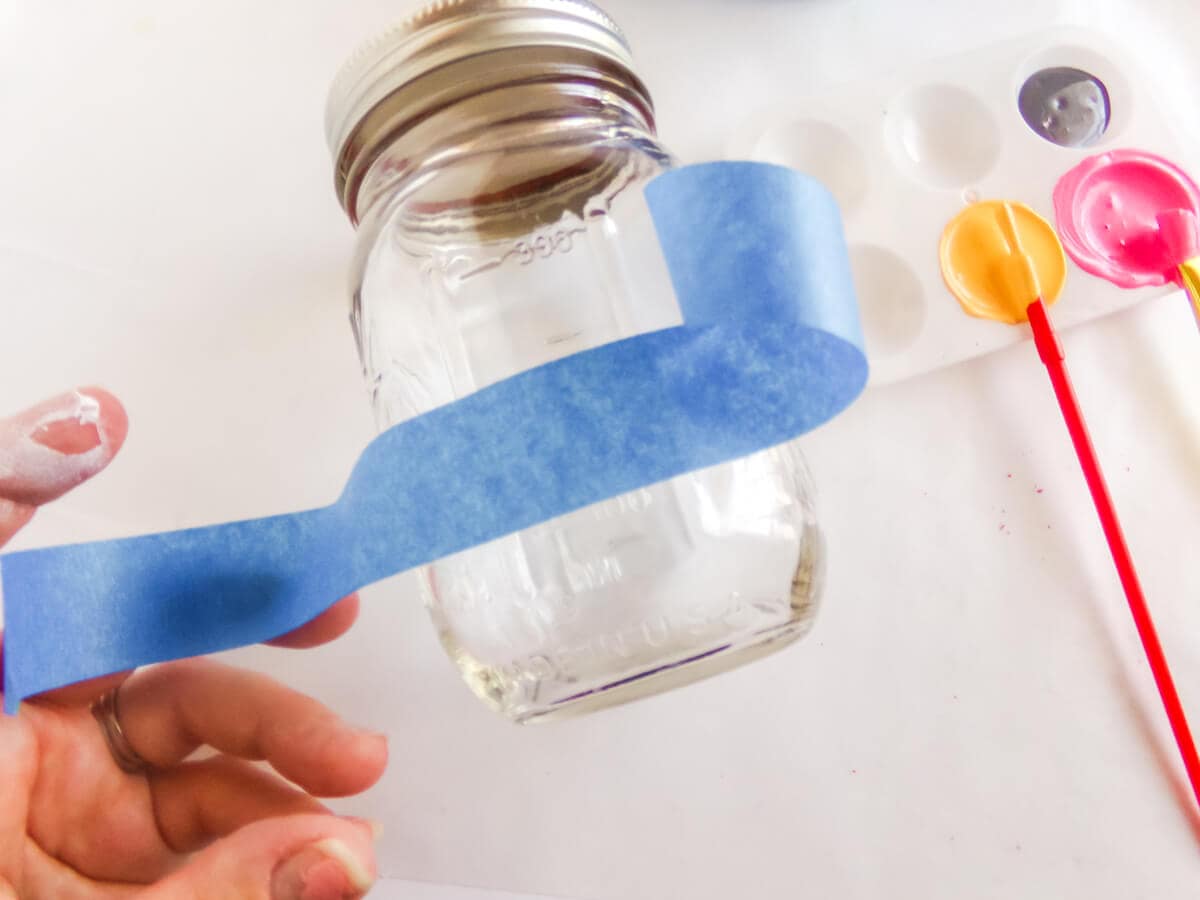
- Painter’s Tape
These can be DIY pencil holders, but there are many other ways you can use them! Fill with candies or trinkets and give them as gifts. You could even use them as a way to deliver a gift card to your child’s favorite teachers.
Working with Mod Podge as a craft sealant
If you haven’t worked with mod podge before, the key is to use it in very thin layers. Don’t glop a bunch on at once, or you’ll be sorely disappointed in the overall finished look. Using thin layers keeps it from clouding your project, and also helps the mod podge dry faster.
After you’ve applied a few thin coats, if you notice any bumps you can lightly – very gently – sand them off with fine grit sandpaper. You may need to apply another thin coat after this to make sure it’s all smooth.
Mod podge will feel dry to the touch after about an hour, but I wait at least 24 hours before considering the project “finishedâ€, just in case.
Remember, mod podge isn’t entirely waterproof when dry. It is water resistant, but you don’t want to get it wet if at all possible. If you want your project to be waterproof, use the dishwasher safe Mod Podge to seal your project.
What You Need to Make Pencil/Crayon/Paper Painted Mason Jars
Supplies
- 3 Mason Jars
- Painter’s Tape
- Acrylic paint in:
- Pink
- Pale beige/brown
- Yellow
- Grey
- Black
- White
- Blue
- Red
- Mod podge or other craft sealant
How to Make Pencil/Crayon/Paper Painted Mason Jars
- Make sure your mason jars are clean and dry before starting.
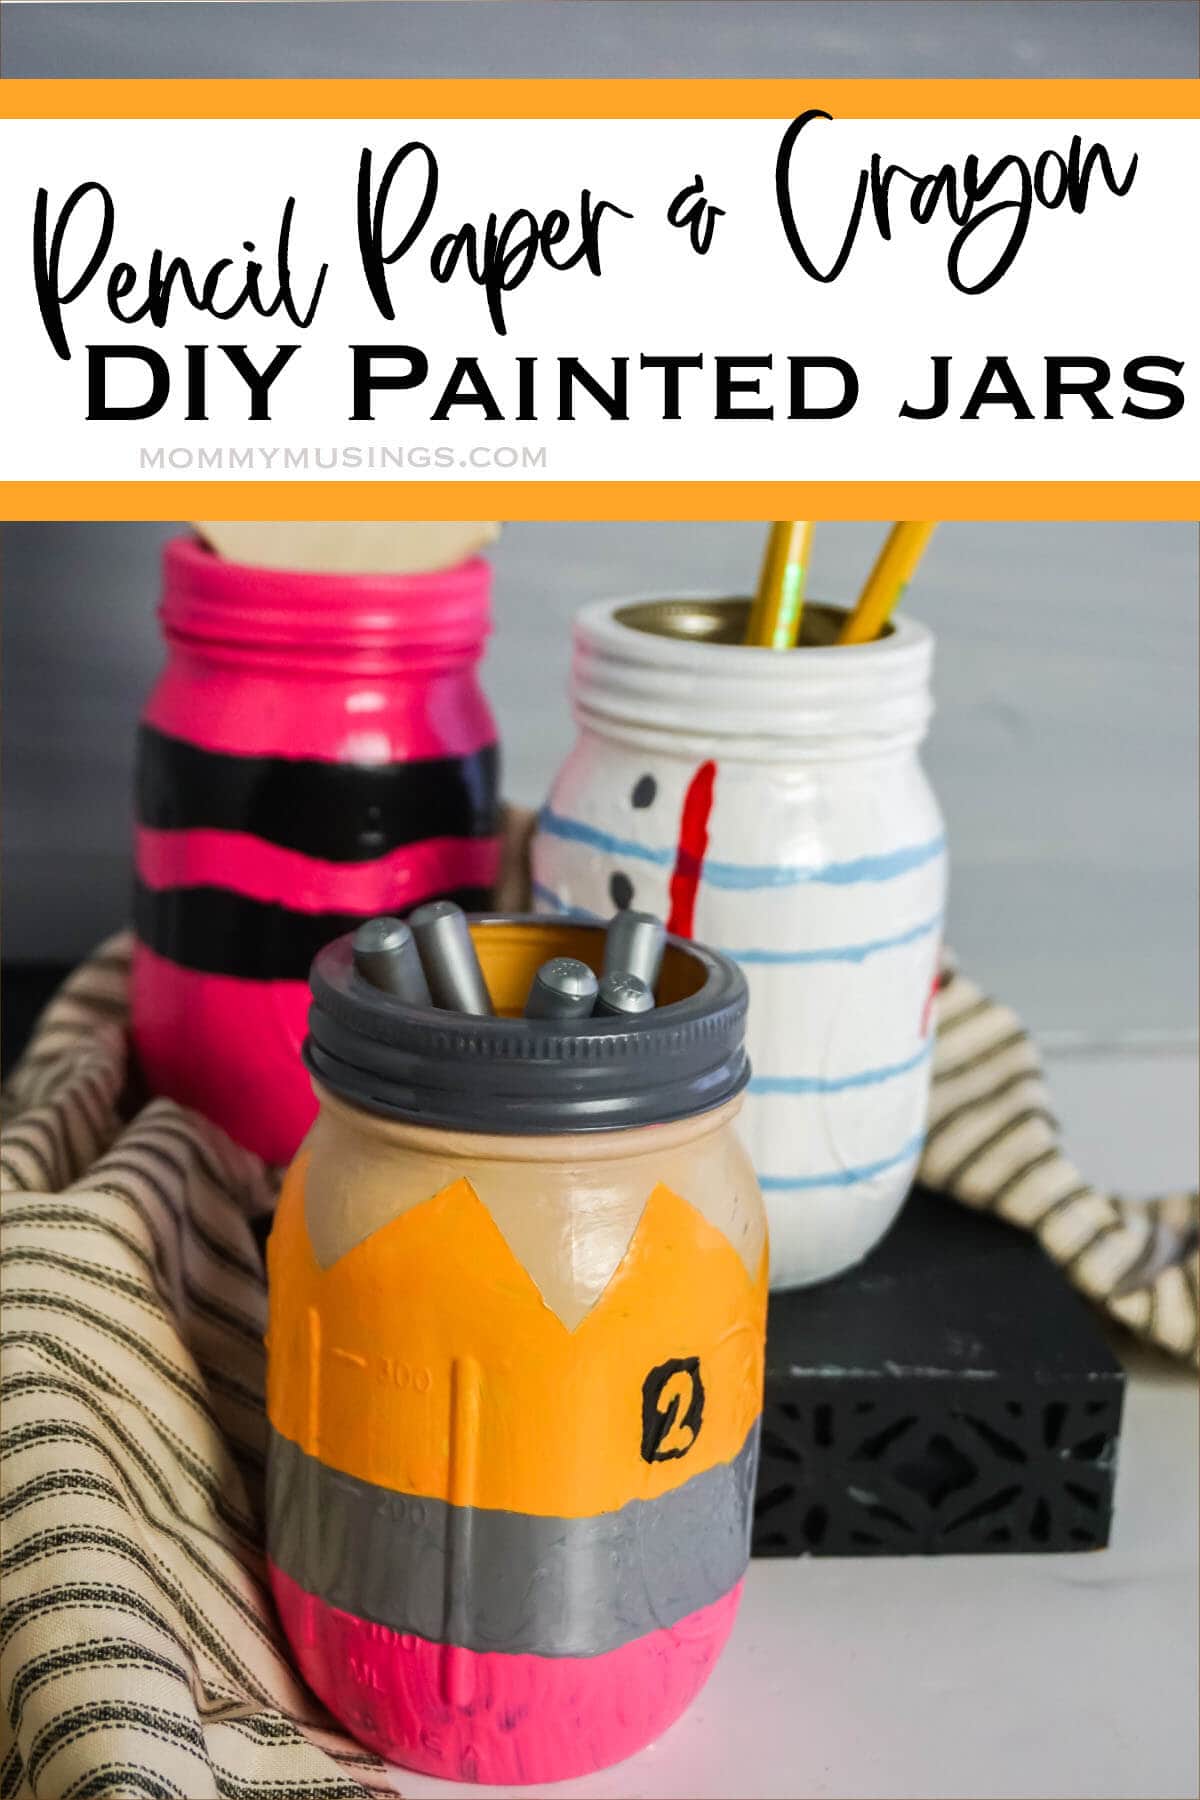
- Make the Pencil mason jar by: Taping off the bottom third of the jar.
 Paint the bottom â…“ of the jar pink. Paint the area above the tape yellow.
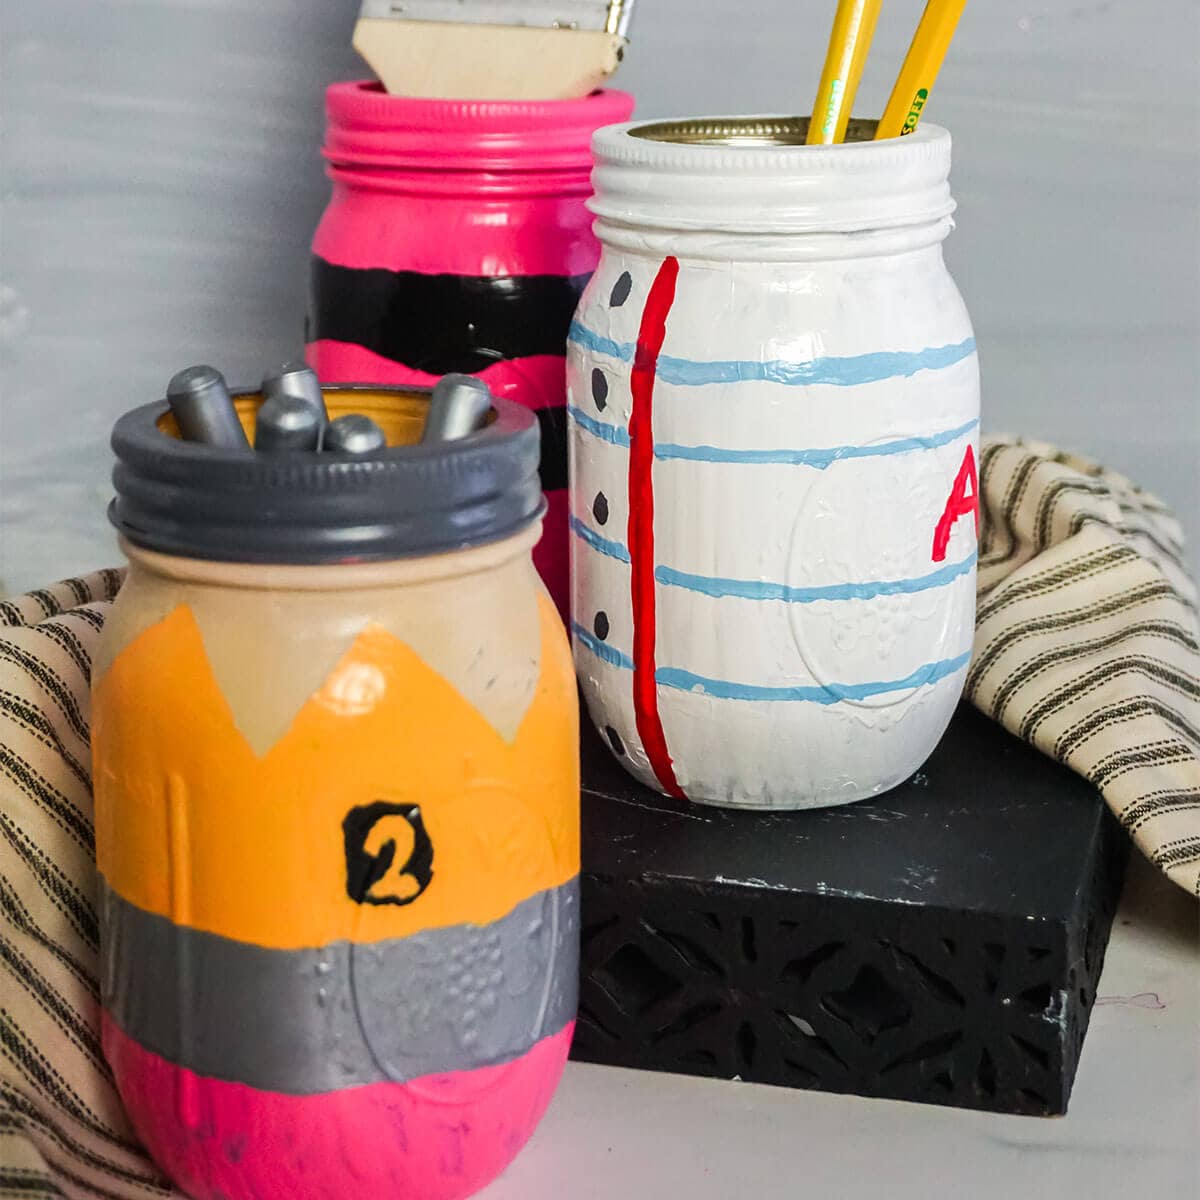
Paint the bottom ⅓ of the jar pink. Paint the area above the tape yellow.  Paint the ring of the jar grey. Allow this coat to dry completely. Remove the tape between the yellow and pink painted sections. Paint the area where the tape had been grey. Tape off the top of the jar with an “M†or “V†pattern. Paint the top portion in the “M†area with the pale beige/brown. Allow this coat of paint to dry completely. Draw on a piece of painter’s tape a number 2 and oval. Cut it out with an exacto knife and position it where you’d like these elements on your pencil. Using this as a guide, sketch your 2 onto your jar along with the oval with a pencil. Paint over the pencil marks with the black paint. Allow this coat to dry completely. Seal with a coat of mod podge or other craft sealant and allow that to dry completely.
 - Make the Paper mason jar by: Painting the entire jar white, then allowing this coat to dry completely. Paint blue horizontal lines on the jar, at ¾-inch increments from top to bottom. You can use tape to help you guide yourself and make the lines straight. Allow this coat to dry completely. Paint one red vertical line on the jar, to the left of whatever side you want to be the front of the jar. Add a large red “A+†on the other side of the front of the jar. Paint 3 black dots about the same size as the distance between the horizontal lines just to the left of the red vertical line. Allow this paint to dry completely. Seal with a coat of mod podge or other craft sealant and allow that to dry completely.
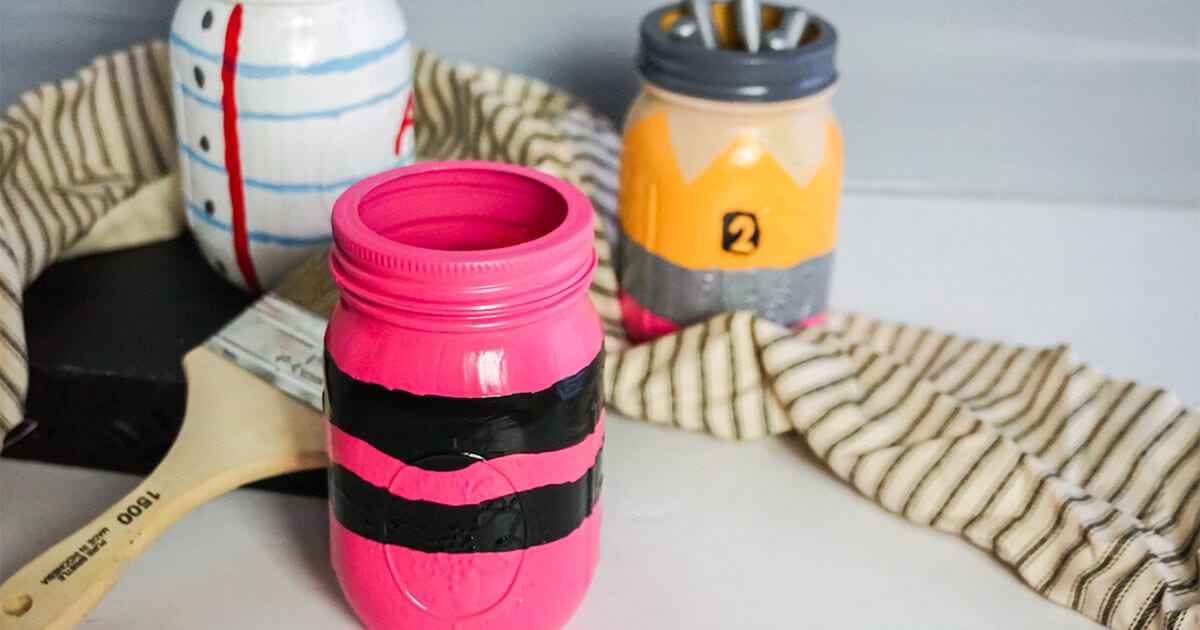
- Make the Crayon mason jar by: Tape off two adjacent lines of your jar about â…“ of the way from the lip of the top, then using an exacto knife to add a wavy bottom line to the topmost piece of tape, between the two pieces. Paint all of the exposed areas of the mason jar with the pink paint. Allow this coat to dry completely. Remove the tape and paint the previously taped off area black. Allow this coat to dry completely. Seal with a coat of mod podge or other craft sealant and allow that to dry completely.
 Paint the bottom â…“ of the jar pink.
 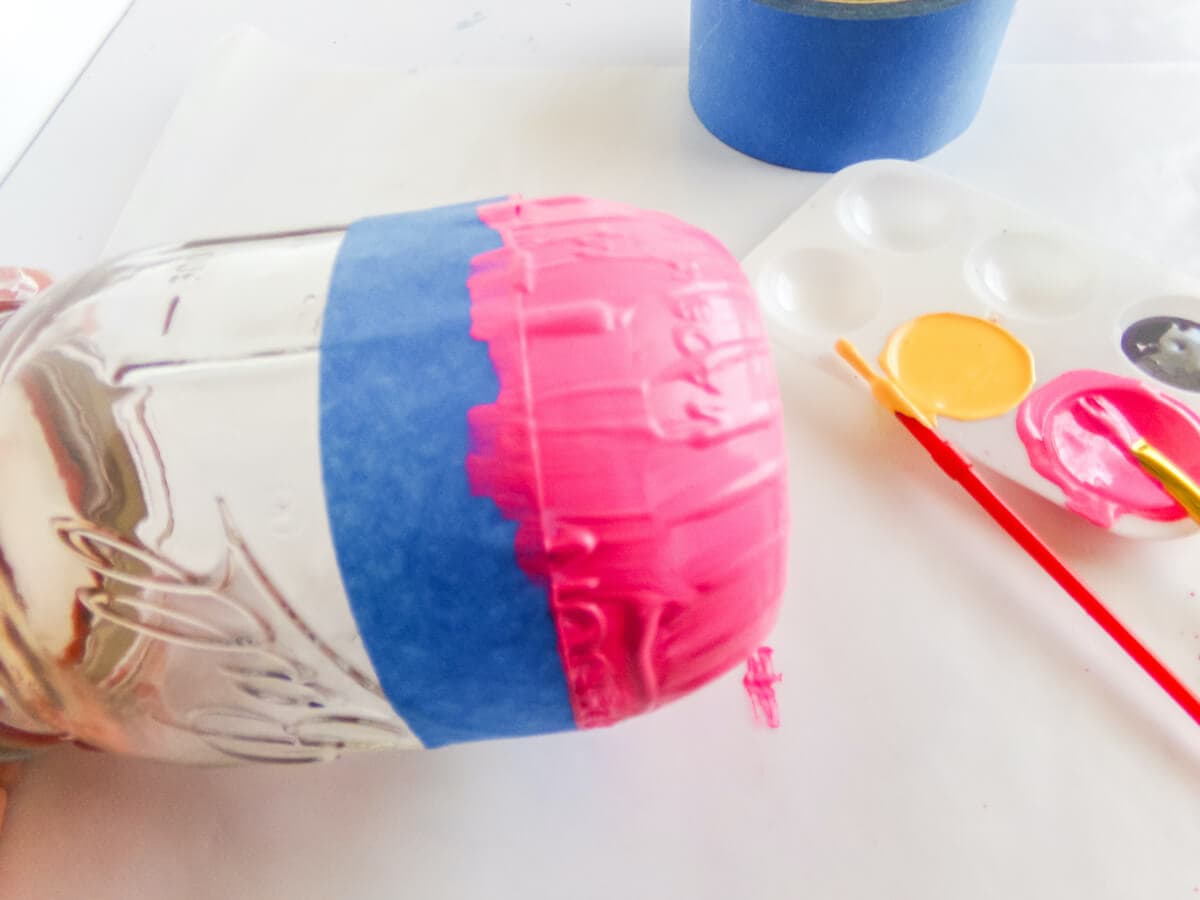 Paint the area above the tape yellow.
 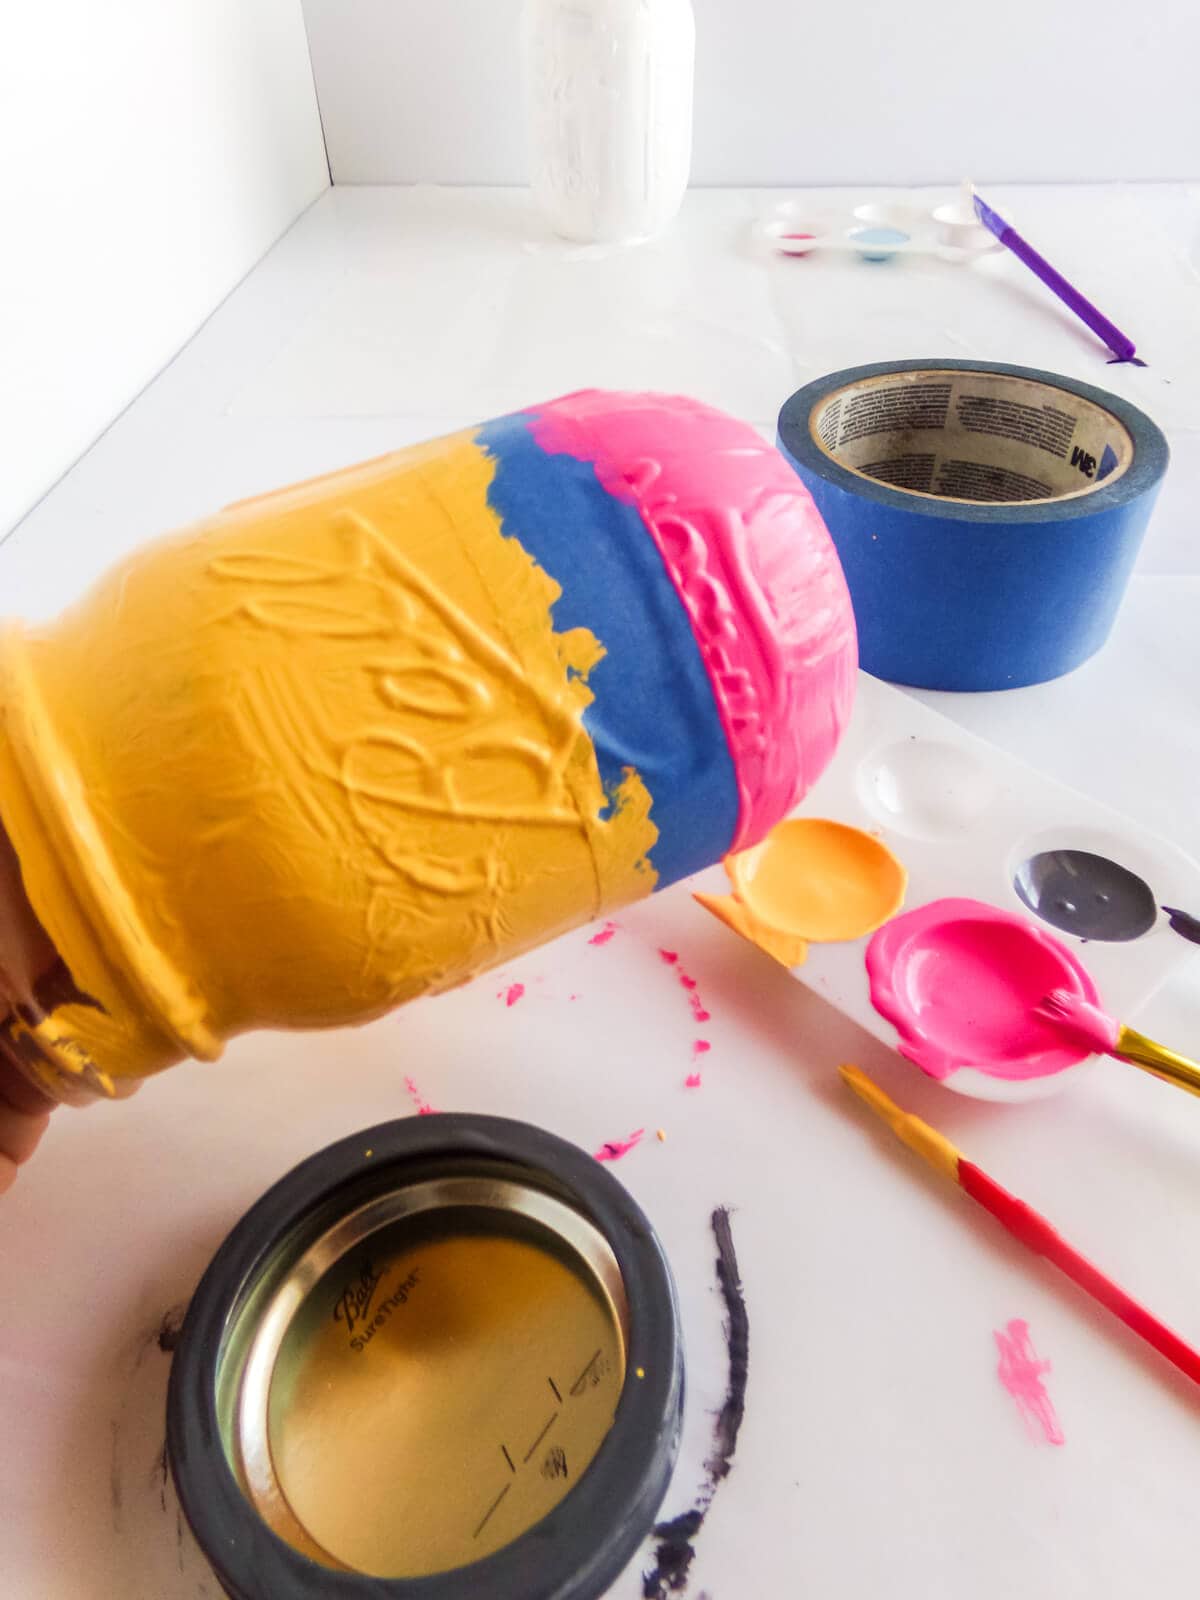 Paint the ring of the jar grey. Allow this coat to dry completely. Remove the tape between the yellow and pink painted sections. Paint the area where the tape had been grey. Tape off the top of the jar with an “M†or “V†pattern. Paint the top portion in the “M†area with the pale beige/brown. Allow this coat of paint to dry completely. Draw on a piece of painter’s tape a number 2 and oval. Cut it out with an exacto knife and position it where you’d like these elements on your pencil. Using this as a guide, sketch your 2 onto your jar along with the oval with a pencil. Paint over the pencil marks with the black paint. Allow this coat to dry completely. Seal with a coat of mod podge or other craft sealant and allow that to dry completely.
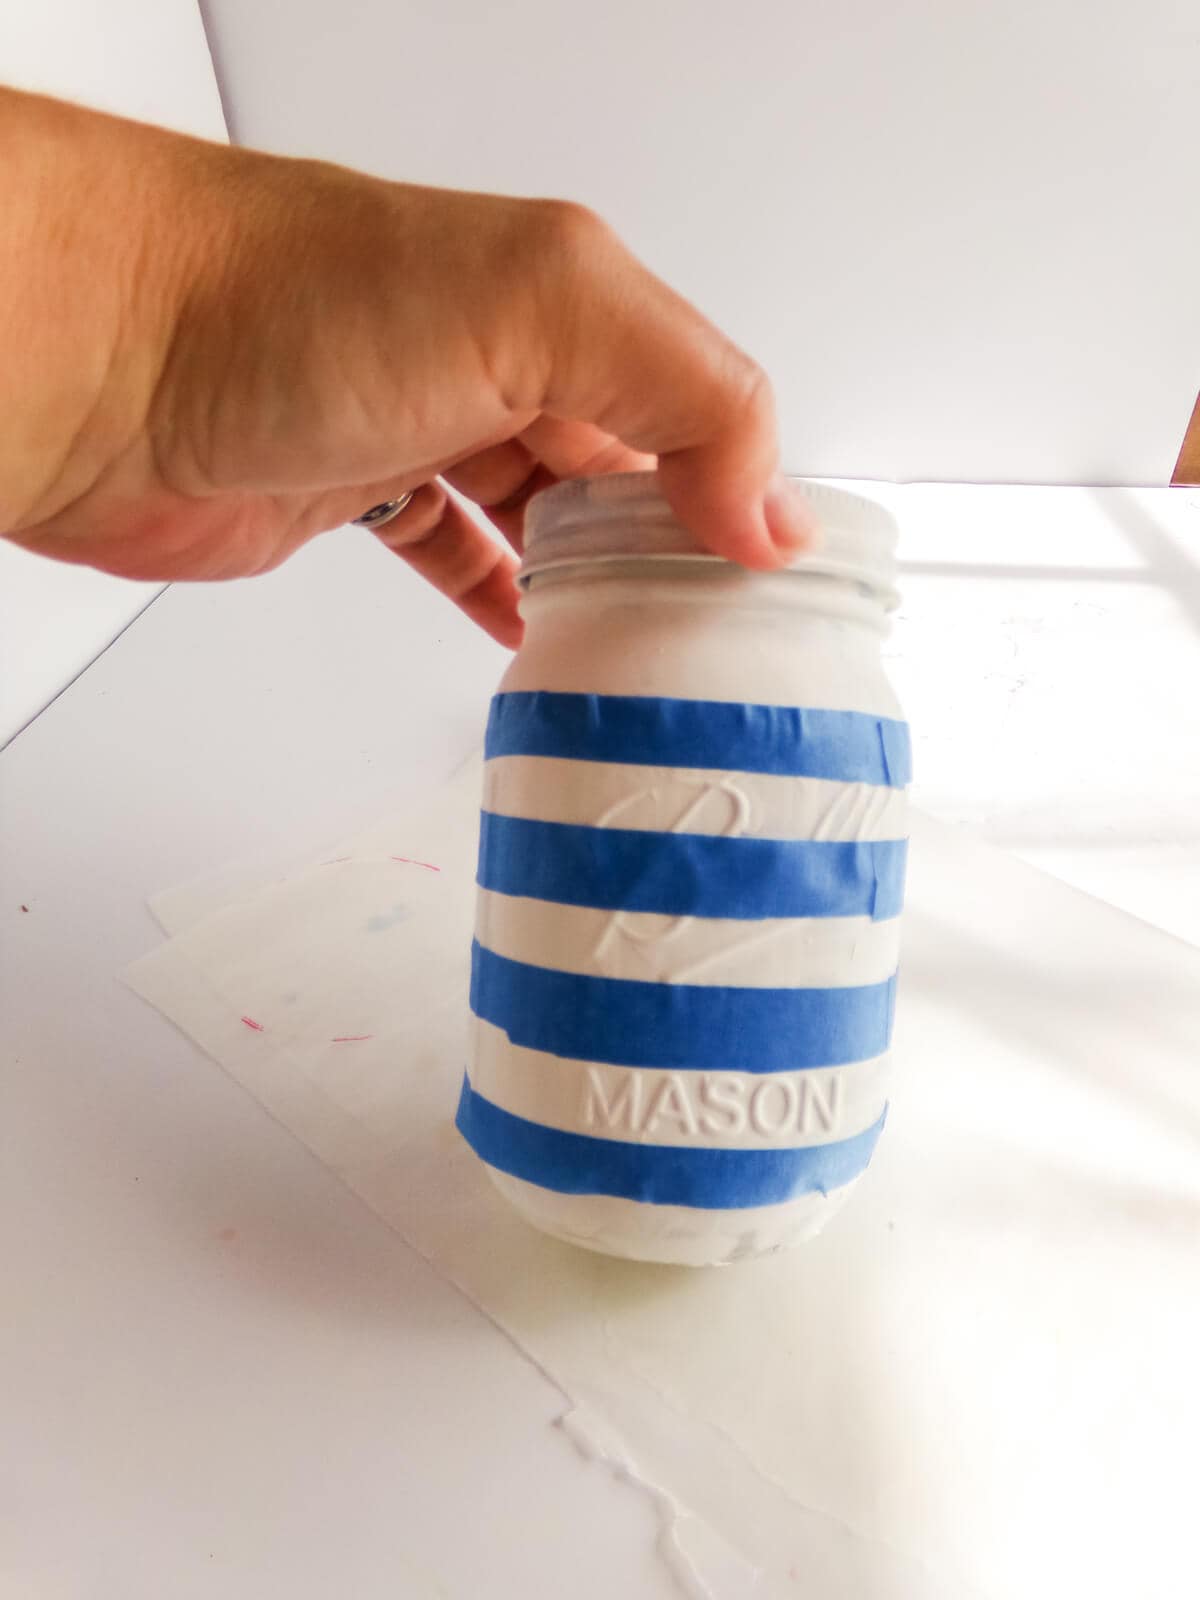 Allow this coat to dry completely. Paint one red vertical line on the jar, to the left of whatever side you want to be the front of the jar. Add a large red “A+†on the other side of the front of the jar.
 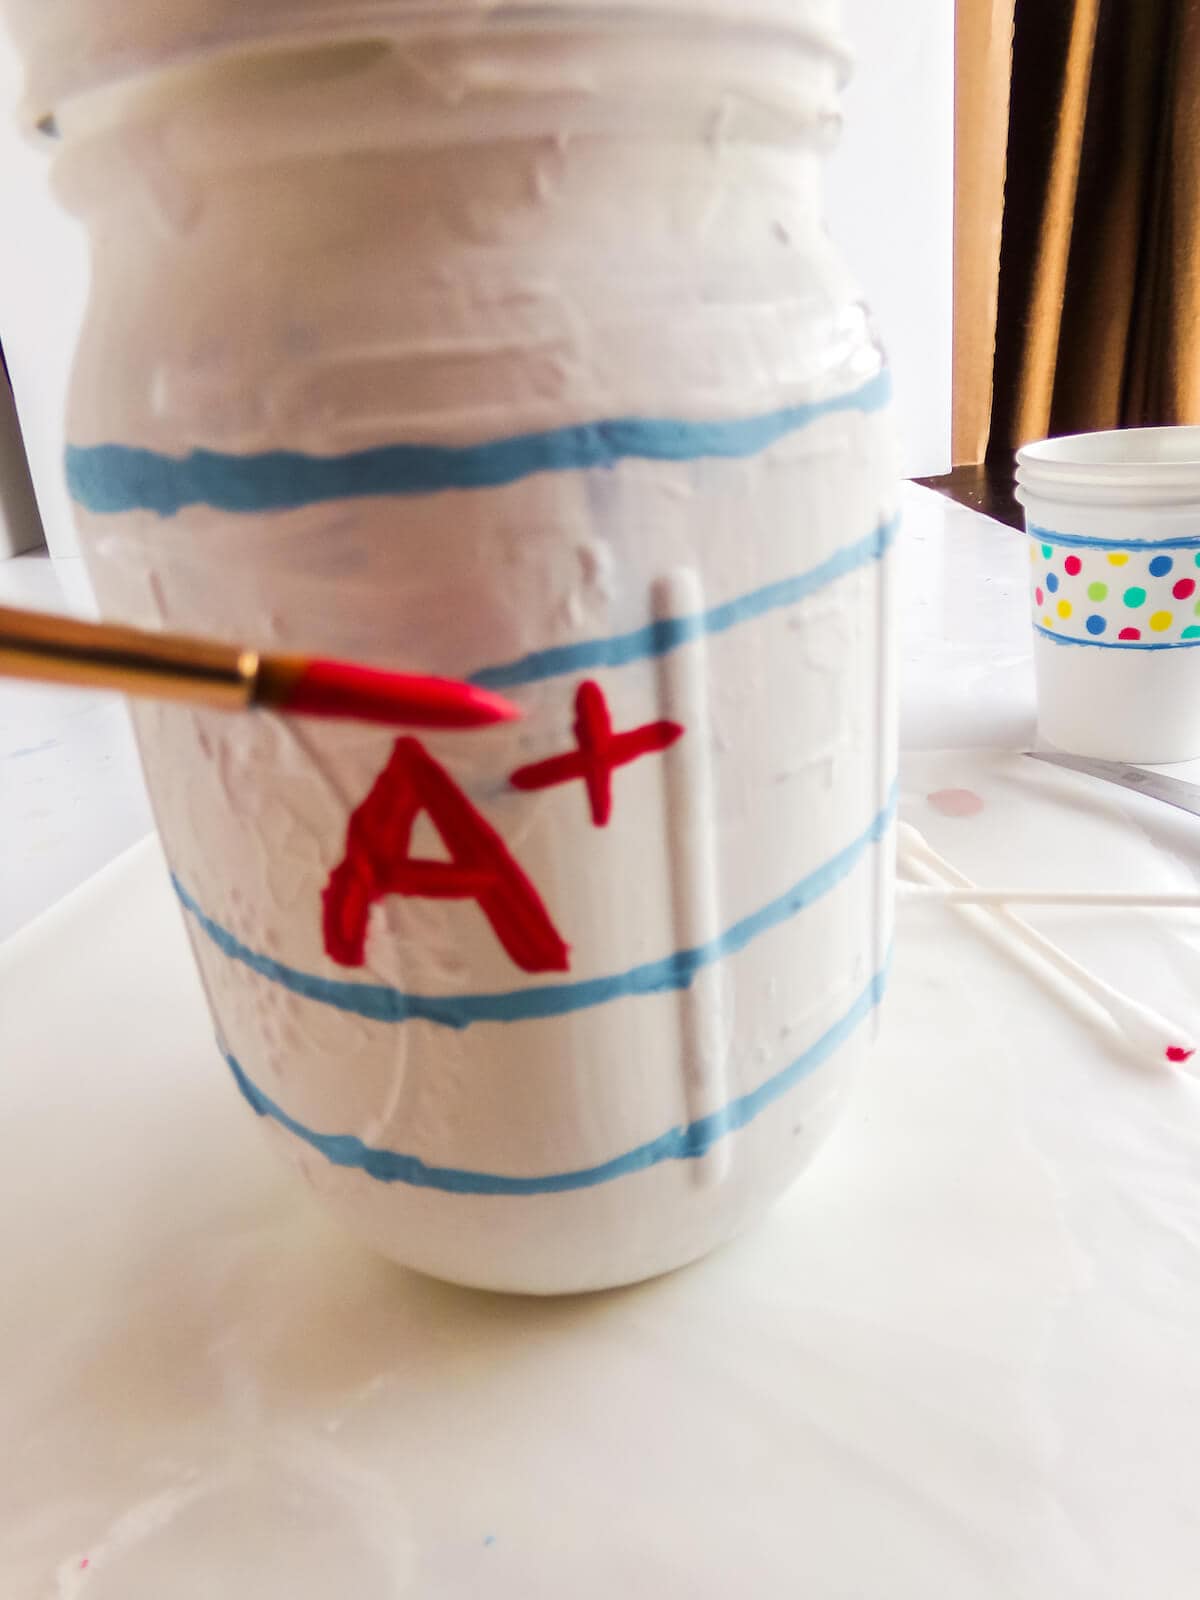 Paint 3 black dots about the same size as the distance between the horizontal lines just to the left of the red vertical line. Allow this paint to dry completely. Seal with a coat of mod podge or other craft sealant and allow that to dry completely.
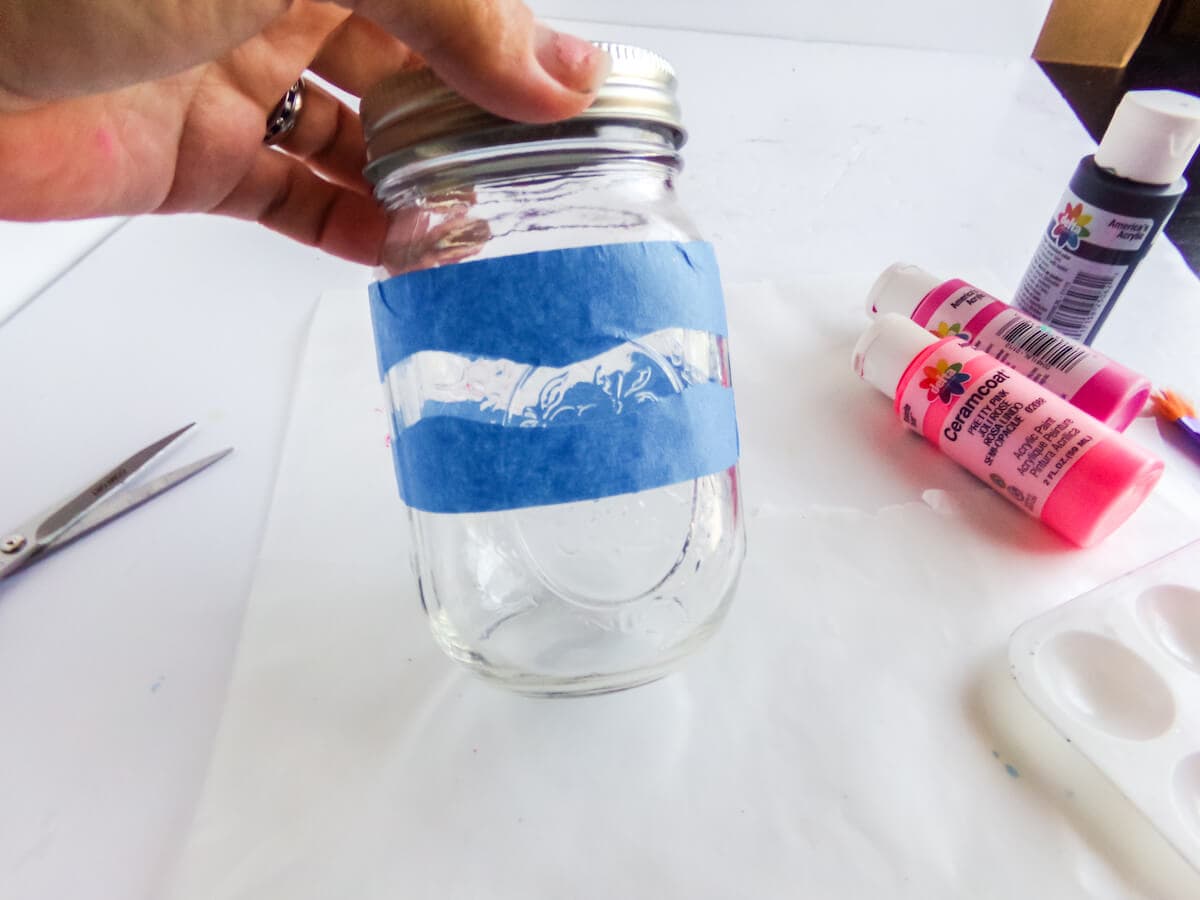 Paint all of the exposed areas of the mason jar with the pink paint. Allow this coat to dry completely.
  Remove the tape and paint the previously taped off area black. Allow this coat to dry completely.
 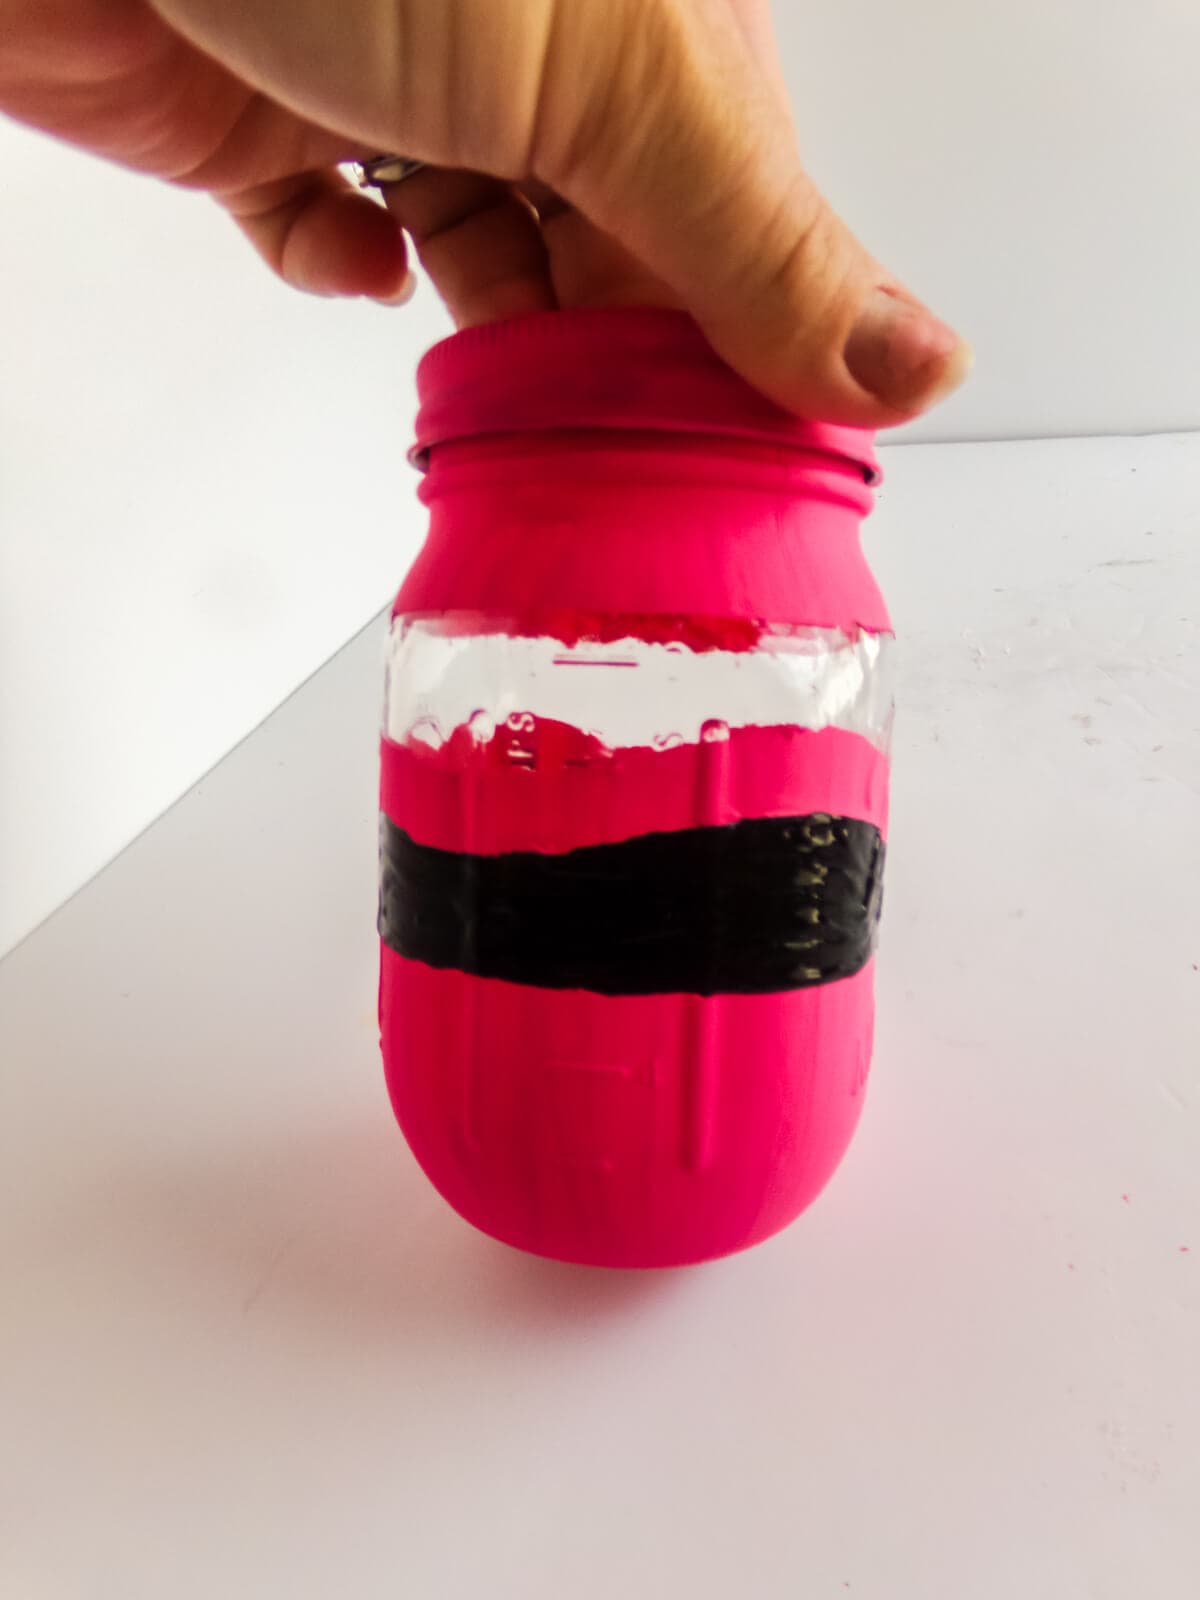 Seal with a coat of mod podge or other craft sealant and allow that to dry completely.
And that’s it – all done!
Loving this easy craft idea, but no time to make it? That’s a-ok. Just be sure to pin this to your favorite craft ideas board on Pinterest so you can find it again fast when you’re ready!
More DIY Crafts You Might Like
Pencil, Paper and Crayon Painted Mason Jars
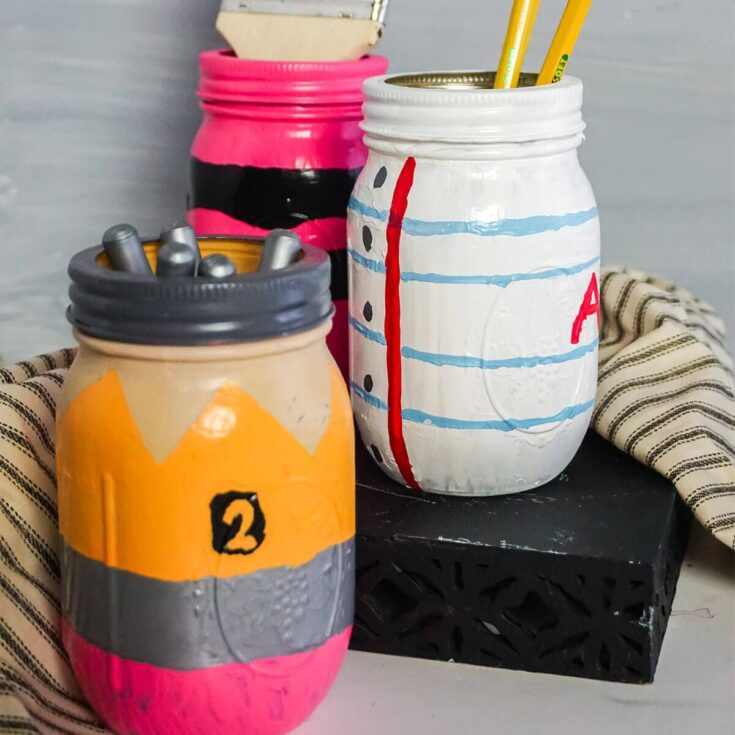
These pencil, paper and crayon painted mason jars are such a great gift idea for teacher appreciation or homeschool organization!
Materials
- 3 Mason Jars
Acrylic paint in:
- Pink
- Pale beige/brown
- Yellow
- Grey
- Black
- White
- Blue
- Red
- Mod podge or other craft sealant
Tools
- Painter’s Tape
- Paintbrushes
Instructions
- Make sure your mason jars are clean and dry before starting.
- Make the Pencil mason jar by: Taping off the bottom third of the jar, painting the bottom ⅓ of the jar pink. Paint the area above the tape yellow. Paint the ring of the jar grey. Allow this coat to dry completely. Remove the tape between the yellow and pink painted sections. Paint the area where the tape had been grey. Tape off the top of the jar with an “M” or “V” pattern. Paint the top portion in the “M” area with the pale beige/brown. Allow this coat of paint to dry completely. Draw on a piece of painter’s tape a number 2 and oval. Cut it out with an exacto knife and position it where you’d like these elements on your pencil. Using this as a guide, sketch your 2 onto your jar along with the oval with a pencil. Paint over the pencil marks with the black paint. Allow this coat to dry completely. Seal with a coat of mod podge or other craft sealant and allow that to dry completely.
- Make the Paper mason jar by: Painting the entire jar white, then allowing this coat to dry completely. Paint blue horizontal lines on the jar, at ¾-inch increments from top to bottom. You can use tape to help you guide yourself and make the lines straight. Allow this coat to dry completely. Paint one red vertical line on the jar, to the left of whatever side you want to be the front of the jar. Add a large red “A+” on the other side of the front of the jar. Paint 3 black dots about the same size as the distance between the horizontal lines just to the left of the red vertical line. Allow this paint to dry completely. Seal with a coat of mod podge or other craft sealant and allow that to dry completely.
- Make the Crayon mason jar by: Tape off two adjacent lines of your jar about ⅓ of the way from the lip of the top, then using an exacto knife to add a wavy bottom line to the topmost piece of tape, between the two pieces. Paint all of the exposed areas of the mason jar with the pink paint. Allow this coat to dry completely. Remove the tape and paint the previously taped off area black. Allow this coat to dry completely. Seal with a coat of mod podge or other craft sealant and allow that to dry completely.
Recommended Products
As an Amazon Associate and member of other affiliate programs, I earn from qualifying purchases.