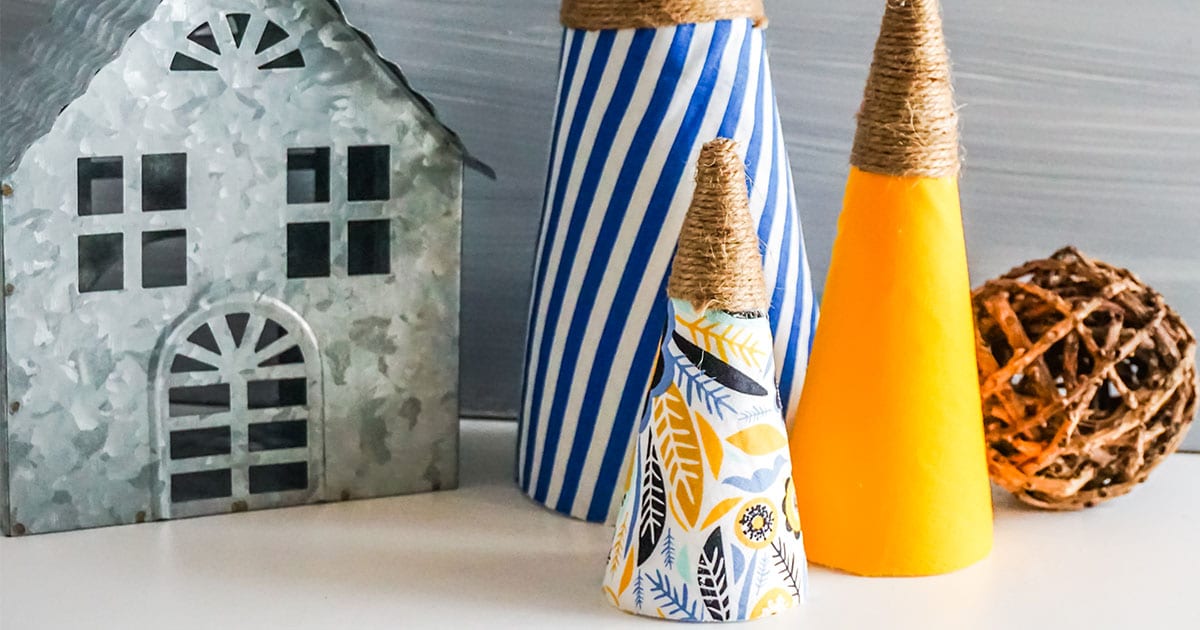
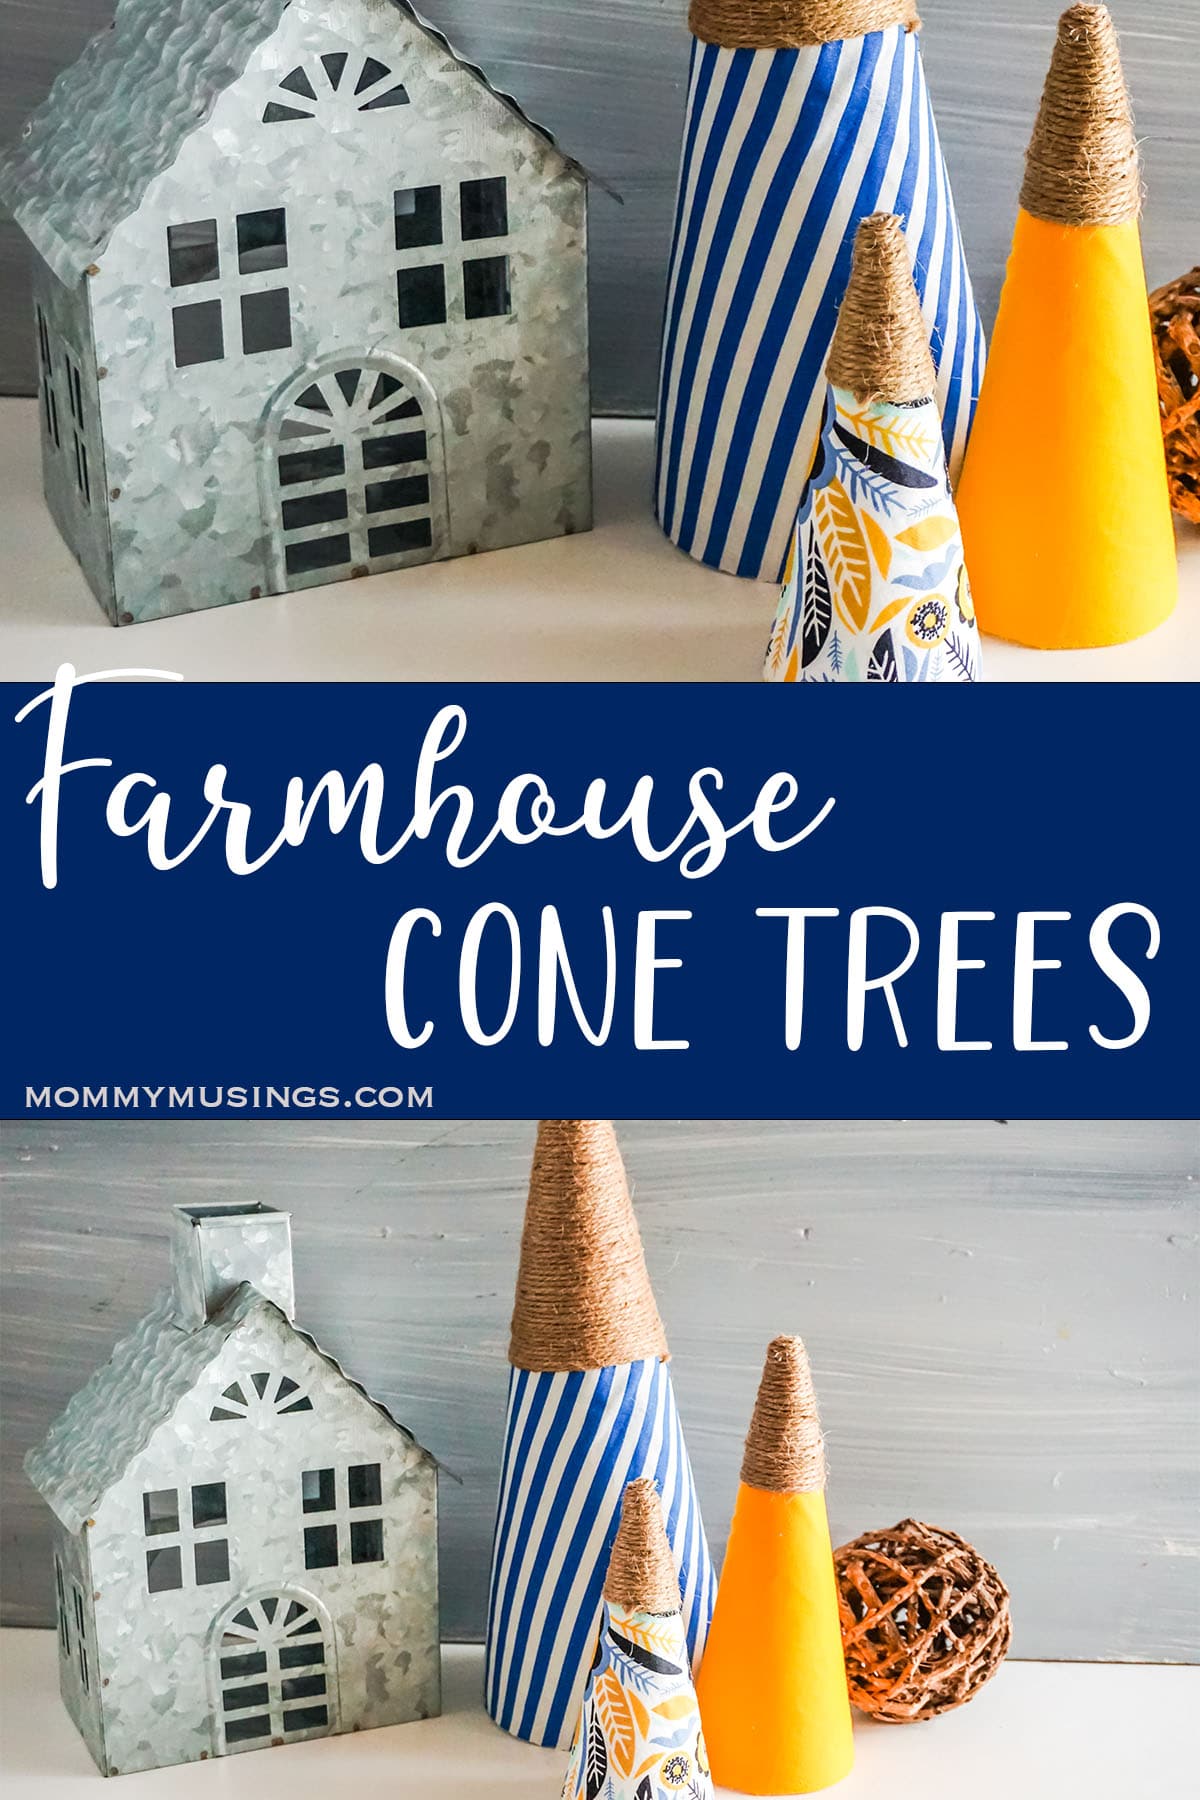
Looking for a quick and easy DIY craft? These Farmhouse Cone Trees are an easy coastal farmhouse craft that will add to your home decor. They take about 10 minutes max, so you can have them done before dinner.
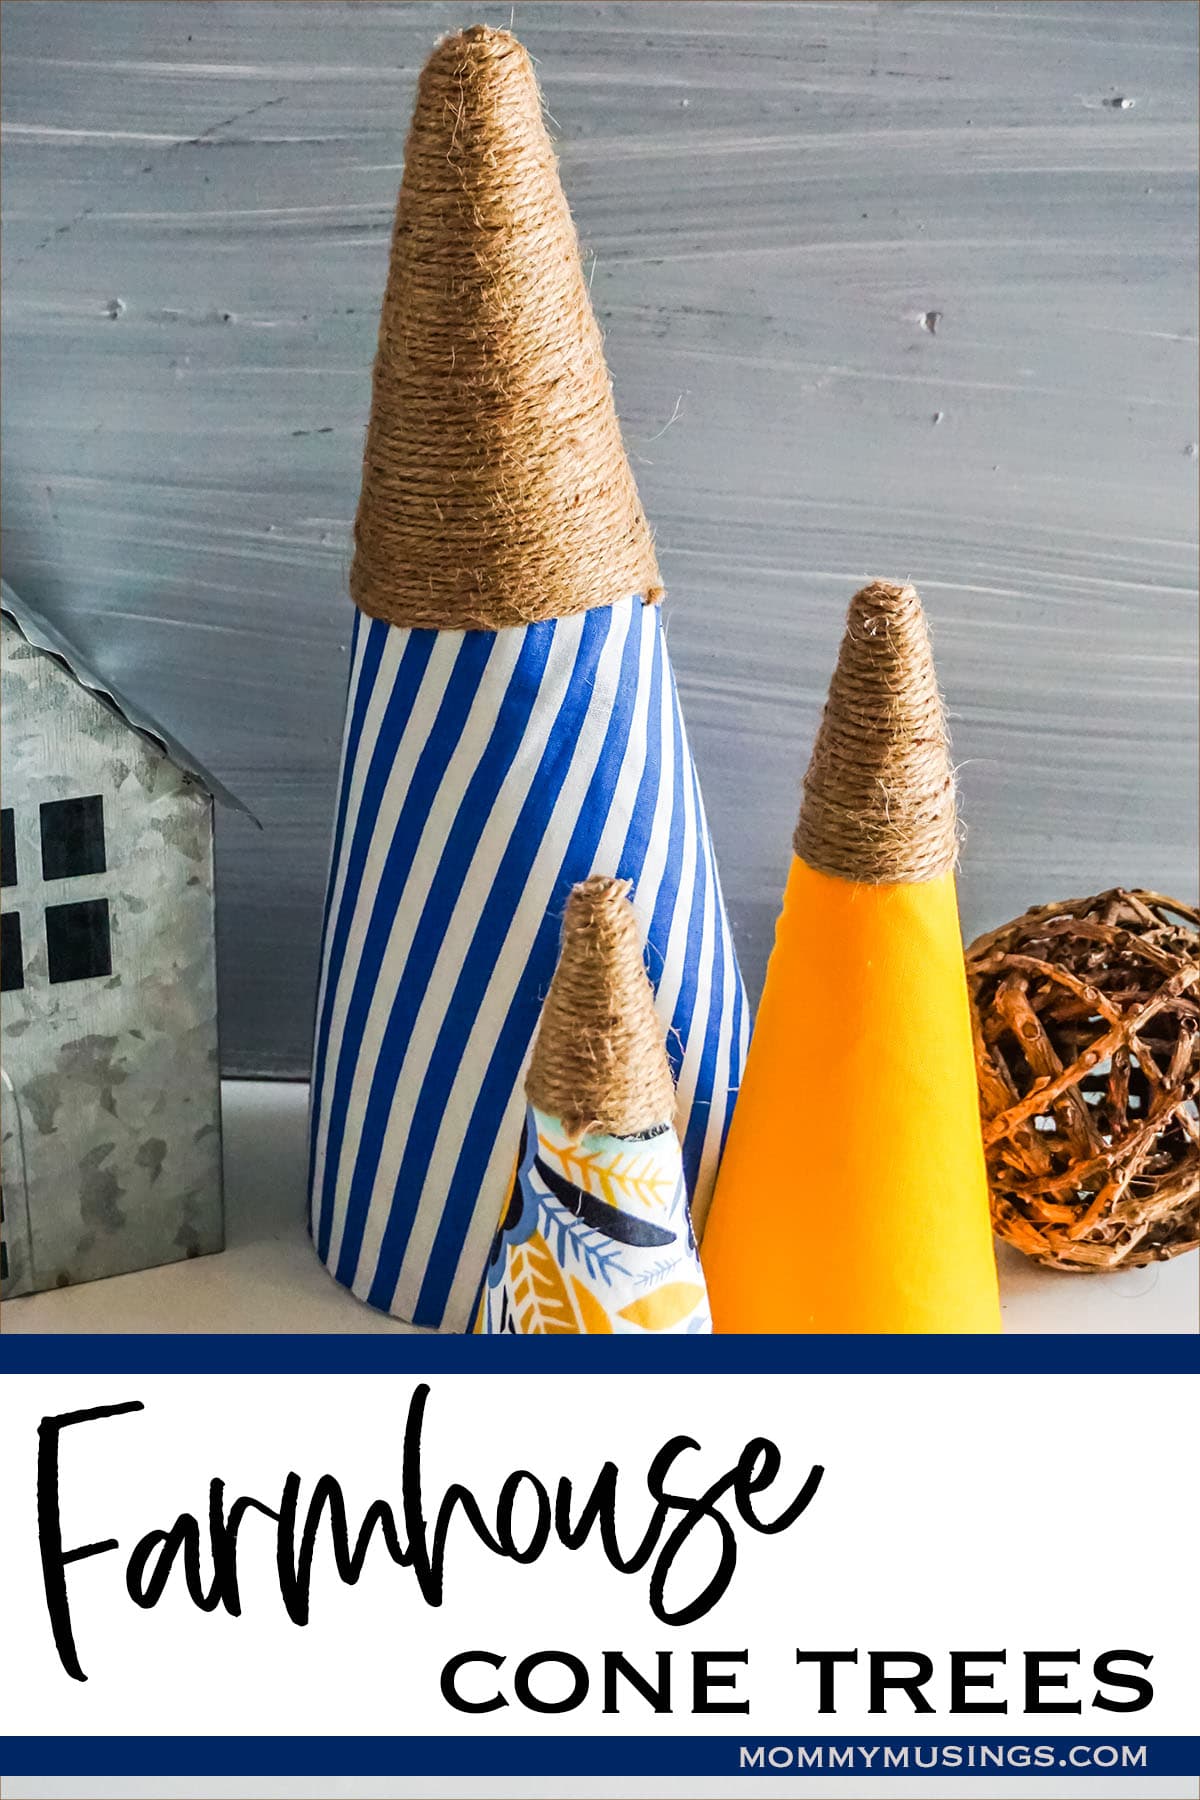
Farmhouse Cone Trees – Easy Coastal Farmhouse Craft
I am so excited to share this easy farmhouse craft with you! I love the coastal feel of these trees and they are super simple to make. With just a few supplies, you can create your very own Farmhouse Cone Tree for any room in your home!
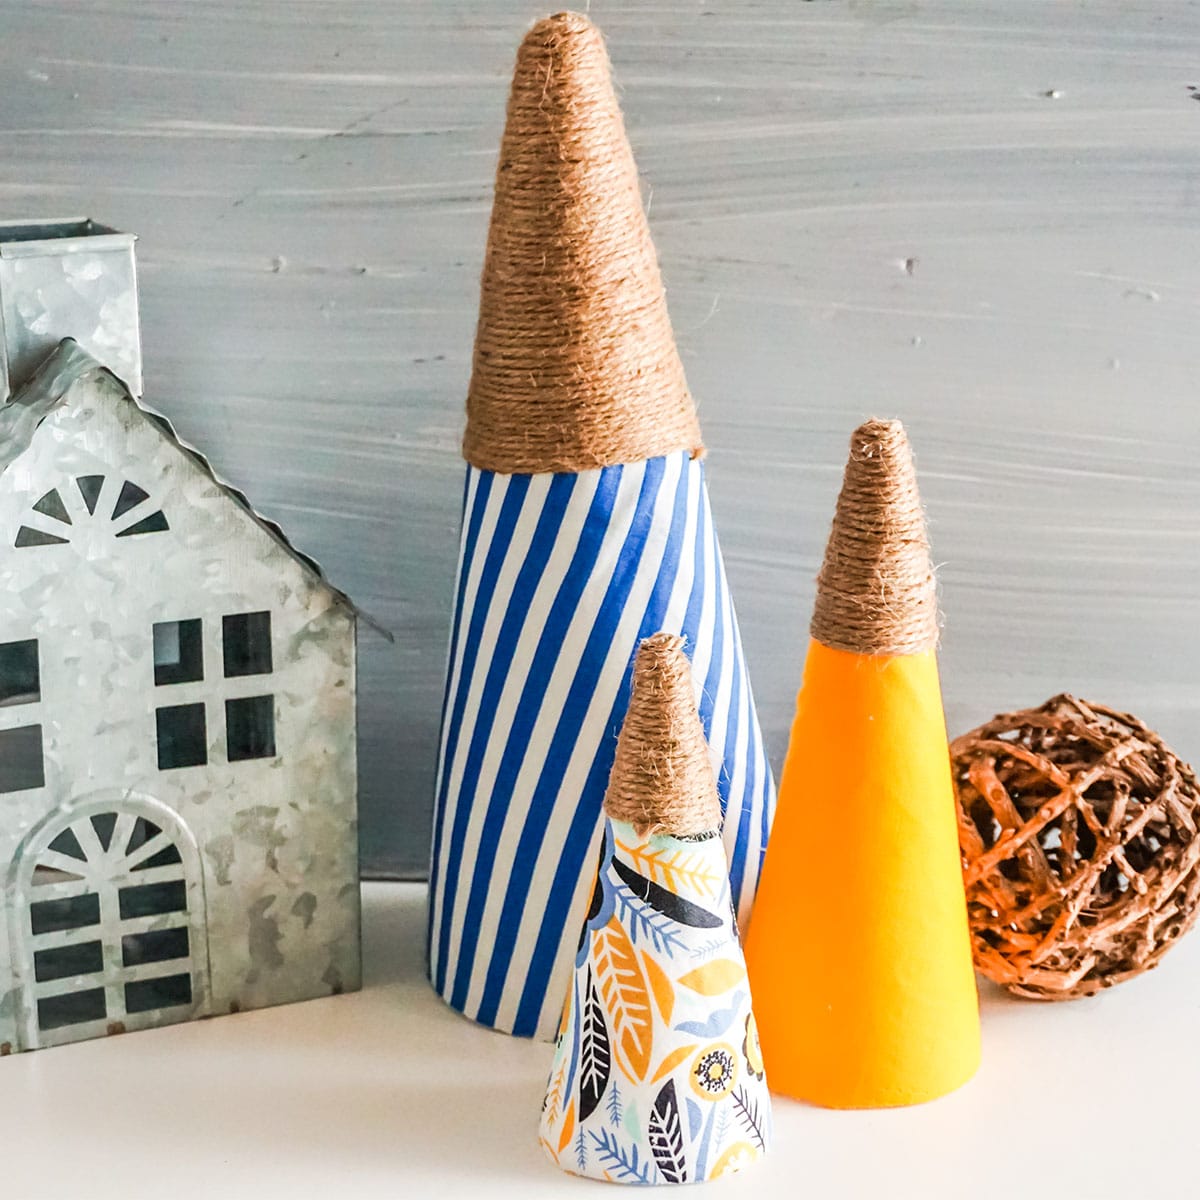
Farmhouse Cone Trees are the perfect easy coastal farmhouse craft for this time of year! With natural materials and this easy to follow tutorial, you’ll be able to make your own set of trees at home.
The best part is that they’re so versatile – you can use them as ornaments or centerpieces. You’ll love how their rustic design will add charm to any room. Let’s get started on making our first one!
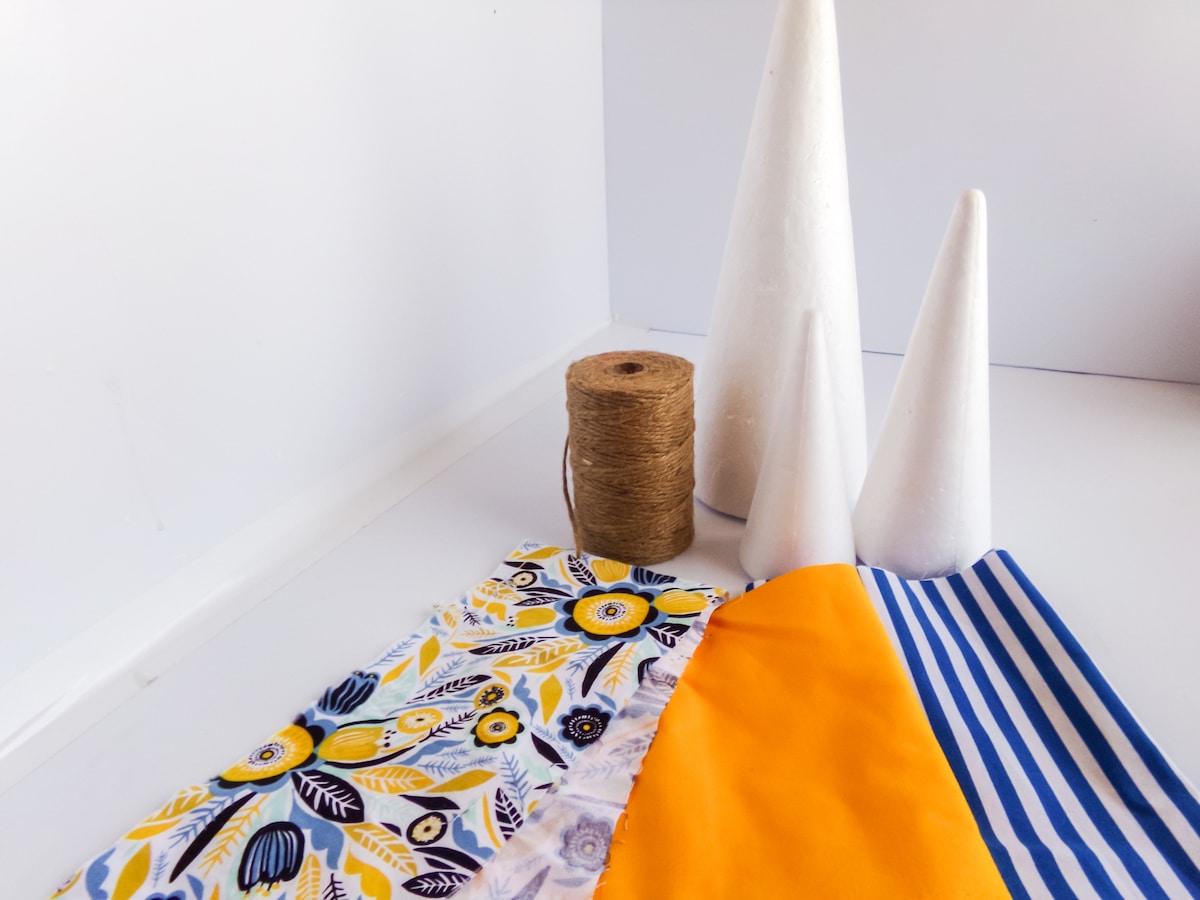
What You Need to Make These Farmhouse Cone Trees
- 1 – 12-inch Styrofoam Cone
- 1 – 9-inch Styrofoam Cone
- 1 – 7-inch Styrofoam Cone
- 1/4 yd Blue and White Striped Fabric (cotton or polyester blend)
- 1/8 yd Blue and Yellow Patterned Fabric (cotton or polyester blend)
- 1/4 yd Solid Yellow Fabric (cotton or polyester blend)
- Twine (2mm)
- Scissors
- Hot Glue Gun & Glue
- Marker, optional
How to Make These Farmhouse Cone Trees
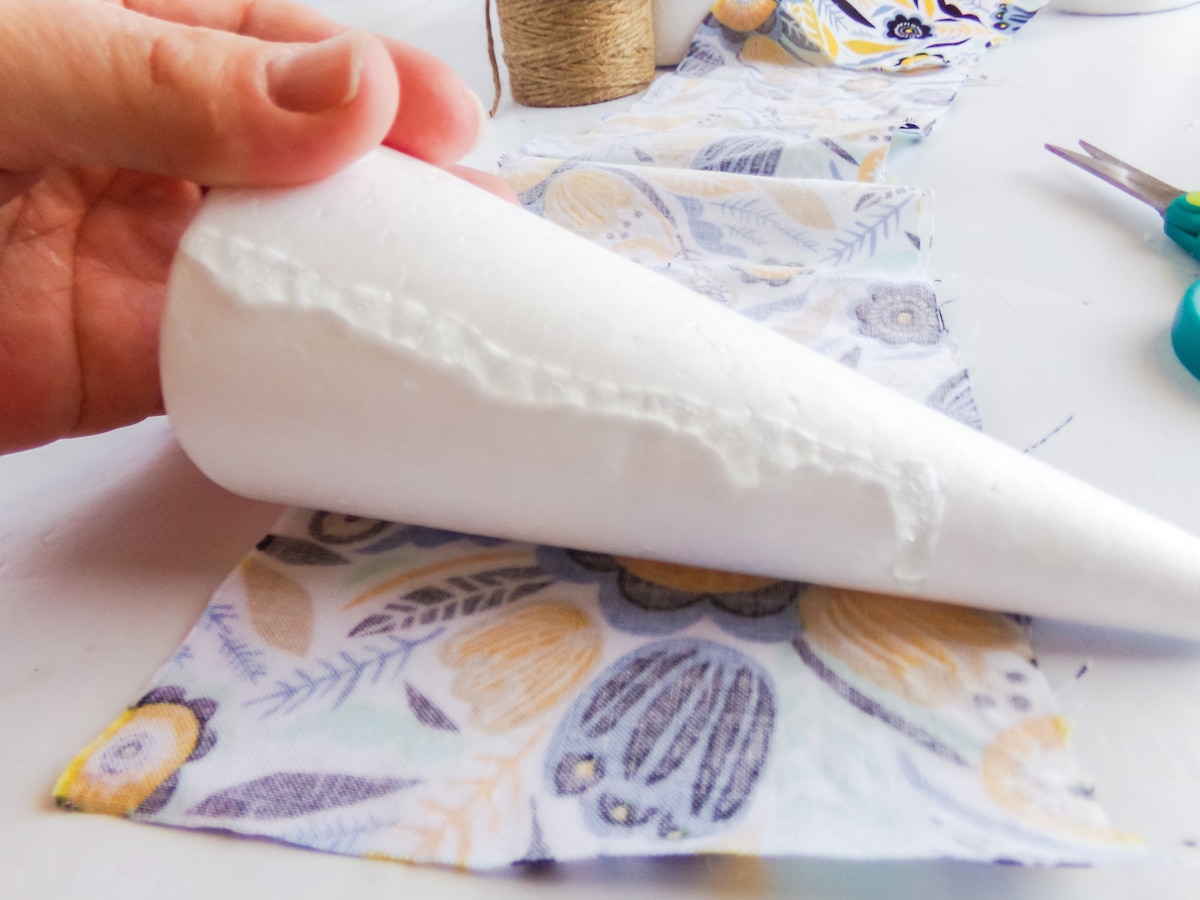
- Put the smallest styrofoam cone lengthwise along one short side of the floral patterned fabric, aligning the longer fabric edge to make it generally straight along the narrow end of the cone (this will cause fabric to be loose on the bottom of the cone).
- Add hot glue along the side of the fabric to attach the edge of the fabric to the cone. Let the glue cool before moving the cone.

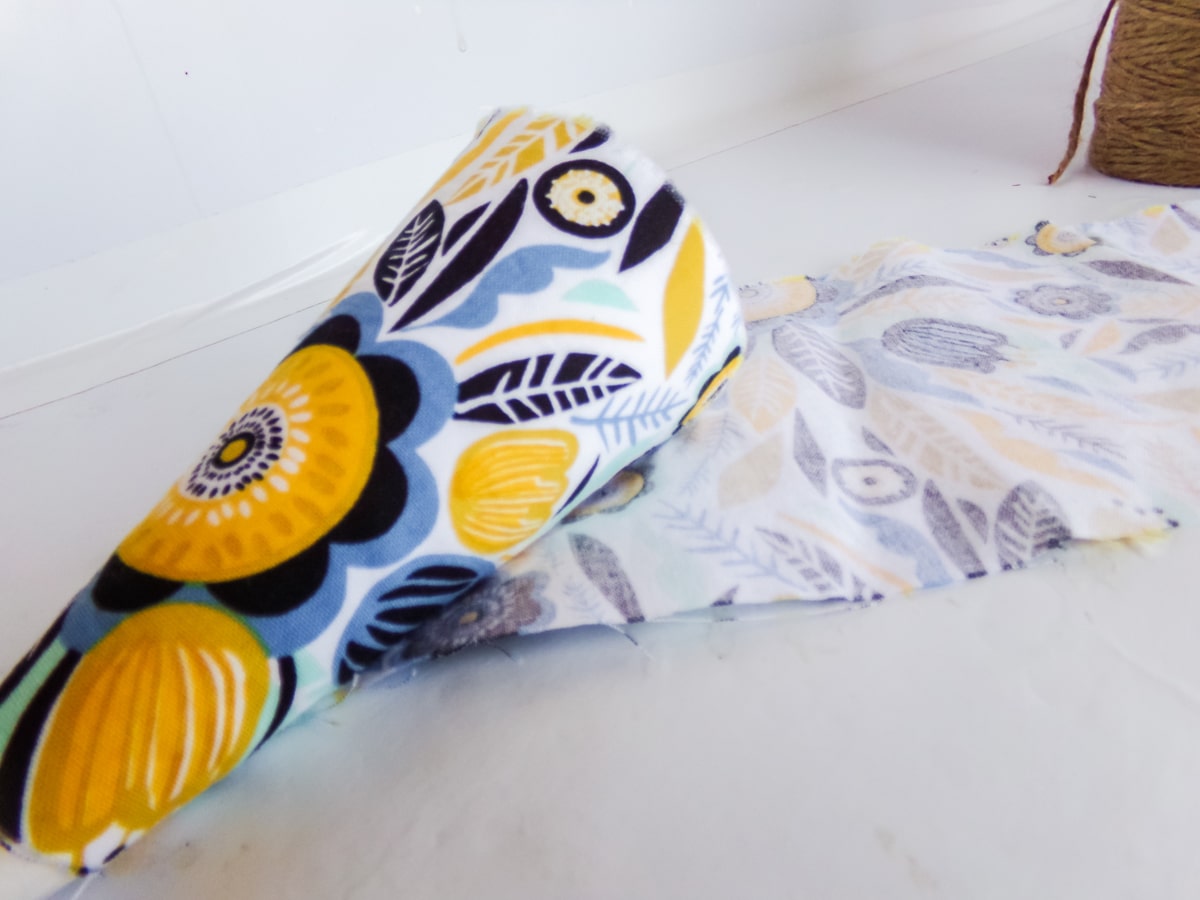
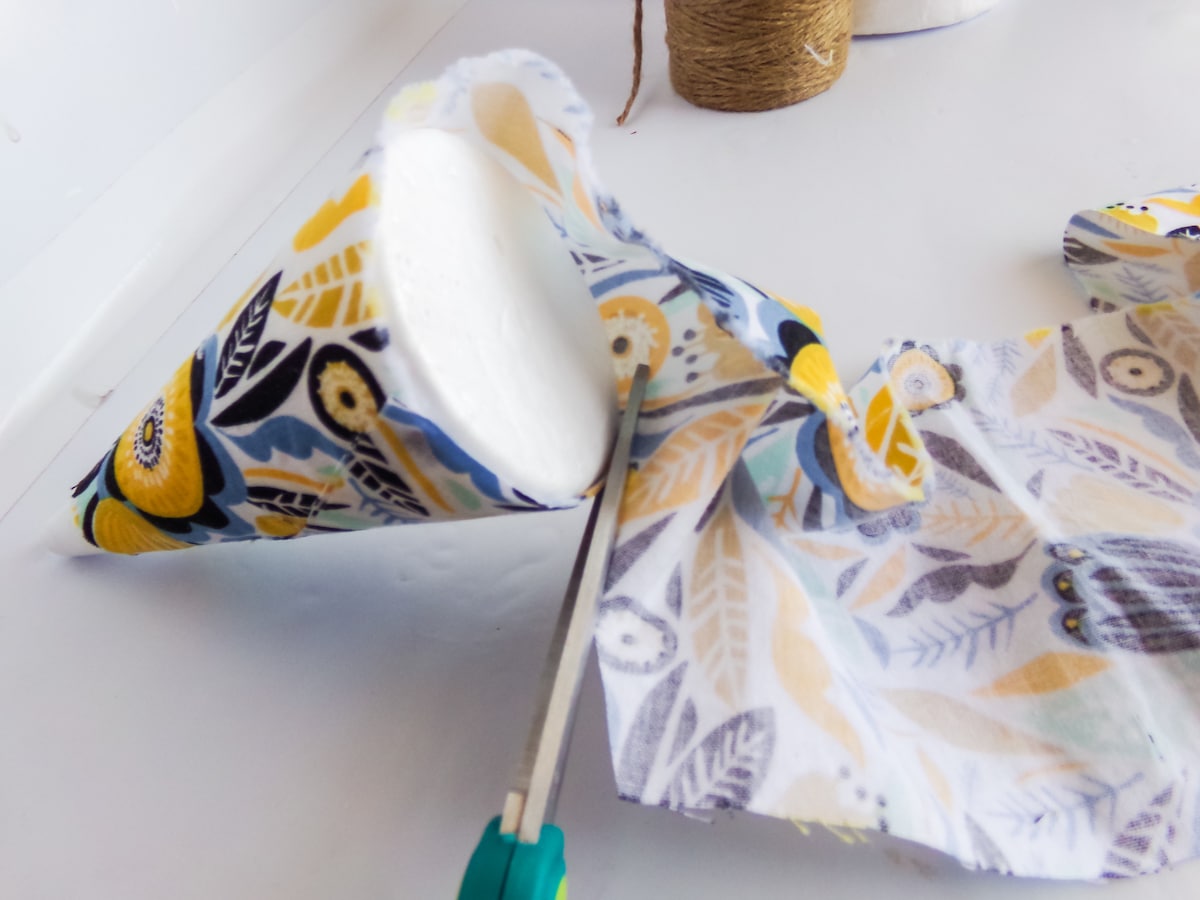
- Wrap the fabric around the cone snugly, covering the cone on all sides, leaving a small portion of the top of the cone exposed. Trim the fabric to fit plus about 1/4 inch to make a hot glue hem. Fold the ¼ inch extra along the edge inside the fabric (folding it snugly around the cone) and hot glue it against the cone.
- Cut off the loose fabric along the bottom of the cone, leaving about 1/2-inches of fabric to fold over under the cone. Fold this ½ inch of fabric around the bottom of the cone, tucking under the cone and hot gluing it in place.
- Repeat covering the remaining tree forms.
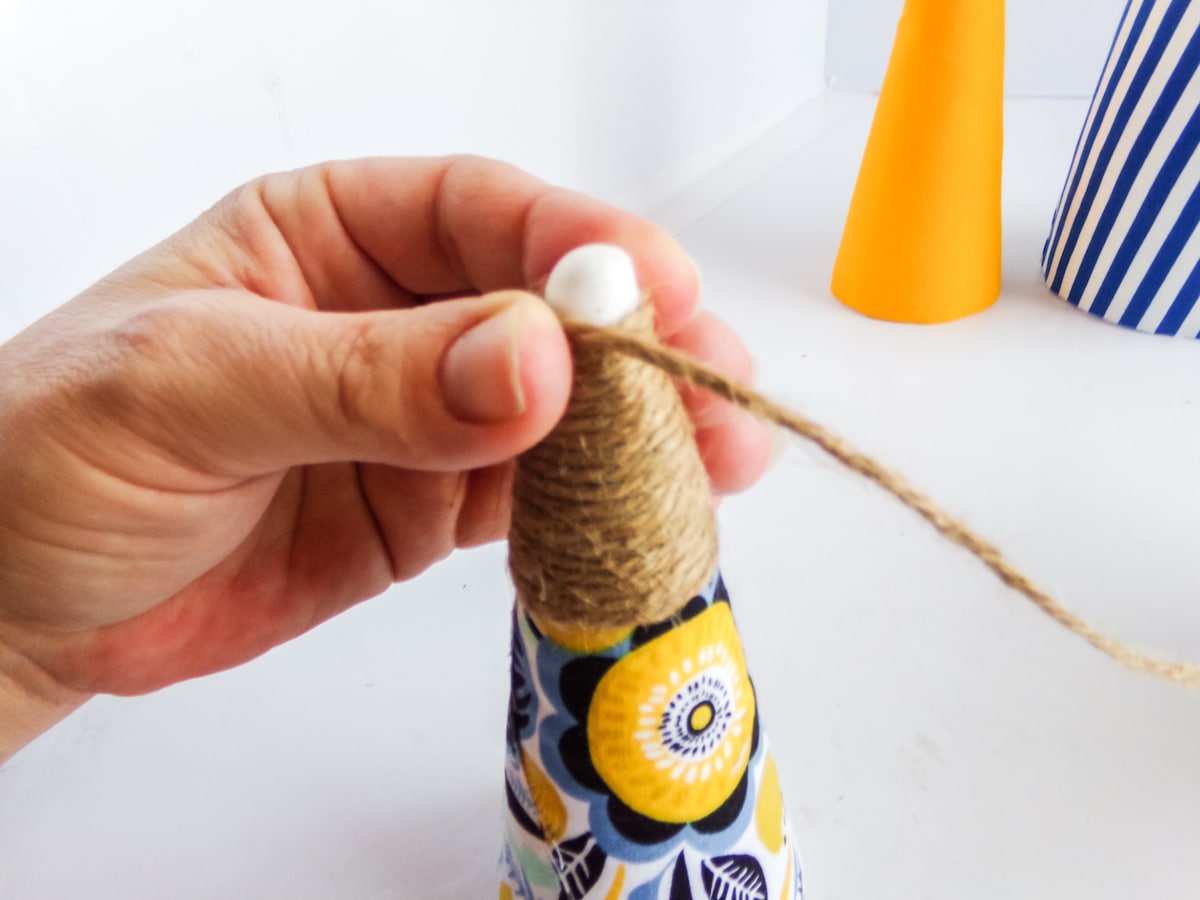
- Starting just below the edge of the fabric-covered portion of the top of one cone, hot glue the end of the twine down, then wrap the twine around the top of the exposed cone, working with as little hot glue as you can to reduce any squeeze-out. Hot glue the end of the twine in place on the tip of the cone, covering the cone completely.
- Repeat with the remaining trees, adding a bit of the wrapped twine as a topper to each. Then your trees are complete.
More Easy Decor Crafts You’ll Love
Farmhouse Cone Trees
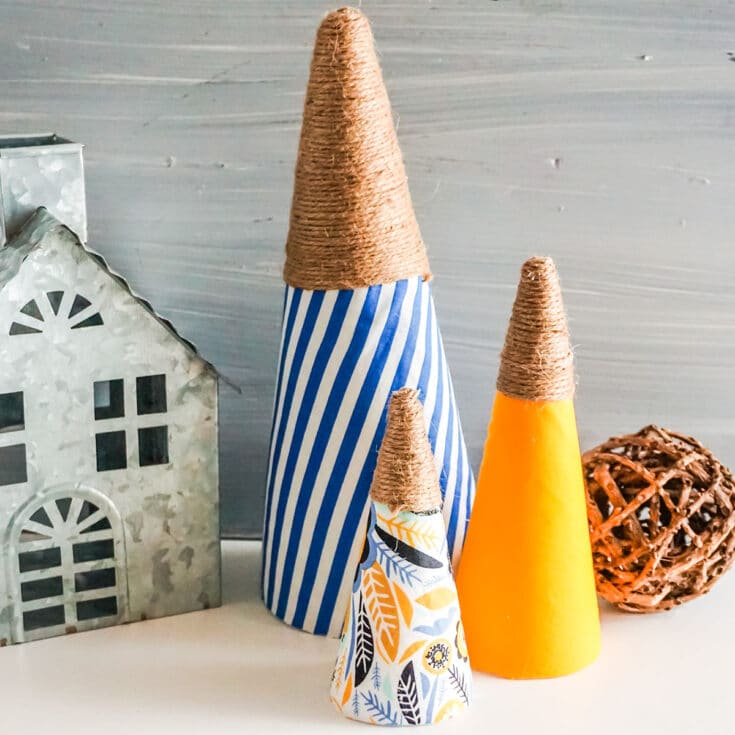
Such a simple way to add a little pop of color to your coastal farmhouse decor, these farmhouse cone trees are a fast and fun craft!
Materials
- 1 - 12-inch Styrofoam Cone
- 1 - 9-inch Styrofoam Cone
- 1 - 7-inch Styrofoam Cone
- 1/4 yd Blue and White Striped Fabric (cotton or polyester blend)
- 1/8 yd Blue and Yellow Patterned Fabric (cotton or polyester blend)
- 1/4 yd Solid Yellow Fabric (cotton or polyester blend)
- Twine (2mm)
Tools
- Scissors
- Hot Glue Gun & Glue
- Marker, optional
Instructions
- Put the smallest styrofoam cone lengthwise along one short side of the floral patterned fabric, aligning the longer fabric edge to make it generally straight along the narrow end of the cone (this will cause fabric to be loose on the bottom of the cone). Add hot glue along the side of the fabric to attach the edge of the fabric to the cone. Let the glue cool before moving the cone.
- Wrap the fabric around the cone snugly, covering the cone on all sides, leaving a small portion of the top of the cone exposed. Trim the fabric to fit plus about 1/4 inch to make a hot glue hem. Fold the ¼ inch extra along the edge inside the fabric (folding it snugly around the cone) and hot glue it against the cone.
- Cut off the loose fabric along the bottom of the cone, leaving about 1/2-inches of fabric to fold over under the cone. Fold this ½ inch of fabric around the bottom of the cone, tucking under the cone and hot gluing it in place.
- Repeat covering the remaining tree forms.
- Starting just below the edge of the fabric-covered portion of the top of one cone, hot glue the end of the twine down, then wrap the twine around the top of the exposed cone, working with as little hot glue as you can to reduce any squeeze-out. Hot glue the end of the twine in place on the tip of the cone, covering the cone completely.
- Repeat with the remaining trees, adding a bit of the wrapped twine as a topper to each. Then your trees are complete.
Recommended Products
As an Amazon Associate and member of other affiliate programs, I earn from qualifying purchases.