
What are you doing this holiday season? Is it too early to start thinking about Christmas already? If not, then these Santa and Mrs. Claus Terra Cotta Pot Ornaments might be the perfect DIY craft for you!
These ornaments are fun because they can be personalized with paint markers to include your family name, give them as gifts, put them on wreaths…the possibilities are endless!

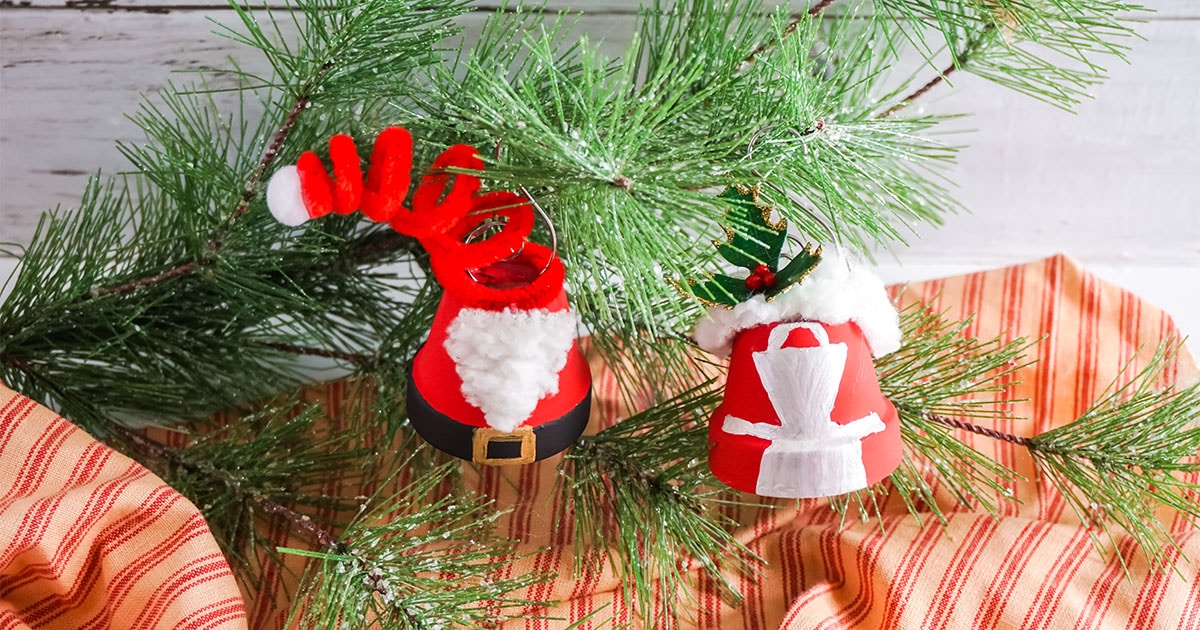
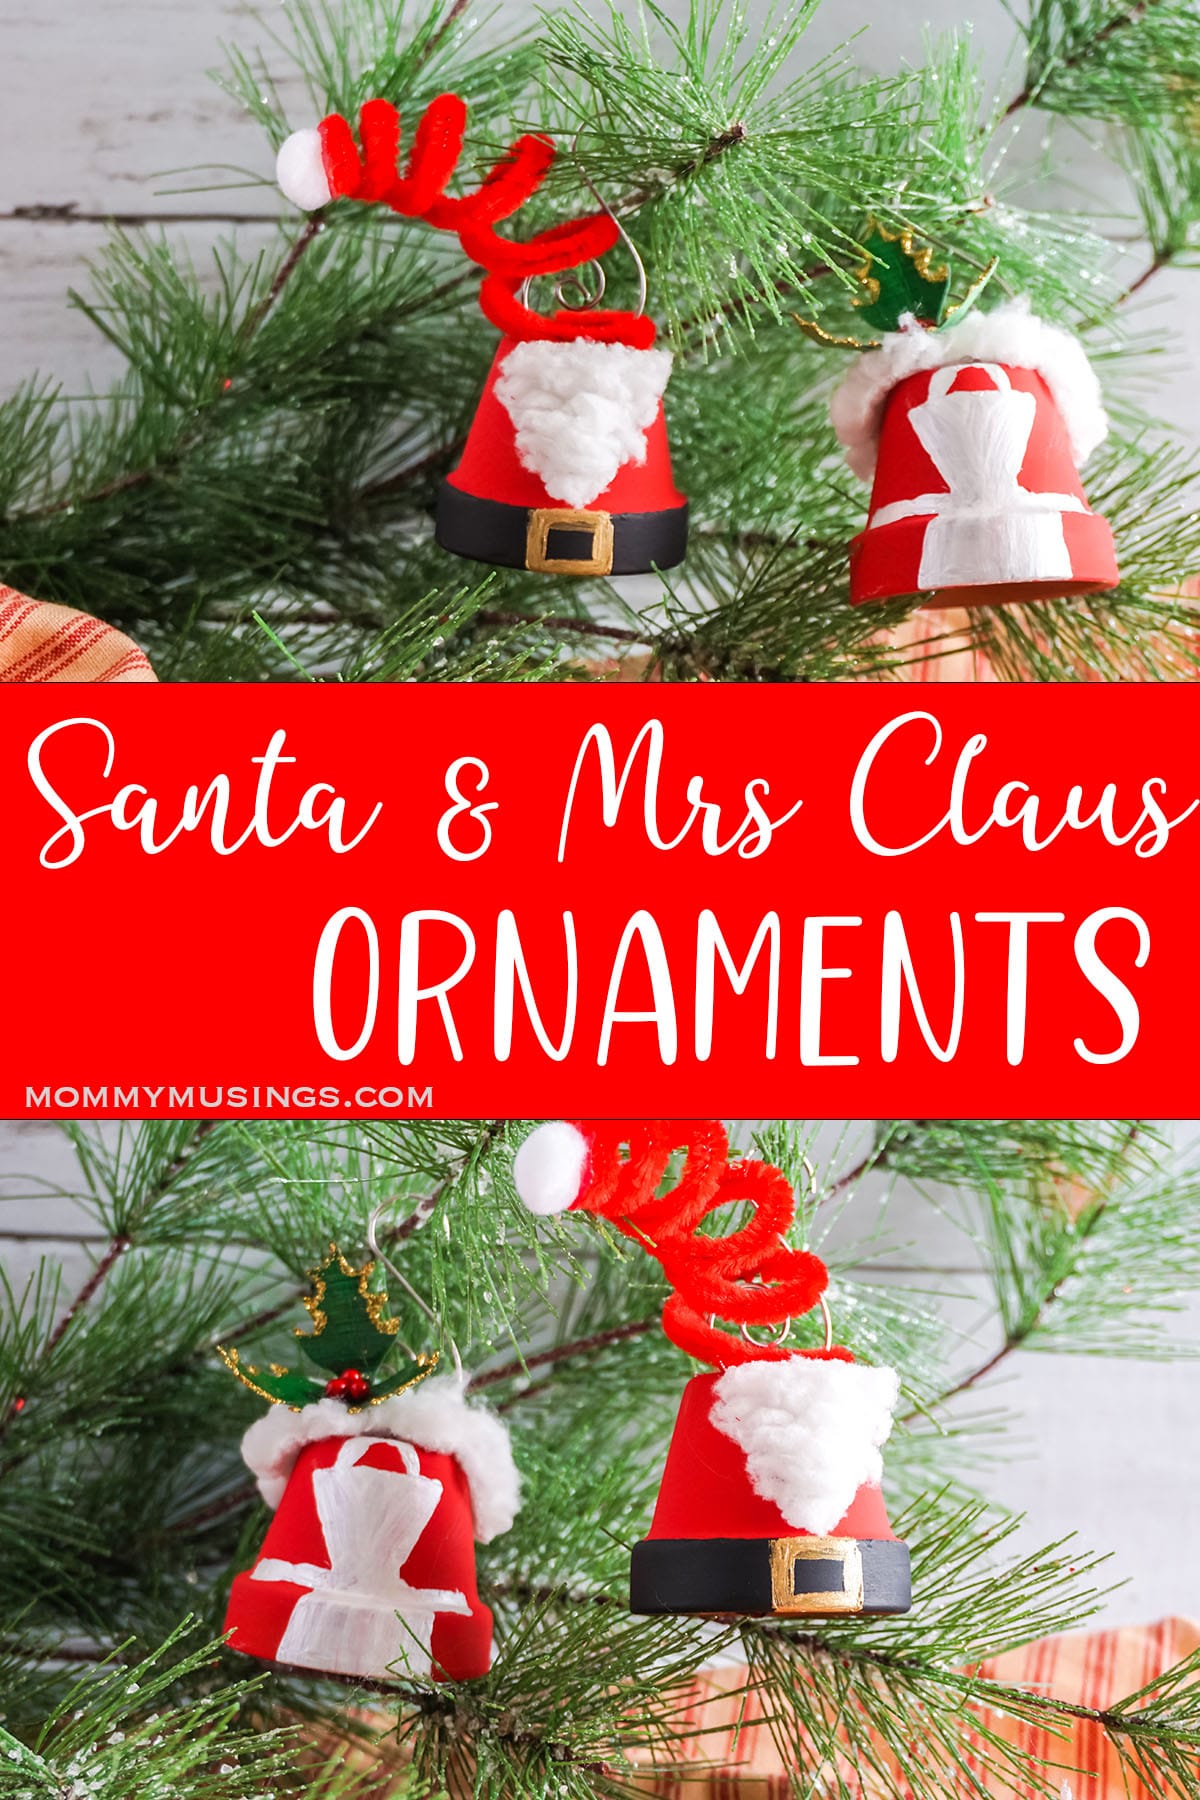
Santa & Mrs. Claus Terra Cotta Pot Ornaments
I’m so excited to share with you this great craft idea for making Santa and Mrs. Claus terra cotta pot ornaments! These are perfect for the holidays, when there’s snow on the ground and Christmas carols are playing. They’re easy to make and they look so festive hanging in your tree!
Moms, don’t forget to include the kids in your Christmas traditions this year! Kids love anything that involves Santa and Mrs. Claus. So craft up some of these fun terra cotta pot ornaments with them and you’ll have something they’re excited about giving as a gift to their classmates at school.
This is a fun craft project idea that will get your kids in on the holiday spirit.
What You Need to Make These Santa & Mrs. Claus Terra Cotta Pot Ornaments
- 2 – 1-inch Terra Cotta Pots
- White Acrylic Paint
- Red Acrylic Paint
- Black Acrylic Paint
- Gold Acrylic Paint
- Scraps White Fluffy Fabric (I used sherpa fabric)
- 1 Red Chenille Wire
- 2 Tiny Red Bells
- White Embroidery Thread
- 2 Ornament Hangers
- 2-3 Christmas Baubles (I used a mini holly and tiny candy cane)
- Tiny White Pom Pom
- Painter’s Tape
- Pencil
- Paint Brush
- Hot Glue Gun & Glue
- Scissors

How to Make Santa & Mrs. Claus Terra Cotta Pot Ornaments
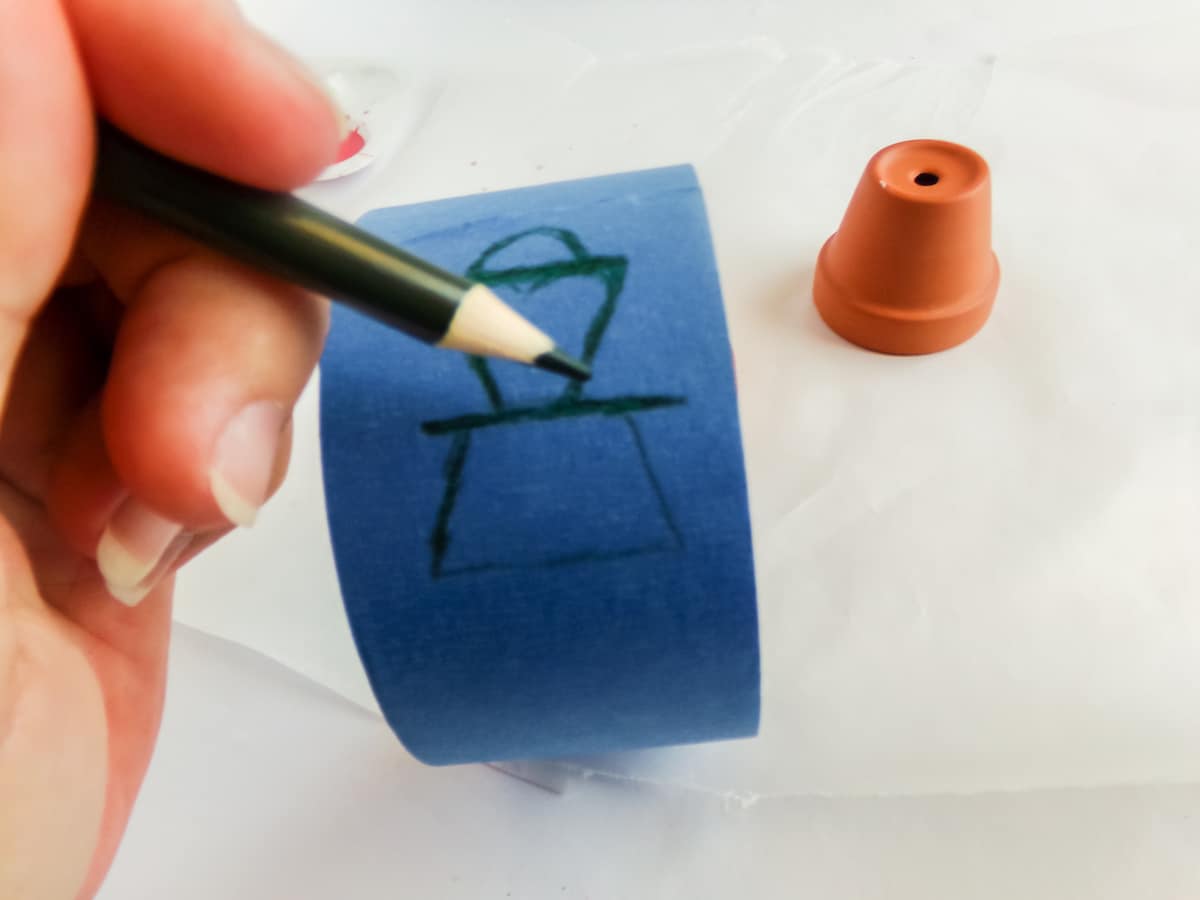
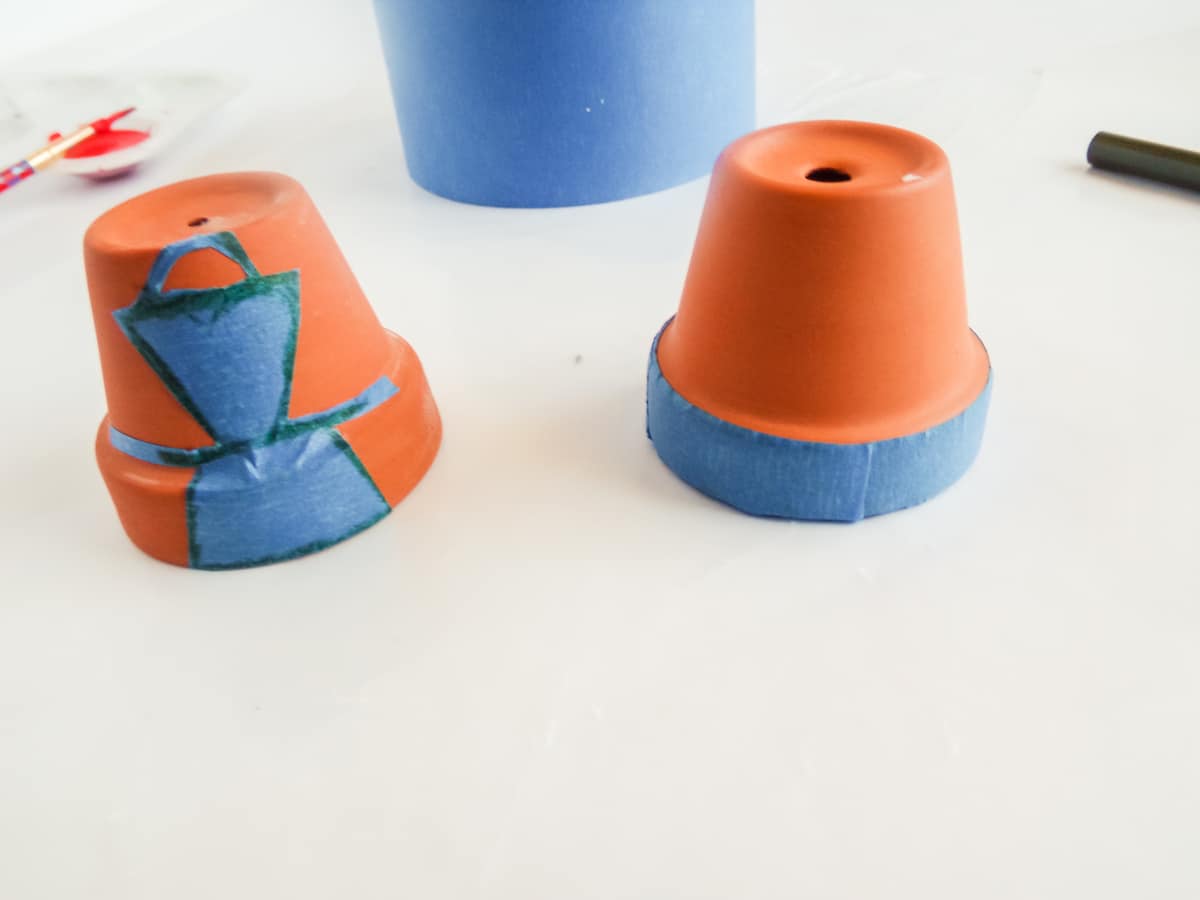
- While the tape is still on the roll, draw a tiny apron shape onto the tape. Basic shapes work well. Cut the piece of tape off the roll then cut the apron shape out. Place the tape apron shape onto one of the terra cotta pots.

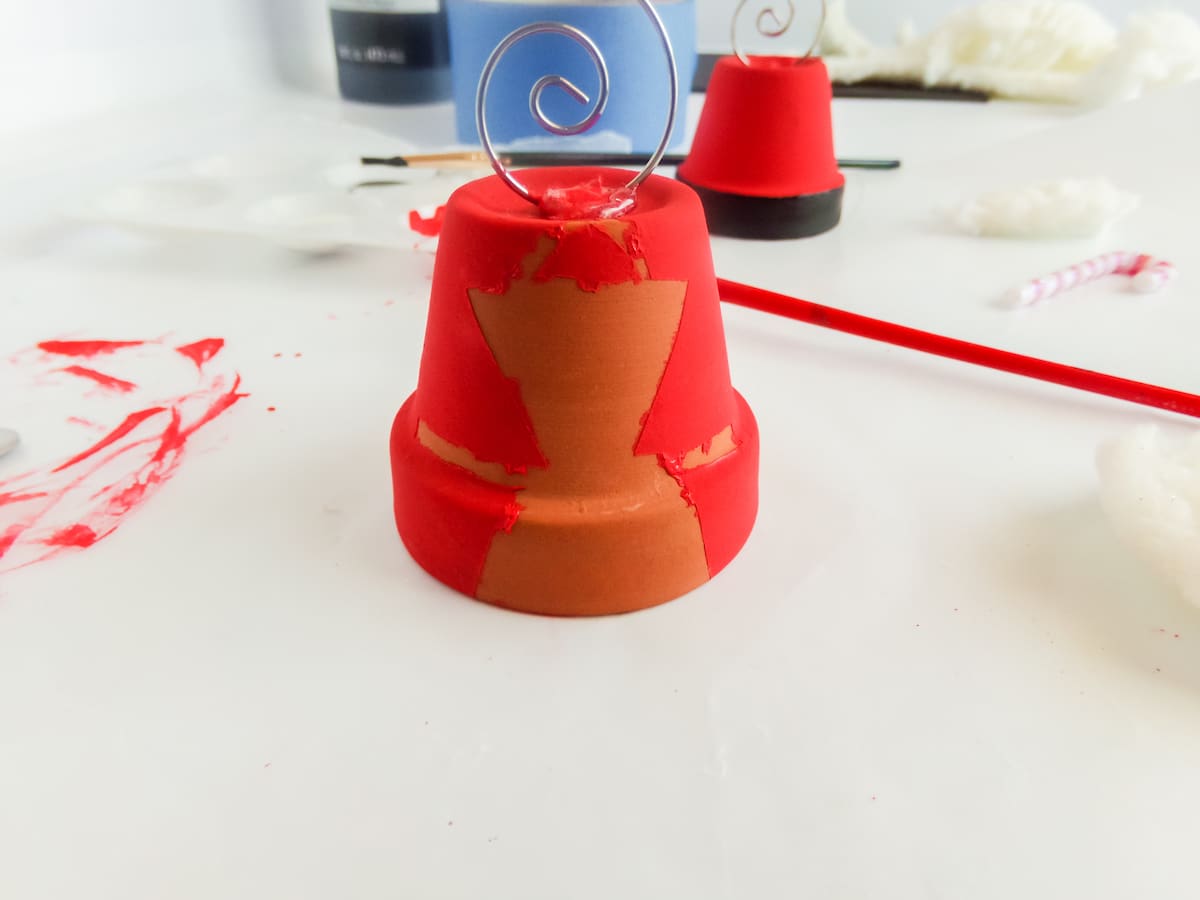
- Tape off the rim of the other terra cotta pot. Paint the non-taped areas of both pots and allow the paint to dry completely.
- Remove the tape and paint the apron shape white and the rim of the other terra cotta pot black. Allow that coat of paint to dry completely.
- Paint a small gold rectangle for a buckle on the front of the black band. Allow that coat of paint to dry completely.
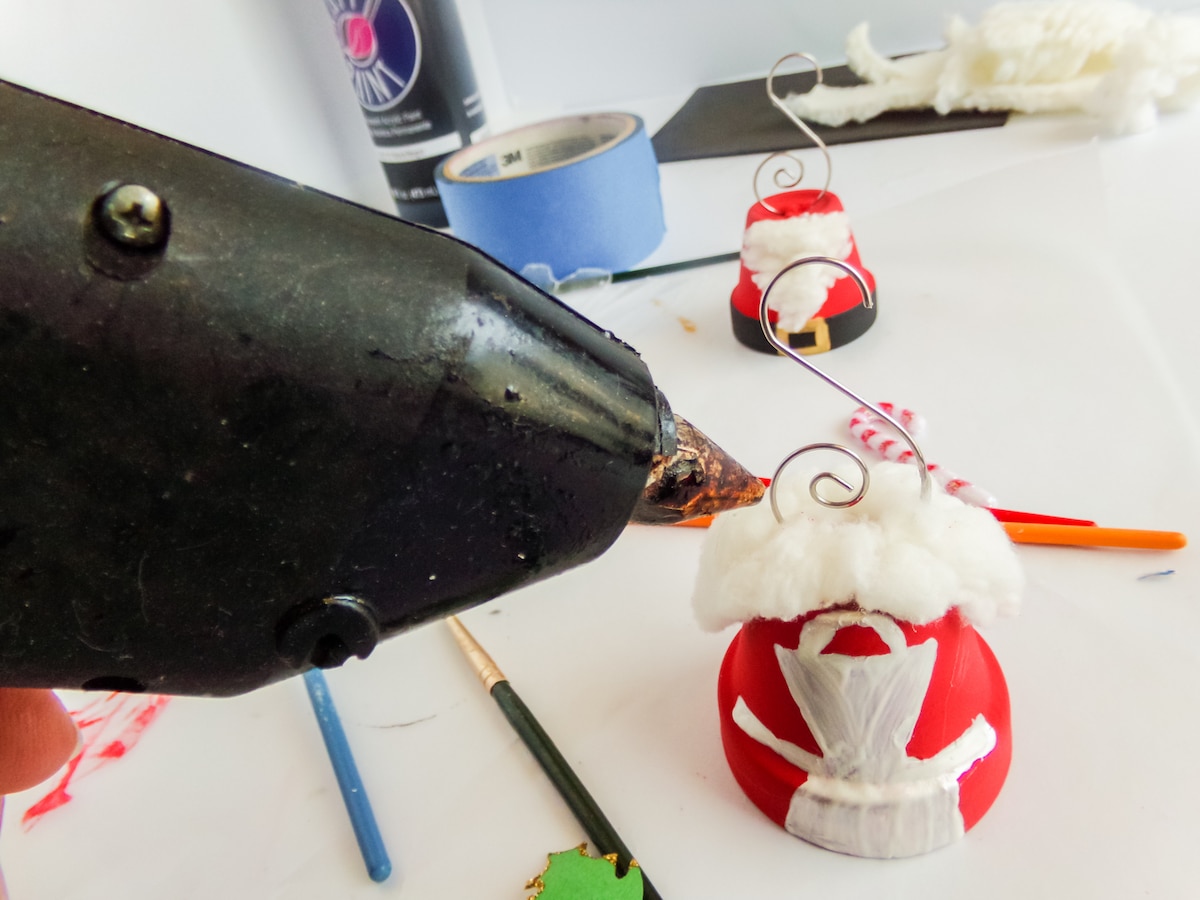
- Thread the bell onto the embroidery thread and through the inside of the pot and the hole in the center. Tie the ends of the thread to the ornament hanger, then hot glue this in place inside the pot.
- Cut a tiny triangle beard of the fluffy fabric about ¾ inches by ¾ inches. Hot glue this to the front of the Santa bell.
- Cut a tiny round circle of the fluffy fabric about ¾ inches in diameter. Hot glue this to the top of the Mrs. Santa bell. You may want to cut a slit into it to fit it around the ornament holder, depending on your particular ornament holder.
- Attach any of the little baubles to Mrs. Claus that you might like.
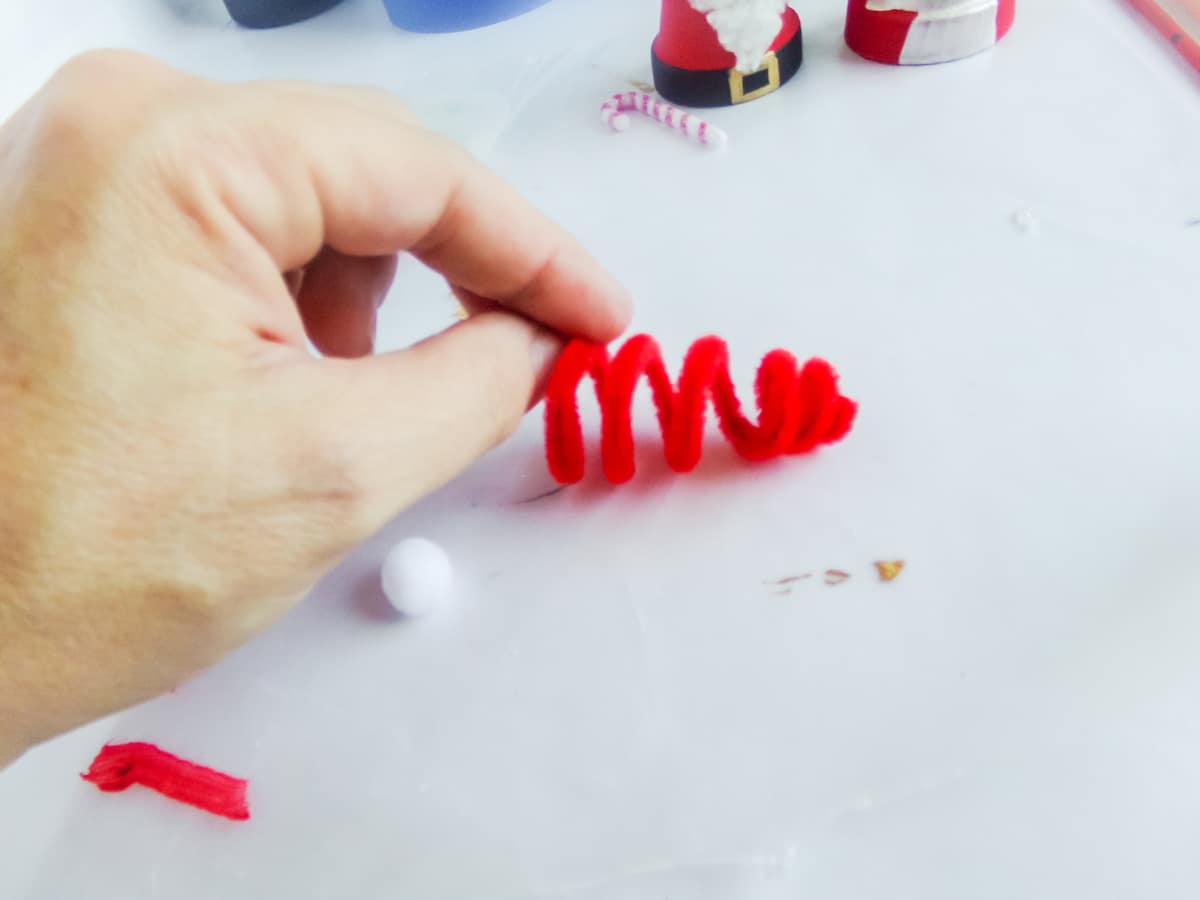
- Twist the chenille wire into a coil, about ¾ inches in diameter at the bottom, but getting tighter and tighter toward the other end.
- Hot glue the chenille wire coil to the top of the Santa bell, then hot glue the pom pom to the tip. Put your ornaments on the tree and enjoy!
More DIY Christmas Ideas You’ll Love
Santa & Mrs. Claus Terra Cotta Pot Ornaments

Making these Santa & Mrs. Claus Terra Cotta Pot Ornaments is a fast and fun way to craft with the kids for the holidays!
Materials
- 2 - 1-inch Terra Cotta Pots
- White Acrylic Paint
- Red Acrylic Paint
- Black Acrylic Paint
- Gold Acrylic Paint
- Scraps White Fluffy Fabric (I used sherpa fabric)
- 1 Red Chenille Wire
- 2 Tiny Red Bells
- White Embroidery Thread
- 2 Ornament Hangers
- 2-3 Christmas Baubles (I used a mini holly and tiny candy cane)
- Tiny White Pom Pom
Tools
- Painter’s Tape
- Pencil
- Paint Brush
- Hot Glue Gun & Glue
- Scissors
Instructions
- While the tape is still on the roll, draw a tiny apron shape onto the tape. Basic shapes work well. Cut the piece of tape off the roll then cut the apron shape out. Place the tape apron shape onto one of the terra cotta pots.
- Tape off the rim of the other terra cotta pot. Paint the non-taped areas of both pots and allow the paint to dry completely.
- Remove the tape and paint the apron shape white and the rim of the other terra cotta pot black. Allow that coat of paint to dry completely.
- Paint a small gold rectangle for a buckle on the front of the black band. Allow that coat of paint to dry completely.
- Thread the bell onto the embroidery thread and through the inside of the pot and the hole in the center. Tie the ends of the thread to the ornament hanger, then hot glue this in place inside the pot.
- Cut a tiny triangle beard of the fluffy fabric about ¾ inches by ¾ inches. Hot glue this to the front of the Santa bell.
- Cut a tiny round circle of the fluffy fabric about ¾ inches in diameter. Hot glue this to the top of the Mrs. Santa bell. You may want to cut a slit into it to fit it around the ornament holder, depending on your particular ornament holder.
- Attach any of the little baubles to Mrs. Claus that you might like.
- Twist the chenille wire into a coil, about ¾ inches in diameter at the bottom, but getting tighter and tighter toward the other end.
- Hot glue the chenille wire coil to the top of the Santa bell, then hot glue the pom pom to the tip. Put your ornaments on the tree and enjoy!
Recommended Products
As an Amazon Associate and member of other affiliate programs, I earn from qualifying purchases.